
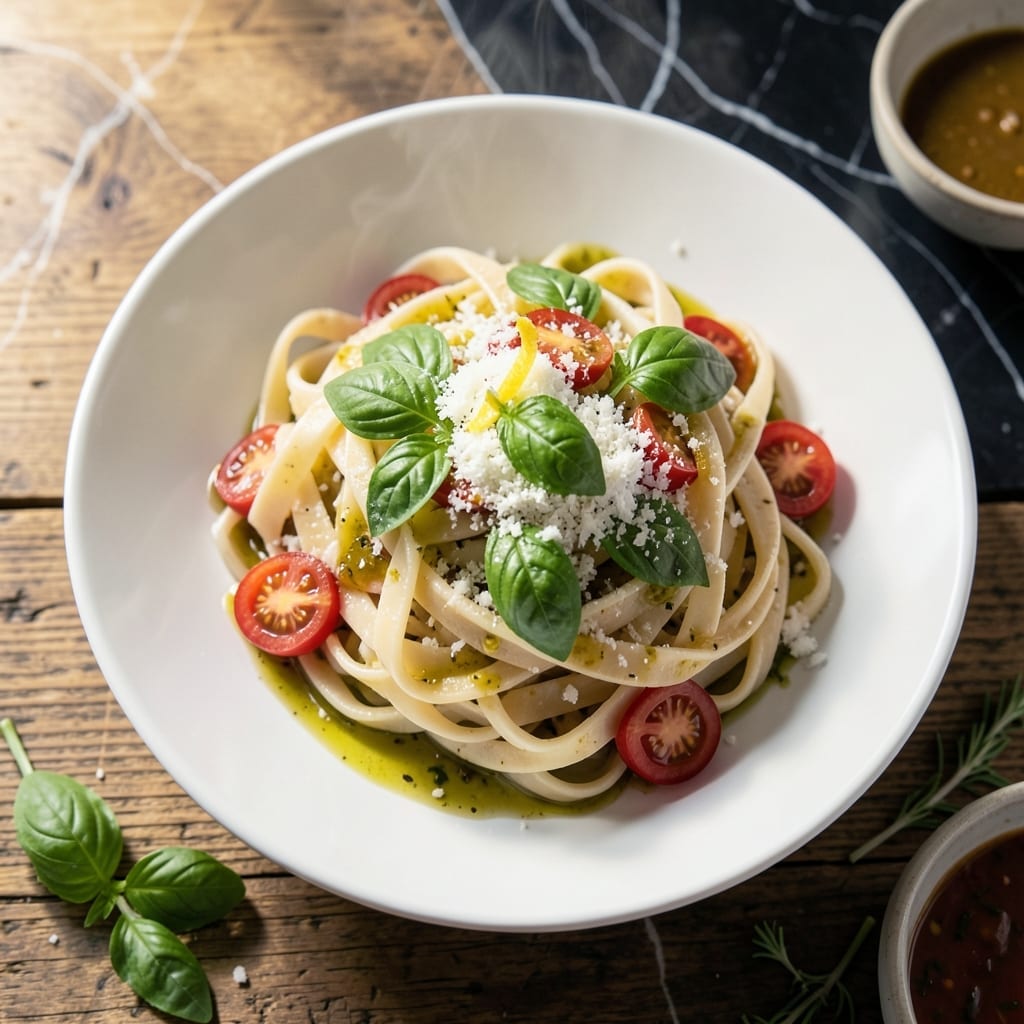
Fresh, homemade rice pasta offers a delightful alternative to traditional wheat-based noodles. This recipe delivers light and silky strands that hold their shape beautifully when cooked.
Making pasta from scratch might seem intimidating, but this method is straightforward. Using just rice flour, water, and a pinch of salt, you can create delicate noodles that rival store-bought varieties. The process requires minimal ingredients and simple tools.
The result is tender, slightly chewy pasta with a clean flavor that pairs perfectly with your favorite sauces. Whether you’re avoiding gluten or simply exploring new culinary techniques, this approach proves that homemade pasta is worth the effort.
With a little practice, you’ll master the art of rolling and cutting these wheat-free noodles to consistent thickness. The satisfaction of twirling your own fresh pasta on a fork is unmatched.
Ingredients for Homemade Rice Pasta
Just rice flour, starch, and water create these delicate wheat-free noodles from scratch.
| Ingredient | Amount | Notes |
|---|---|---|
| White Rice Flour 🌾 | 2 cups | Superfine grind preferred |
| Tapioca Starch 🌾 | ½ cup | For elasticity and chew |
| Xanthan Gum 🧪 | ½ tsp | Bind the dough together |
| Sea Salt 🧂 | ½ tsp | Fine grain for even distribution |
| Water 💧 | ¾ cup | Warm, about 110°F |
| Olive Oil 🫒 | 1 tbsp | For dough smoothness |
| Cornstarch 🌽 | ¼ cup | For dusting surfaces |
| Garlic Powder 🧄 | ½ tsp | Optional for flavor |
The rice flour is non-negotiable here—superfine white rice flour gives the silkiest texture. Look for it in the gluten-free aisle at Whole Foods or Sprouts. Bob’s Red Mill is a reliable brand, but Authentic Foods is even finer. Tapioca starch adds that perfect chew, so don’t skip it. Xanthan gum might sound fancy, but it’s just binding the dough (find it in the baking section at most supermarkets).
No xanthan gum? Psyllium husk powder at half the amount works in a pinch, though the texture might differ slightly. For a nutty twist, swap one-quarter of the rice flour for brown rice flour. The olive oil can be any neutral oil, but I like the subtle depth it adds. If your dough feels too sticky, add extra cornstarch a tablespoon at a time.
Fresh rice pasta cooks in 2-3 minutes—keep an eye on it. Store uncooked pasta dusted with cornstarch in an airtight container at room temperature for up to 3 days, or freeze for 1 month. Cooked pasta is best served immediately but can be refrigerated for 2 days in a sealed container.
Why You’ll Love This Recipe
- I’ll be real: leftovers keep well for days in the fridge, so I double the batch and save time later in the week.
- Five Ingredients Only: I just dump white rice flour, tapioca starch, xanthan gum, sea salt, and water—no specialty store runs or confusing substitutions.
- Mild, Clean Taste: Honestly, the neutral flavor lets my sauces shine without overpowering them like some store-bought gluten-free pastas do.
- Gluten-Free Swap: Between us, it’s my go-to for family dinners where half of us avoid gluten but still crave pasta night.
Step-by-Step Instructions for Wheat-Free Rice Pasta
Here’s my tested method for achieving perfectly smooth, elastic wheat-free noodles in your own kitchen.
Step 1: Mix the Dry Ingredients for Optimal Texture
In a large mixing bowl, whisk together the 2 cups White Rice Flour, 0.5 cup Tapioca Starch, 0.5 tsp Xanthan Gum, 0.5 tsp Sea Salt, and 0.5 tsp Garlic Powder until fully combined. I like to sift these together first to eliminate any lumps in the White Rice Flour.
The xanthan gum is your secret weapon here—it mimics gluten’s elasticity, giving your pasta that satisfying chew. Without it, the dough would be too fragile to handle. Make sure your sea salt is fine grain so it distributes evenly throughout the mixture.
Step 2: Incorporate Wet Ingredients to Form the Dough
Create a well in the center of your dry ingredients and pour in the 0.75 cup Water (warm, about 110°F) and 1 tbsp Olive Oil. Using a fork or silicone spatula, gradually incorporate the dry mixture into the wet ingredients until a shaggy dough forms.
Here’s the thing—the dough will feel slightly sticky at first, but resist the urge to add more flour. The White Rice Flour absorbs moisture differently than wheat flour, and the texture will change as it hydrates. Let it rest for 5 minutes to allow the flours to fully absorb the liquid.
Step 3: Knead and Rest the Dough for Smoothness
Dust your work surface generously with 0.25 cup Cornstarch—this prevents sticking without altering the dough’s texture. Turn out the dough and knead it for 8-10 minutes until it becomes smooth and slightly elastic. The Cornstarch gives you a non-stick surface that’s easier to clean up than wheat flour.
Shape the dough into a ball, wrap it tightly in plastic wrap, and let it rest at room temperature for 30 minutes. This rest period relaxes the dough, making it easier to roll out thinly. You’ll notice the texture transforms from slightly gritty to smooth and pliable during this time.
Step 4: Roll and Cut the Pasta
Divide the rested dough into 4 equal portions. Working with one portion at a time (keep the others covered), flatten it into a rough rectangle. Set your pasta machine to its widest setting and roll the dough through. Fold the sheet in thirds like a letter, then roll it through again. Repeat this process 2-3 times to develop elasticity.
Gradually decrease the pasta machine setting, rolling the dough through once at each thickness until you reach the second-to-thinnest setting. For fettuccine or linguine, cut the sheet to your desired width and run it through the cutting attachment. Dust the cut pasta with additional Cornstarch to prevent sticking.
If you don’t have a pasta machine, you can roll the dough by hand with a rolling pin, aiming for sheets about 1/16-inch thick. Cut into your preferred noodle shape with a sharp knife.
Step 5: Cook the Pasta to Al Dente Perfection
Bring a large pot of salted water to a rolling boil. Add the fresh pasta and cook for 2-3 minutes until it floats to the surface and is tender but still slightly firm to the bite. Fresh rice pasta cooks much faster than dried wheat pasta, so keep a close eye on it.
Drain the pasta immediately and toss with your favorite sauce. I’ve found that rice pasta absorbs sauces beautifully, so you might need slightly less sauce than you’d use with traditional pasta. Serve immediately while hot—the texture is best right after cooking.
Pro Tips For Making Homemade Rice Pasta
- Knead the Dough Longer: I learned this the hard way—rice flour dough needs at least 8-10 minutes of kneading to activate the xanthan gum fully. Otherwise, your pasta will crumble when boiling.
- Use Warm Water: Sounds weird, but it works: warm water (around 110°F) helps the tapioca starch bind better with the rice flour, making the dough more pliable.
- Rest Before Rolling: After mixing, let the dough rest for 20 minutes under a damp towel. Skipping this makes the pasta brittle—yes, even if you’re impatient like me.
- Dust with Rice Flour: When rolling out the pasta, use rice flour for dusting instead of regular flour. It prevents sticking without altering the flavor or texture.
Essential Equipment for Perfect Results
Pasta Machine Essentials
A quality pasta machine is non-negotiable for consistent results. I swear by the Marcato Atlas 150—it’s durable, easy to clean, and rolls dough to paper-thin perfection. The Imperia Pasta Machine is another great mid-range option that attaches to your countertop. 💛
Work Surface Protection
Your countertop needs protection from sticky dough and cornstarch. I use a large silicone baking mat (at least 24×16 inches) which provides a non-slip surface. A marble pastry board also works beautifully and stays cool, preventing the dough from sticking.
Dusting Tools
A fine-mesh sieve is perfect for evenly dusting cornstarch on your work surface and pasta sheets. I keep a small bowl of extra cornstarch nearby for quick touch-ups. A pastry brush helps remove excess starch from the machine rollers between uses.
Cutting Options
If your pasta machine lacks cutting attachments, invest in a pasta cutter wheel for straight edges or a raviole cutter for shaped pastas. For hand-cut noodles, a sharp chef’s knife (I use Wüsthof 8-inch) ensures clean cuts without tearing the delicate dough.
Drying Equipment
A folding drying rack is invaluable for preventing freshly cut pasta from sticking together. I use a stainless steel pasta drying rack from OXO that holds 4 pounds of pasta. For small batches, a clean kitchen towel laid flat works in a pinch.
A small fan on low setting helps dry pasta faster if you’re making large quantities for storage. 🔥
Nutrition Facts
Frequently Asked Questions
Can I make this without a pasta machine?
Yes! Use a rolling pin to roll the dough to 1/16-inch thickness. Cut into strips with a sharp knife, dusting with cornstarch to prevent sticking. It takes more effort but works well.
Why does the dough feel gritty at first?
Rice flour absorbs moisture slowly. After kneading for 8-10 minutes and resting for 30 minutes, the texture will become smooth and elastic as the flours hydrate.
How do I prevent the pasta from sticking?
Generously dust your work surface and cut pasta with cornstarch. Keep uncooked noodles separated on a drying rack or floured towel until ready to boil.
Can I use this for lasagna?
Roll the dough slightly thicker (about 1/8-inch), cut into sheets, and layer as you would with traditional lasagna noodles. No pre-boiling needed.

- Jollof Rice Sauce Recipe: West African Tomato and Spice Infusion - September 25, 2026
- Japanese Rice Soup Recipe: Umami-Rich Comfort in a Bowl - September 25, 2026
- Homemade Cream Of Rice Recipe: Silk-Smooth Breakfast in Minutes - September 25, 2026