
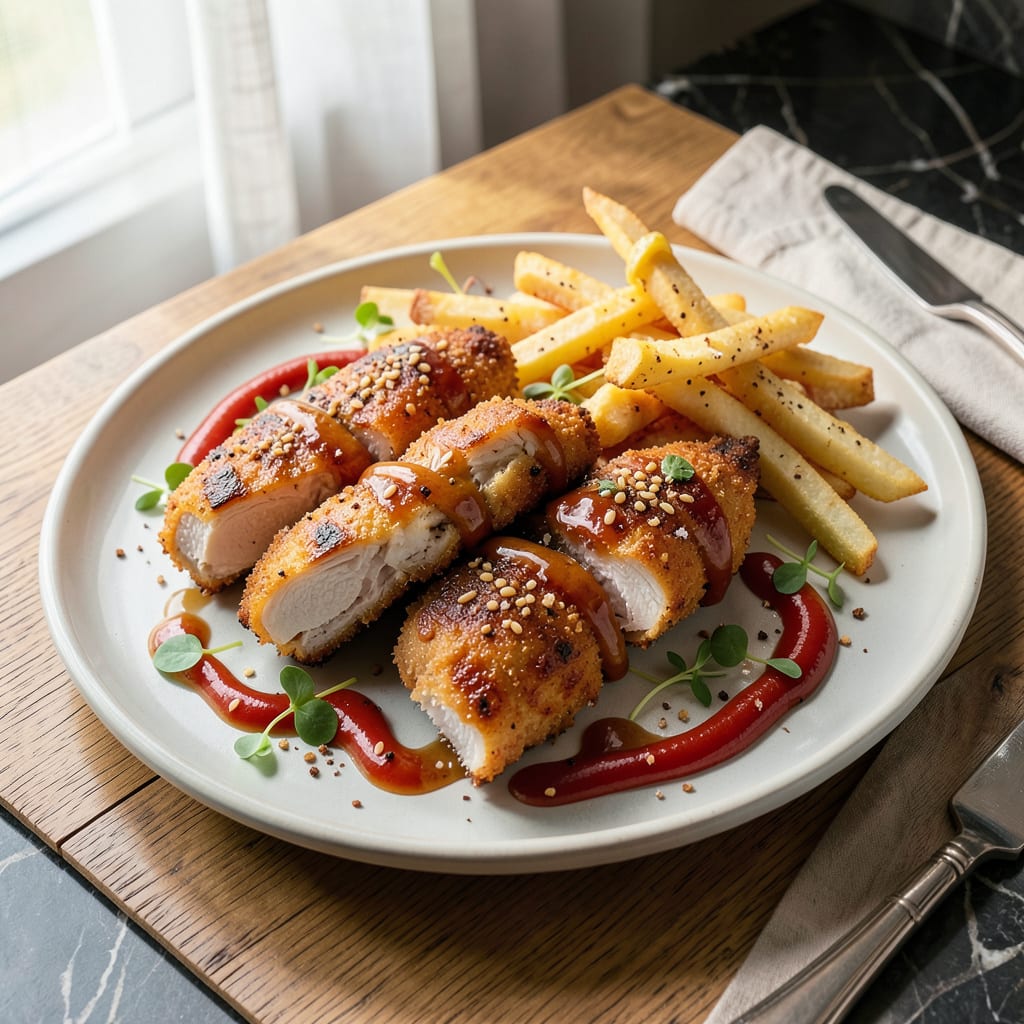
Frozen chicken tenders don’t have to be soggy or bland—this simple oven-baked method transforms them into crispy, golden perfection with minimal effort. Using just three pantry staples and a wire rack, you can achieve results that rival restaurant-style tenders at home. The technique is foolproof and works with any brand of frozen tenders.
The key lies in high-heat baking at 425°F and a light coating of cornstarch before baking, which creates an extra-crispy exterior while keeping the inside tender. A quick spray of oil ensures even browning without turning the tenders greasy. This approach eliminates the need for deep frying while delivering superior texture.
What emerges from the oven are chicken tenders with shatteringly crisp edges and juicy centers—exactly what frozen versions often lack. The method takes less than 20 minutes from start to finish, making it ideal for busy weeknights when you want restaurant-quality results without the hassle.
Pair with homemade honey mustard or spicy mayo for dipping, and serve alongside crispy oven fries or a simple slaw. This upgrade turns a basic freezer staple into a meal worth looking forward to.
📚 In This Guide
- What You’ll Need
- Instructions
- Tips and Common Mistakes
What Youll Need
- ● 1 bag (16–20 oz) frozen chicken tenders – Any brand, but unbreaded works best for extra crispiness! 🍗
- ● 2 tbsp olive oil or melted butter – For that golden, crispy coating.
- ● ½ cup panko breadcrumbs or crushed cornflakes – The secret to extra crunch!
- ● 1 tsp garlic powder, paprika, or Cajun seasoning – Pick your favorite for a flavor boost. 🌶️
- ● Baking sheet + wire rack (or parchment paper)
- ● Mixing bowl (medium-sized)
- ● Tongs or spatula (for flipping)
- ○ Cooking spray (optional, for non-stick ease)
- ● Grated Parmesan (2 tbsp) – For a cheesy kick! 🧀
- ● Hot sauce or honey (for dipping) – Because why not?
- ● Air fryer (if skipping the oven) – Cuts cook time in half!
Instructions
This simple method transforms basic frozen tenders into restaurant-quality results with minimal effort.
Preheat and Prepare the Baking Sheet
Position your oven rack in the upper-middle position and preheat to 425°F. This high heat creates rapid browning while cooking the tenders through evenly. I’ve found this temperature delivers the perfect balance between crispy exterior and juicy interior.
Line a large baking sheet with parchment paper or aluminum foil. The parchment prevents sticking without requiring extra oil, while foil makes cleanup effortless. Don’t skip this step—it ensures your tenders release cleanly when you flip them.
Arrange the Tenders for Optimal Airflow
Remove the frozen chicken tenders from their packaging and arrange them in a single layer on the prepared baking sheet. Leave about 1 inch of space between each tender to allow hot air to circulate freely. This spacing prevents steaming and promotes even crisping.
Don’t thaw the tenders first—starting from frozen actually helps create a crispier crust as the moisture converts to steam and escapes. The steam initially softens the breading, but the high oven temperature quickly drives it off, leaving behind a crunchy exterior.
Apply the Oil for Extra Crispiness
Lightly brush or spray both sides of each tender with neutral oil (vegetable, canola, or avocado work well). The oil serves two critical purposes: it conducts heat more efficiently to the breading, and it promotes deeper browning through the Maillard reaction.
Use just enough oil to coat the surface—about 1 teaspoon per 4 tenders—without saturating the breading. You’ll see the oil glisten on the surface when applied correctly. This thin coating makes all the difference between soggy and spectacular.
Bake with Strategic Flipping
Bake the tenders for 12 minutes, then carefully flip each piece using tongs. The undersides should be golden brown and the edges just beginning to crisp. Return them to the oven for another 8-10 minutes until both sides are uniformly crispy and the internal temperature reaches 165°F.
The flipping step ensures even cooking and prevents one side from becoming overdone while the other remains pale. Watch for the breading to turn a deep golden color—this visual cue is more reliable than timing alone, as oven temperatures can vary.
Rest Briefly Before Serving
Transfer the baked tenders to a wire rack set over a baking sheet and let them rest for 2 minutes. This brief rest allows the crust to set completely and prevents the breading from sticking to the serving plate. The internal temperature will also equalize during this time.
Serve immediately while still hot and crispy. You’ll notice the difference in texture immediately—the exterior should shatter slightly when bitten, giving way to tender, juicy chicken inside. The contrast between the crisp coating and moist interior is what makes these tenders truly exceptional.
Tips and Common Mistakes
These professional techniques will elevate your frozen chicken tenders from basic to restaurant-quality with minimal effort.
Heat Distribution: The 425°F temperature specified in Step 1 isn’t arbitrary—it’s the sweet spot for creating that perfect crispy exterior while ensuring the chicken cooks through evenly. Positioning the oven rack in the upper-middle position as directed maximizes heat exposure to the breading while preventing the bottoms from burning before the tops brown properly. This high heat also drives off moisture quickly, which is essential for achieving that shatteringly crisp texture.
Oil Application Technique: When applying oil in Step 3, use a pastry brush for the most even distribution. The 1 teaspoon per 4 tenders measurement is precise—too much oil will make the breading soggy, while too little won’t promote proper browning. I’ve found that avocado oil gives the best results due to its high smoke point and neutral flavor, though any neutral oil will work. The oil should create a thin, glossy sheen on the surface, not pool in the breading’s crevices.
Flipping Strategy: The 12-minute initial bake time in Step 4 is critical for setting the breading before flipping. When you turn the tenders, you should see the undersides transformed to a deep golden brown—this indicates the Maillard reaction has properly developed. Use tongs rather than a spatula to avoid compressing the breading. During the final 8-10 minutes, watch for the edges to become just slightly darker than the centers, which signals perfect doneness.
Resting Period: Those 2 minutes of resting time in Step 5 aren’t just for show—they allow the crust to firm up completely and prevent the breading from detaching when bitten. Transferring the tenders to a wire rack immediately after baking prevents steam from accumulating underneath, which would make the bottoms soggy. The internal temperature will also stabilize during this brief rest, ensuring consistent doneness throughout each piece.
Pro Tips for Make Frozen Chicken Tenders Better
- These professional techniques will elevate your frozen chicken tenders from basic to restaurant-quality with minimal …
- Heat Distribution: The 425°F temperature specified in Step 1 isn’t arbitrary—it’s the sweet spot for creating that pe…
- Oil Application Technique: When applying oil in Step 3, use a pastry brush for the most even distribution. The 1 teas…
Frequently Asked Questions
Can I air-fry frozen chicken tenders instead of baking them?
Air-frying is a game-changer for frozen tenders—cook at 375°F for 10-12 minutes, flipping halfway. They’ll be extra crispy with no oil needed. Just avoid overcrowding the basket for even cooking!
How do I keep chicken tenders crispy after baking?
Place them on a wire rack (not a plate) after baking to prevent sogginess. For leftovers, reheat in the air fryer (350°F, 3-4 mins) or oven—not the microwave! Pro tip: Spritz with oil before reheating for extra crunch.
What’s the best dipping sauce for upgraded chicken tenders?
Skip the basic ketchup! Try spicy mayo (mayo + sriracha), honey mustard (3:1 ratio), or buffalo ranch (mix hot sauce + ranch). For a tangy twist, whisk Greek yogurt + lemon + garlic.
Why are my chicken tenders still soggy after baking?
Common culprits: skipping the oil spray, using a crowded pan, or not preheating the oven. Pat tenders dry before seasoning, and bake at 425°F+ for maximum crisp. No peeking—opening the oven drops the temp!
Can I use gluten-free or vegan tenders with these tips?
Yes! Most methods work for gluten-free brands (check labels for oven temps). For vegan tenders, reduce cook time by 2-3 minutes—they brown faster. Always confirm internal temp hits 165°F for safety.
With just a few simple tweaks, your frozen chicken tenders can go from meh to mouthwateringly crispy in minutes! 🍗✨ Whether you’re baking, air-frying, or adding a flavor boost with spices, the secret lies in those small but mighty upgrades. Next time you grab a bag, experiment with your favorite seasonings or dips—your taste buds (and dinner crew) will thank you.
Ready to level up? Try pairing your upgraded tenders with a homemade dip or turn them into a gourmet sandwich. Happy cooking!

- Jollof Rice Sauce Recipe: West African Tomato and Spice Infusion - September 25, 2026
- Japanese Rice Soup Recipe: Umami-Rich Comfort in a Bowl - September 25, 2026
- Homemade Cream Of Rice Recipe: Silk-Smooth Breakfast in Minutes - September 25, 2026