
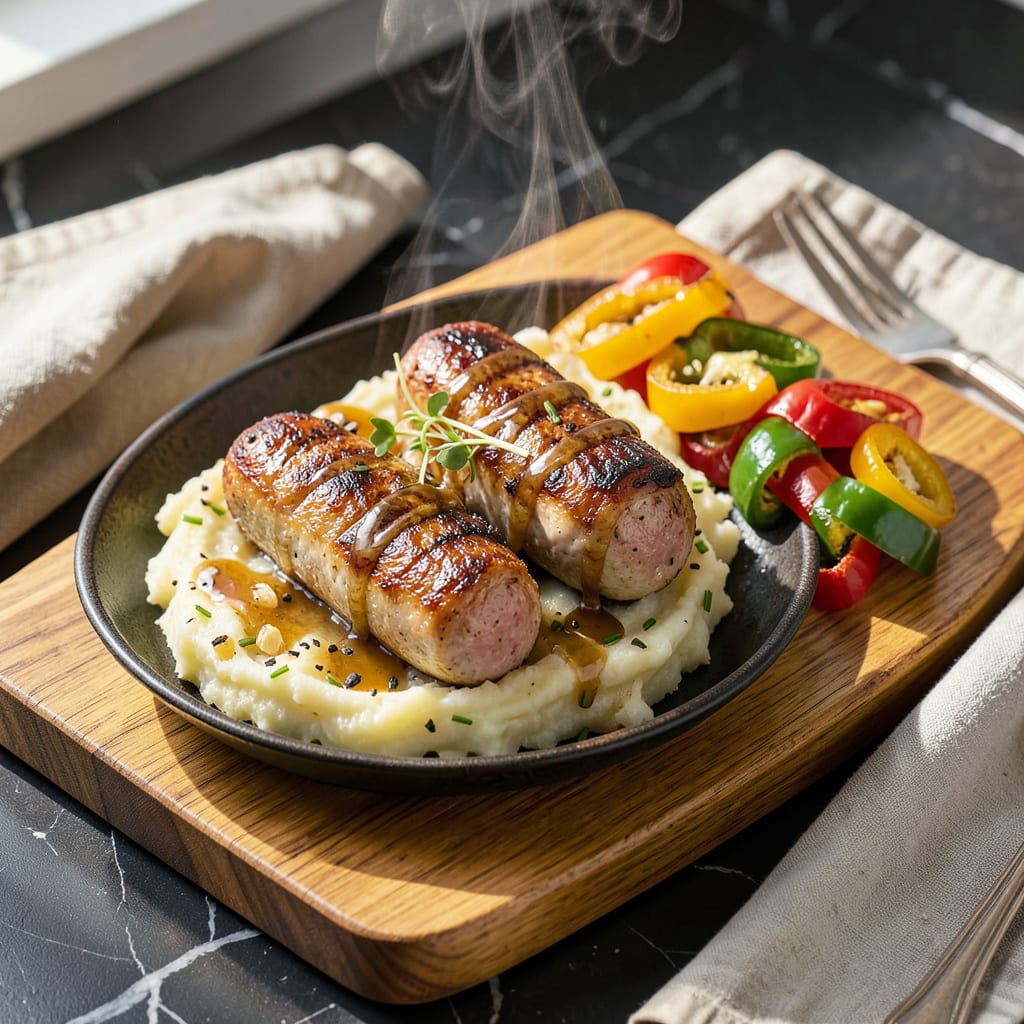
Let me show you how to get that perfect sear on chicken sausage without drying it out. I’ve burned through more batches than I’d like to admit, but finally nailed the 10-minute method that delivers juicy centers and a golden crust every time. No fancy equipment needed—just a good pan and a little patience.
The secret starts with room-temperature sausage and the right oil. I use medium heat to cook them low and slow, which renders the fat gradually instead of burning the outside. You’ll hear that satisfying sizzle when they hit the pan, and that’s your cue to resist the urge to flip too soon. Let them develop that crispy crust before turning.
What you end up with is sausage that’s crispy outside, tender inside, and packed with flavor. The best part? This method works for any variety—spicy Italian, apple chicken, or even turkey sausage. I serve them with mustard for dipping or slice them into pasta for an easy protein boost.
Cleanup is a breeze since everything cooks in one pan. Whether you’re making breakfast hash or a quick weeknight dinner, this technique will change how you cook sausage forever. Ready to get that perfect sear?
📚 In This Guide
- What You’ll Need
- Instructions
- Tips and Common Mistakes
What Youll Need
- ● Chicken sausage: 4 links (12–16 oz total), fresh or thawed if frozen (check for pre-cooked labels!)
- ● Cooking oil: 1–2 tbsp neutral-high smoke point (avocado, canola, or vegetable oil 🌿)
- ○ Butter (optional): 1 tbsp for extra richness and browning
- ○ Seasonings (optional): ½ tsp garlic powder, smoked paprika, or black pepper to taste
- ○ Fresh herbs (optional): 1 tbsp chopped parsley or thyme for garnish
- ● 10–12″ skillet (stainless steel or cast iron for best sear 🍳)
- ● Tongs or heatproof spatula (no forks—they pierce the casing!)
- ● Meat thermometer (instant-read, for perfect 165°F doneness 🌡️)
- ● Paper towels (to pat sausage dry and drain excess oil)
- ● Cutting board + sharp knife (if slicing post-cooking)
- ○ Splatter screen (optional) to tame oil pops!
Instructions
You’re just minutes away from perfectly browned, juicy chicken sausage—let’s get that skillet hot!
Prep the Sausage for Even Cooking
Start by removing the chicken sausage from its packaging and patting it completely dry with paper towels. This is crucial—any moisture on the surface will steam instead of sear, preventing that beautiful golden crust we’re after. I like to use a clean kitchen towel for this step to really absorb all the moisture.
If you’re using linked sausages, carefully separate them by cutting between the links with a sharp knife. Don’t pull them apart—the casings might tear, causing the juices to escape during cooking. For even browning, I recommend making a few shallow slits (about ¼-inch deep) on the non-curved side of each sausage.
Heat the Skillet to Perfect Temperature
Place a heavy skillet (cast iron works best) over medium heat and let it preheat for 2-3 minutes. You want the pan hot enough to sizzle immediately when the sausage hits it, but not so hot that the outside burns before the inside cooks through. To test, flick a few drops of water onto the pan—they should dance and evaporate quickly.
Add just enough oil to lightly coat the bottom of the pan—about 1 tablespoon should do it. Swirl the pan to distribute the oil evenly. I prefer using oil with a high smoke point like vegetable or avocado oil for this. When the oil starts to shimmer and you see faint wisps of smoke, you’re ready to add the sausage.
Cook for Maximum Crispiness and Juiciness
Carefully place the sausages in the hot pan, leaving about 1 inch of space between them. You should hear an immediate, satisfying sizzle. Cook undisturbed for 3-4 minutes until the bottom develops a deep golden-brown crust. Resist the urge to move them—this is how we get that perfect sear.
Using tongs (never a fork—it pierces the casing), flip the sausages to the other side. Cook for another 3-4 minutes until equally browned. For even cooking, rotate the sausages a quarter turn and cook for 1-2 minutes more on each of the remaining sides. The sausage is done when it reaches an internal temperature of 165°F and the juices run clear when pierced with a knife.
Rest and Serve for Best Texture
Transfer the cooked sausages to a clean plate or cutting board and let them rest for 2-3 minutes before serving. This brief rest allows the juices to redistribute throughout the sausage instead of running out when you cut into it. I promise this makes a noticeable difference in how juicy each bite will be!
Serve your perfectly pan-fried chicken sausage while still warm. The exterior should be crispy with a rich golden-brown color, while the interior remains tender and juicy. For extra flavor, you can deglaze the pan with a splash of broth or wine to create a quick pan sauce using all those delicious browned bits left behind.
Tips and Common Mistakes for Perfectly Pan-Fried Chicken Sausage
Let me share the secrets that transform good sausage into restaurant-quality perfection every time.
Heat Control: The 2-3 minutes of preheating in Step 2 isn’t just a suggestion—it’s your golden ticket to that perfect sear! I’ve found that cast iron holds heat best, but any heavy skillet works if you let it get properly hot. Test with water droplets that should dance like popcorn kernels before adding your oil. This is where that crispy crust begins!
The Technique That Changed Everything: When you’re cooking for 3-4 minutes per side in Step 3, resist every urge to peek or move the sausages! That sizzling sound means the Maillard reaction is working its magic. I learned the hard way that moving them too soon creates steamed instead of seared sausage. Let the crust form undisturbed—it’s worth the wait!
Resting is Non-Negotiable: Those 2-3 minutes of resting in Step 4 might seem insignificant, but they make all the difference between juicy and dry sausage. I time it perfectly by starting my side dishes during this window. The juices need this brief pause to retreat back into the meat—cut too soon and you’ll watch all that flavor puddle on your plate!
Equipment Recommendation: Invest in an instant-read thermometer and use it! The 165°F internal temperature is your foolproof guide to perfect doneness. I check multiple spots since chicken sausage can have uneven density. It’s the only way to guarantee juicy centers without overcooking the exterior.
Pro Tips for Pan Fry Chicken Sausage
- Let me share the secrets that transform good sausage into restaurant-quality perfection every time.
- Heat Control: The 2-3 minutes of preheating in Step 2 isn’t just a suggestion—it’s your golden ticket to that perfect…
- The Technique That Changed Everything: When you’re cooking for 3-4 minutes per side in Step 3, resist every urge to p…
Frequently Asked Questions
How long does it take to pan-fry chicken sausage?
Pan-frying chicken sausage typically takes 8–10 minutes over medium heat. Pre-cooked sausages need just 4–5 minutes per side to brown, while raw sausages require 5–6 minutes per side (or until internal temp hits 165°F). Use a meat thermometer for accuracy!
Can I pan-fry frozen chicken sausage?
Yes, but thaw first for best results! If cooking from frozen, add 2–3 extra minutes per side on medium-low heat to avoid burning the outside. Cover the pan with a lid to steam the inside evenly.
What’s the best oil for pan-frying chicken sausage?
Use oils with a high smoke point like avocado, canola, or vegetable oil. Butter works too but burns faster—mix it with oil for flavor. Avoid extra virgin olive oil (smoke point is too low).
Why is my chicken sausage dry after pan-frying?
Overcooking or high heat is usually the culprit! Cook on medium heat and pull sausages off just as they reach 165°F. Let them rest 2–3 minutes before slicing to lock in juices.
What can I use instead of chicken sausage in recipes?
Try turkey sausage (leaner), pork sausage (richer flavor), or plant-based sausages (like Beyond or Impossible). Adjust cooking times slightly—pork may need 1–2 extra minutes, while plant-based cooks faster.
Now you’ve got the secret to perfectly pan-fried chicken sausage—crispy on the outside, juicy on the inside, and ready in just 10 minutes! 🎉 Whether you’re whipping up a quick weeknight dinner or meal prepping for the week, this method delivers restaurant-quality results with minimal effort. Don’t stop here—try pairing your sausage with roasted veggies, a fresh salad, or even a cozy pasta dish for a complete meal.
Ready to level up? Experiment with different seasonings or sauces next time—your taste buds will thank you! Happy cooking! 🍽️

- Jollof Rice Sauce Recipe: West African Tomato and Spice Infusion - September 25, 2026
- Japanese Rice Soup Recipe: Umami-Rich Comfort in a Bowl - September 25, 2026
- Homemade Cream Of Rice Recipe: Silk-Smooth Breakfast in Minutes - September 25, 2026