
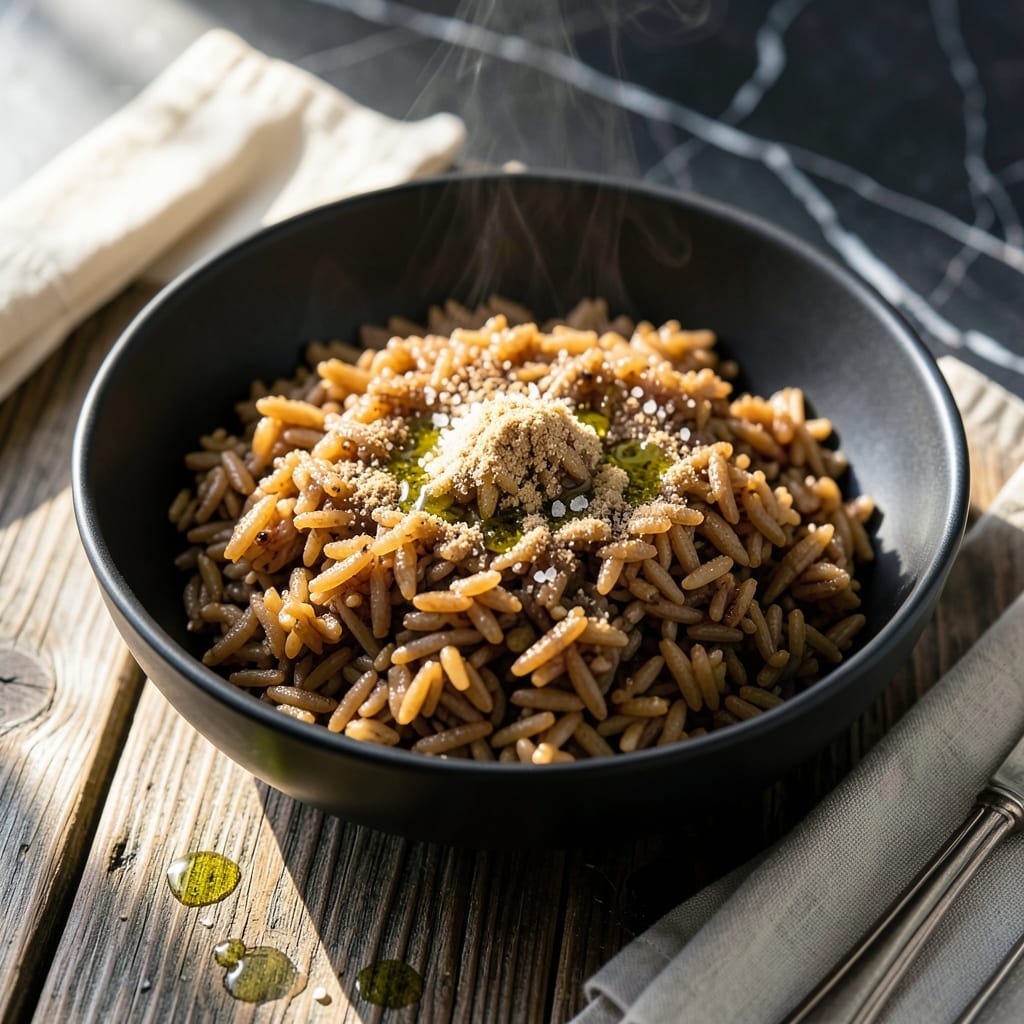
Achieve perfectly cooked brown rice with your Instant Pot using this proven method for fluffy results every time. No more mushy or undercooked grains.
This hands-off technique ensures consistent texture with precise liquid ratios and pressure cooking times. Say goodbye to watching the stove and hello to effortless, restaurant-quality rice.
Ingredients for Insta Pot Brown Rice
Minimal ingredients deliver restaurant-quality results with your Instant Pot every single time.
| Ingredient | Amount | Notes |
|---|---|---|
| Long-Grain Brown Rice 🌾 | 2 cups | Rinsed until water runs clear |
| Water 💧 | 2 ½ cups | Or vegetable broth for extra flavor |
| Extra-Virgin Olive Oil 🫒 | 1 tbsp | Optional for richness |
| Sea Salt 🧂 | ½ tsp | Fine grain preferred |
| Garlic Powder 🧄 | ½ tsp | Optional for depth |
| Onion Powder 🧅 | ½ tsp | Optional for aroma |
| Bay Leaf 🍃 | 1 whole | Optional for subtle infusion |
| Dried Thyme 🌿 | ¼ tsp | Optional herb addition |
| Lemon Juice 🍋 | 1 tsp | Freshly squeezed for brightness |
The rice quality is paramount here. Short-grain brown rice will yield stickier results, so opt for long-grain for that classic fluffy texture. Lundberg or Nishiki brands are excellent choices and widely available at Whole Foods or Sprouts. Rinsing removes excess starch, which is critical for avoiding mushy grains. Use filtered water if your tap water has a strong mineral taste.
Substitutions are simple for this recipe. Swap water for vegetable broth (use low-sodium to control seasoning) or add 1 tbsp soy sauce for umami depth. No olive oil? Skip it entirely—the rice will still cook perfectly. Fresh garlic or onion can replace the powders at one-third the amount, but sauté them first in the pot before adding rice.
Cooked rice keeps in the fridge for 4-5 days in an airtight container. Freeze for up to 6 months in portioned bags (squeeze out air to prevent freezer burn). Reheat with a splash of water in the microwave or Instant Pot to restore moisture.
Why You’ll Love This Recipe
- Set and Forget: I toss everything in the Instant Pot, press a button, and walk away—no stirring, no watching the pot.
- Garlicky Depth: The olive oil and garlic powder turn plain brown rice into something rich and aromatic.
- Meal Prep MVP: I make a big batch Sunday and use it in bowls, wraps, or soups all week.
- Stays Fresh: Honestly, it reheats better than any other rice I’ve tried—still fluffy days later.
Step-by-Step Instructions for Insta Pot Brown Rice
Master the pressure cooker method for perfectly fluffy, separate grains with minimal effort.
Step 1: Rinse and Prepare the Long-Grain Brown Rice
Place the 2 cups long-grain brown rice in a fine-mesh strainer and rinse under cold running water until the water runs completely clear. This critical step removes excess starch that would otherwise make the rice gummy.
I always give it a final shake to remove any lingering water droplets. Properly rinsed rice ensures each grain cooks evenly and maintains its individual texture. Drain thoroughly before adding to the Insta Pot.
Step 2: Sauté Aromatics and Toast the Rice
Set your Insta Pot to the Sauté function on Normal/Medium heat. Add the 1 tbsp extra-virgin olive oil, then stir in the 0.5 tsp garlic powder, 0.5 tsp onion powder, and the drained rice. Toast for 2-3 minutes, stirring constantly, until you detect a nutty aroma.
This toasting step enhances the rice’s natural flavor and prevents it from tasting bland. Watch for the grains to turn slightly translucent at the edges—that’s your visual cue. Don’t let it brown, as this can impart a bitter taste.
Step 3: Add Liquids and Seasonings
Pour in the 2.5 cups water, then add the 0.5 tsp sea salt, 1 whole bay leaf, and 0.25 tsp dried thyme. Stir well to distribute the seasonings evenly and ensure no rice grains are sticking to the bottom of the pot.
This is where precision matters: the water-to-rice ratio is calibrated for long-grain brown rice’s absorption rate. The bay leaf and thyme infuse subtle depth, while the salt seasons from within. Double-check that all rice is submerged.
Step 4: Pressure Cook and Natural Release
Secure the lid, set the valve to Sealing, and cook on High Pressure for 22 minutes. When the cooking cycle completes, allow for a full 10-minute natural pressure release before carefully switching the valve to Venting to release any remaining pressure.
The natural release is crucial—it prevents the rice from becoming mushy by allowing it to finish steaming gently. You’ll know it’s ready when the float valve drops completely. Resist the urge to quick-release, as this can lead to uneven doneness.
Step 5: Fluff and Finish with Brightness
Open the lid and remove the bay leaf. Gently fluff the rice with a fork to separate the grains, taking care not to press down—this maintains the light, airy texture. Drizzle the 1 tsp lemon juice over the top and fold it in.
The lemon juice adds a final bright note that balances the earthy flavors. Let it sit covered for 5 minutes to allow the rice to absorb any remaining moisture. Each grain should be tender with a slight bite, and the rice should look fluffy with distinct separation.
Pro Tips For Making Insta Pot Brown Rice
- Use a 1:1.5 Ratio: I learned this the hard way—brown rice needs more water than white. Stick to 1 cup rice to 1.5 cups water for perfectly tender grains.
- Rinse the Rice: Sounds tedious, but it removes excess starch so your rice doesn’t turn out gummy. A quick swirl in a fine-mesh strainer does the trick.
- Skip the Stir: After adding everything to the Instant Pot, resist the urge to stir. It can make the rice mushy—just close the lid and let the pressure do its job.
- Natural Release Only: I was skeptical until I tried it, but letting the pressure release naturally (about 15 minutes) keeps the rice from getting crunchy or undercooked.
Regional Styles of This Dish
Texas Style
In Texas, this dish often gets a smoky twist with 1 tsp smoked paprika and ½ tsp cumin added to the water. The rice pairs perfectly with barbecue, soaking up those rich, saucy flavors. I love how the spices complement the earthy brown rice. 🌶️
California Fusion
West Coast cooks incorporate avocado slices and cilantro after cooking for a fresh, vibrant finish. The creamy avocado contrasts beautifully with the chewy rice texture. A squeeze of lime replaces the lemon for a brighter note.
Asian Inspiration
For an Asian-inspired version, swap water for 2.5 cups coconut milk and add 1 tsp ginger and 1 tbsp soy sauce. The rice becomes richer and pairs wonderfully with stir-fries or curries. I use light coconut milk to keep it balanced.
Southern Comfort
Southern kitchens often use chicken broth instead of water and stir in ½ cup diced bell peppers before cooking. The broth infuses extra depth, while the peppers add color and subtle sweetness. This version feels like a complete side dish on its own.
Mediterranean Touch
Add ½ cup diced sun-dried tomatoes and ¼ cup chopped kalamata olives with the water for a Mediterranean flair. The briny olives and sweet tomatoes create a complex flavor profile. I recommend Divina brand olives for consistent quality.
Mexican Fiesta
Stir in ½ cup corn kernels and 1 diced jalapeño before pressure cooking for a festive touch. The corn adds sweetness, while the jalapeño provides a gentle heat. This style works great as a base for burrito bowls or taco fillings. 🔥
Nutrition Facts
Frequently Asked Questions
Why do I need to rinse the rice first?
Rinsing removes excess starch that can make rice gummy. It ensures each grain cooks evenly and stays separate. Skip this step and you risk mushy results.
Can I use chicken broth instead of water?
Use 2.5 cups low-sodium broth for extra flavor. The rice will absorb the savory notes beautifully. Just adjust added salt accordingly.
What if my rice is still crunchy?
Add ¼ cup water, reseal, and cook for another 5 minutes on high pressure. Old rice or insufficient liquid often causes this. Always check liquid ratios.
How long can I store leftovers?
Cooked rice keeps in the fridge for 4-5 days in an airtight container. For longer storage, freeze up to 6 months. Reheat with a splash of water.

- Mujadara Rice and Lentils Recipe: Earthy Spiced Lentils With Caramelized Onions - November 1, 2026
- Naija Fried Rice Recipe: Street-Style Spice With Veggie Crunch - November 1, 2026
- Mushy Rice Recipe: Fluffy Grains Transformed in Minutes - November 1, 2026