
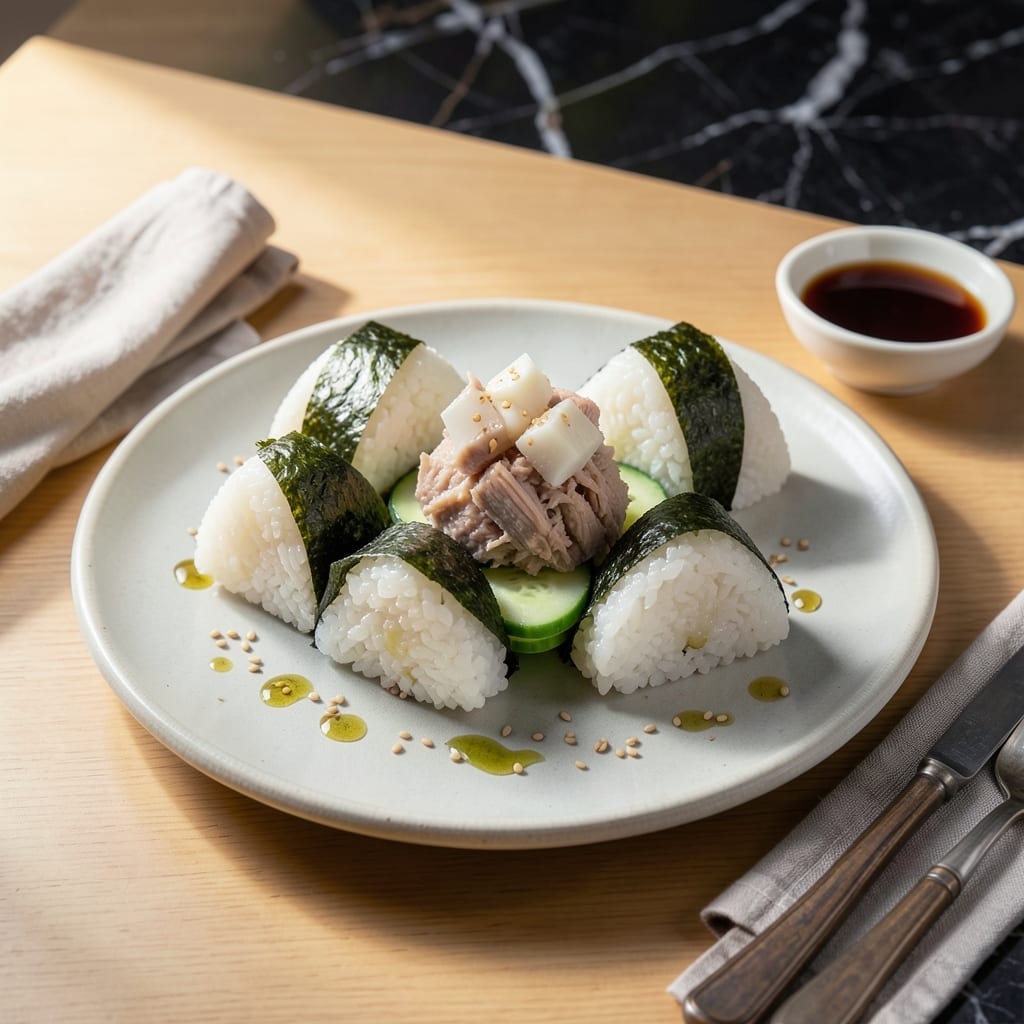
There’s a certain satisfaction in crafting these handheld bites that combine simplicity with bold flavor. The process begins with warm rice, seasoned just enough to complement the filling without overpowering it.
This version features a classic tuna filling mixed with a touch of soy sauce and sesame oil, creating that signature umami taste. The rice is shaped by hand into perfect triangles, then wrapped with a strip of crisp nori for texture.
What makes this recipe special is its portability and versatility. You can customize the filling or keep it traditional—either way, the result is a satisfying snack that’s as fun to make as it is to eat.
Perfect for picnics, lunchboxes, or an on-the-go treat. Here’s how to make them at home.
Ingredients for Japanese Rice Balls Tuna
Short grain rice, fresh tuna, and crisp nori make these handheld bites irresistibly delicious and portable.
| Ingredient | Amount | Notes |
|---|---|---|
| Sushi Rice 🍚 | 2 cups | Short-grain, rinsed thoroughly |
| Water 💧 | 2 ½ cups | For cooking rice |
| Rice Vinegar 🍶 | 2 tbsp | For seasoning rice |
| Granulated Sugar 🍬 | 1 tsp | Balances vinegar acidity |
| Salt 🧂 | ½ tsp | Fine sea salt preferred |
| Canned Tuna in Water 🐟 | 2 cans | 5 oz each, drained |
| Japanese Mayonnaise 🥄 | 2 tbsp | Kewpie brand recommended |
| Soy Sauce 🫒 | 1 tbsp | Low-sodium preferred |
| Sesame Oil 🫒 | 1 tsp | Toasted variety for depth |
| Nori Sheets 🌿 | 2 sheets | Cut into thin strips |
| Fresh Cucumber 🥒 | ½ whole | Peeled, deseeded, finely diced |
| Green Onions 🧅 | 2 whole | Thinly sliced for garnish |
| Sesame Seeds 🌰 | 1 tsp | Toasted for garnish |
Sushi rice is non-negotiable here—short-grain varieties like Koshihikari or Nishiki give you that perfect sticky texture. You’ll find these at any Asian market or the international aisle of major grocers. The rice vinegar should be labeled specifically as such (not apple cider or white vinegar). For the tuna, wild-caught in water has better flavor than oil-packed, and I prefer Albacore for its firmer texture.
No Japanese mayo? Regular mayo works in a pinch but lacks the sweet, tangy depth. Swap soy sauce for tamari if gluten-free. Short on nori? Furikake seasoning adds a similar umami kick to the rice. The cucumber can be omitted, but it adds a refreshing crunch. If using frozen tuna, thaw completely and drain well (excess water makes the filling soggy).
Assemble these just before serving—rice hardens as it cools. Wrap tightly in plastic for 24 hours in the fridge, but they’re best fresh. Freezing isn’t recommended (texture suffers). Keep nori sheets in a sealed bag with a damp paper towel to prevent drying out.
Why You’ll Love This Recipe
- No Cook Seasoning: I just mix the rice vinegar, sugar, and salt right into the warm rice—no extra pots or fuss.
- Umami Bomb: The tuna soaks into the rice so every bite has that savory depth I crave.
- Lunchbox Hero: My kids actually eat these cold the next day, and I’ll be real: that’s a win.
- Budget Stretch: A single can of tuna turns two cups of rice into a filling meal for four.
Step-by-Step Instructions for Japanese Rice Balls Tuna
Master the technique for perfectly seasoned rice and balanced fillings in every bite.
Step 1: Cook and Season the Sushi Rice
Combine the 2 cups sushi rice with 2.5 cups water in a rice cooker or pot. Cook until the water is absorbed and the rice is tender—about 20 minutes for most stovetop methods. You’ll know it’s done when the surface looks dry and the grains are plump.
While the rice is still hot, transfer it to a large bowl. Gently fold in the 2 tbsp rice vinegar, 1 tsp granulated sugar, and 0.5 tsp salt using a cutting motion with a rice paddle or spatula. This seasoning step ensures every grain carries balanced sweetness and acidity. Let the rice cool slightly to room temperature—it should be sticky but manageable with damp hands.
Step 2: Prepare the Tuna Filling
Drain the 2 cans canned tuna in water thoroughly, pressing out excess liquid with a fork. In a separate bowl, combine the tuna with 2 tbsp Japanese mayonnaise, 1 tbsp soy sauce, and 1 tsp sesame oil. Mix until fully incorporated—the filling should hold together but remain slightly chunky.
Finely dice the 0.5 whole fresh cucumber and thinly slice the 2 whole green onions. Fold these into the tuna mixture for added texture and freshness. This creates a well-rounded filling with crunch and umami depth. Taste and adjust seasoning if needed, though the soy sauce and sesame oil should provide ample flavor.
Step 3: Shape the Rice Balls
Wet your hands with cold water to prevent sticking. Take about ⅓ cup of the seasoned rice and gently press it into a flat disc in your palm. Create a small indentation in the center and add a generous spoonful of the tuna filling. The rice should encase the filling completely without tearing.
Seal the rice around the filling by cupping your hands and pressing gently. Rotate the ball as you go to ensure even shaping. The finished rice ball should hold its form without cracking. If the mixture feels too dry, dip your hands in water again—this maintains the right texture for shaping.
Step 4: Garnish and Serve
Cut the 2 sheets nori sheets into thin strips using kitchen shears. Wrap a strip around each rice ball, pressing lightly so it adheres to the surface. The nori adds a crisp contrast to the soft rice and creamy filling.
Sprinkle the rice balls with 1 tsp sesame seeds for a nutty finish and visual appeal. Arrange on a serving platter and let them rest for 5 minutes to set. Serve immediately for the best texture—the nori stays crisp, and the rice remains slightly warm. Each bite should deliver a harmony of flavors and textures.
Pro Tips For Making Japanese Rice Balls Tuna
- Wet Your Hands: Keep a bowl of water nearby and wet your hands before shaping each rice ball—prevents the sushi rice from sticking and makes rolling smoother.
- Warm the Rice: Use rice that’s still warm or at room temperature when forming the balls; cold rice hardens and cracks when you press it.
- Skip the Overmixing: When folding tuna into the rice, mix just enough to combine—overworking makes the rice mushy and the filling disappear.
- Use Short-Grain Only: I learned this the hard way—long-grain rice won’t hold its shape, so stick with proper sushi rice for the perfect chewy texture.
Regional Styles of This Dish
Hokkaido Style
In northern Japan, they often add butter and corn to the filling for a creamier texture. I mix 1 tbsp softened butter and ¼ cup corn kernels into the tuna for this regional twist. The sweetness pairs beautifully with the umami. 💛
Osaka Variation
Osaka’s version includes pickled plum (umeboshi) alongside the tuna for a tangy contrast. Add 1 pitted umeboshi, finely chopped, to the filling. The saltiness enhances the tuna’s flavor without overpowering it.
Kyoto Elegance
For a refined touch, Kyoto-style onigiri use fresh sushi-grade tuna instead of canned. Mix ½ cup finely diced raw tuna with soy sauce and wasabi. This version highlights the fish’s natural richness.
Tokyo Convenience
Tokyo’s busy lifestyle led to the popular convenience store onigiri. These use pre-seasoned rice and a simple tuna-mayo filling. I mimic this by adding 1 tsp soy sauce directly to the rice before shaping.
This approach saves time while keeping the flavor authentic.
Okinawa Twist
Okinawa adds bitter melon (goya) for a unique crunch and health boost. Finely dice ¼ cup bitter melon and sauté before mixing with the tuna. The bitterness balances the dish’s richness.
Nutrition Facts
Frequently Asked Questions
Can I use regular rice instead of sushi rice?
No, regular rice won’t hold its shape. Sushi rice’s sticky texture is essential for forming the balls and keeping the filling intact.
How do I keep the rice from sticking to my hands?
Wet your hands with cold water before handling the rice. Re-wet as needed to maintain a smooth shaping process without tearing.
Can I make these ahead of time?
Yes, but assemble them no more than 2 hours before serving. Wrap tightly in plastic to prevent drying, and add nori just before eating to keep it crisp.
What if my filling falls out when shaping?
Ensure you’re using enough rice to fully encase the filling. Press gently but firmly, and check that the rice isn’t too hot—let it cool slightly first.

- Mujadara Rice and Lentils Recipe: Earthy Spiced Lentils With Caramelized Onions - November 1, 2026
- Naija Fried Rice Recipe: Street-Style Spice With Veggie Crunch - November 1, 2026
- Mushy Rice Recipe: Fluffy Grains Transformed in Minutes - November 1, 2026