
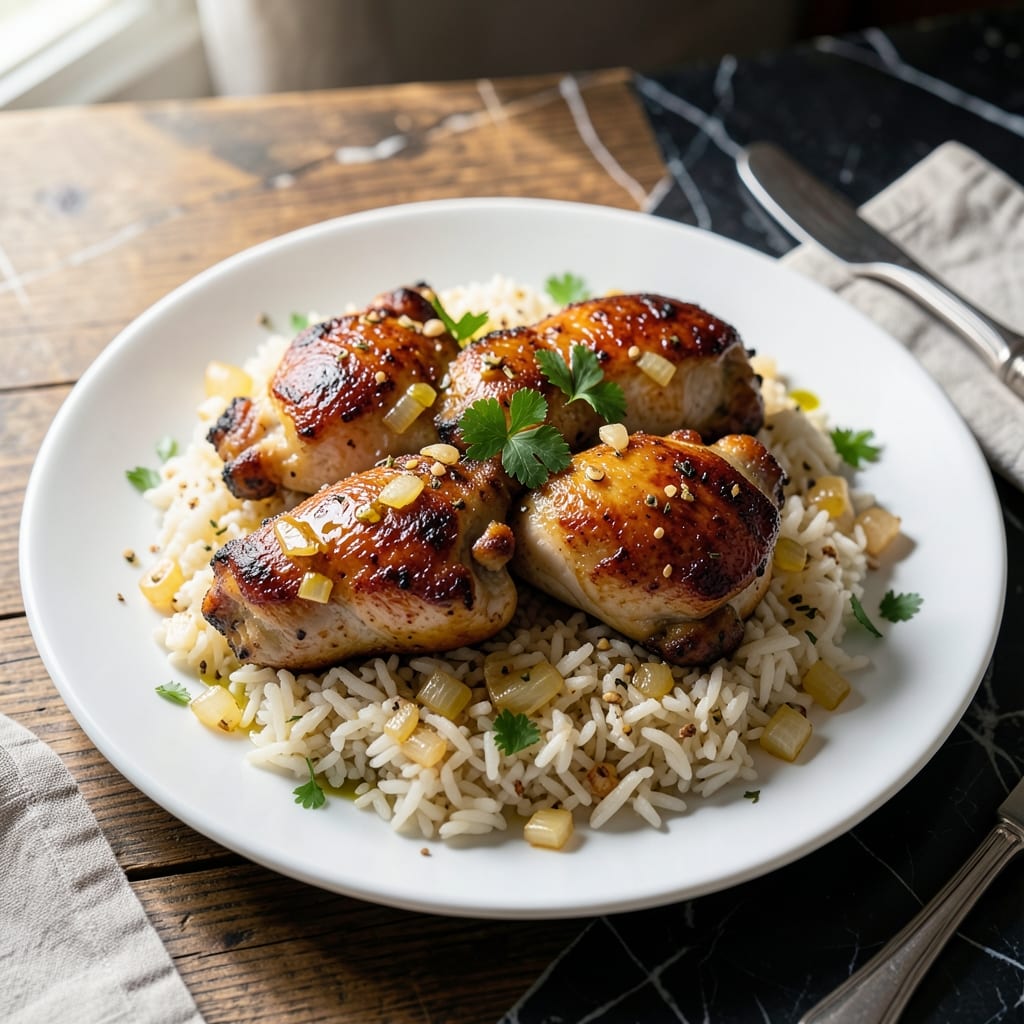
This recipe delivers restaurant-quality results with minimal effort in your Instant Pot. The combination of tender chicken thighs and perfectly cooked rice creates a complete meal in one pot.
I developed this method after years of testing to achieve the ideal texture balance between juicy chicken and fluffy grains. The hands-free approach lets you focus on other tasks while the flavors meld together.
The secret lies in layering the ingredients properly and using the right liquid ratio. You’ll end up with chicken that falls apart at the touch of a fork and rice that’s never mushy.
This dish proves that weeknight dinners can be both convenient and delicious without compromising on quality or taste.
Ingredients for Instant Pot Boneless Chicken Thighs and Rice
Simple ingredients for a one-pot dinner that tastes like it took hours to make.
| Ingredient | Amount | Notes |
|---|---|---|
| Boneless Chicken Thighs 🍗 | 1 ½ lb | Skin-on or skinless, trimmed |
| Long-Grain White Rice 🍚 | 1 ½ cups | Rinsed until water runs clear |
| Chicken Broth 🥣 | 2 cups | Low-sodium preferred for control |
| Yellow Onion 🧅 | 1 whole | Medium, finely diced |
| Garlic Cloves 🧄 | 4 cloves | Minced for even distribution |
| Olive Oil 🫒 | 2 tbsp | Extra-virgin for sautéing |
| Dried Thyme 🌿 | 1 tsp | Or 1 tbsp fresh thyme |
| Dried Oregano 🍃 | 1 tsp | Mediterranean for depth |
| Salt 🧂 | 1 tsp | Kosher or sea salt preferred |
| Black Pepper 🌶️ | ½ tsp | Freshly ground for best flavor |
| Paprika 🌶️ | 1 tsp | Sweet or smoked variety |
| Bay Leaf 🍃 | 1 whole | Remove before serving |
| Frozen Peas 🟢 | ½ cup | Optional for color and texture |
| Fresh Parsley 🌿 | ¼ cup | Chopped, for garnish |
The chicken thighs are the star. Boneless, skin-on gives you the best of both worlds—juicy meat and crispy edges. Costco has great bulk deals, but any grocery store will work. Look for thighs with some fat marbling (that’s flavor). The rice? Long-grain white is classic, but jasmine or basmati add a nice fragrance. Rinse it well—this removes excess starch so you don’t end up with a gummy mess.
No chicken broth? Water plus bouillon cubes works in a pinch. Swap the fresh garlic for one-third the amount of garlic powder if you’re short on time. Fresh herbs can replace the dried (use triple the amount). Want more veg? Toss in some diced bell peppers or carrots with the onion. The peas are optional, but they add a nice pop of color (and my kids actually eat them).
Leftovers keep 4-5 days in the fridge, and honestly taste better the next day. Freezes for 3 months too—just thaw overnight. I double the batch and pack single servings for easy lunches. The bay leaf? Don’t forget to pull it out before serving (nobody wants to chew on that).
Why You’ll Love This Recipe
- Set and Forget: I toss in the chicken, rice, broth, and onions, then walk away—my Instant Pot does all the work.
- Rich Garlic Depth: The garlic cloves and broth infuse the chicken thighs with a savory, juicy flavor that’s hard to resist.
- Meal Prep Magic: I make a big batch on Sunday and pack it for lunches all week—still tastes fresh days later.
- Budget Stretch: Boneless chicken thighs and rice feed my family for pennies per serving. Here’s what sold me—it’s filling, cheap, and never boring.
Step-by-Step Instructions for Instant Pot Chicken Thighs and Rice
Here’s the method. Straightforward, tested, works every time.
Step 1: Sauté the Aromatics and Chicken
Set your Instant Pot to the Sauté function and add the 2 tbsp olive oil. When the oil shimmers, add the finely diced yellow onion and cook for 3-4 minutes until it turns translucent and just starts to soften.
Add the minced garlic cloves and stir for 30 seconds until fragrant—don’t let it brown. Push the onion and garlic to the sides, then add the 1.5 lb boneless chicken thighs in a single layer. Sear for 2-3 minutes per side until golden brown. This builds deep flavor.
Step 2: Season and Deglaze
Sprinkle the 1 tsp salt, 0.5 tsp black pepper, 1 tsp dried thyme, 1 tsp dried oregano, and 1 tsp paprika evenly over the chicken and onions. Stir everything together so the spices coat the chicken and aromatics evenly.
Pour in ½ cup of the chicken broth and use a wooden spoon to scrape up any browned bits from the bottom of the pot. This deglazing step prevents burning and adds incredible flavor to the dish. Let it simmer for 1 minute to build a good fond.
Step 3: Pressure Cook the Rice and Chicken
Add the 1.5 cups long-grain white rice (rinsed) to the pot, stirring to combine with the chicken and spices. Pour in the remaining 1.5 cups chicken broth, then add the bay leaf. Stir once more to distribute everything evenly.
Secure the lid and set the Instant Pot to High Pressure for 10 minutes. It will take about 10-15 minutes to come to pressure before the timer starts. Once the cooking time is complete, allow a natural release for 10 minutes, then quick-release any remaining pressure.
Step 4: Finish with Peas and Garnish
Carefully open the lid and remove the bay leaf. Stir in the 0.5 cup frozen peas—they’ll heat through in just 1-2 minutes from the residual heat. The rice should be tender and the chicken should pull apart easily with a fork.
Let the dish sit for 5 minutes to allow the rice to absorb any remaining liquid. Sprinkle the 0.25 cup fresh parsley over the top just before serving. Each bite will have tender chicken, fluffy rice, and a burst of fresh herb flavor.
Pro Tips For Making Instant Pot Boneless Chicken Thighs And Rice
- Sear the Thighs: Brown the chicken thighs in the Instant Pot first using the sauté function—about 3-4 minutes per side. I learned this the hard way: skipping this step gives you bland, pale meat instead of rich, caramelized flavor.
- Rinse the Rice: Always rinse your long-grain white rice until the water runs clear. It removes excess starch so your rice doesn’t turn into a gummy mess in the pressure cooker.
- Use Enough Liquid: Stick to a 1:1.25 ratio of rice to chicken broth—so 1 cup rice gets 1.25 cups broth. After burning a batch, I finally figured out that too little liquid leaves the rice undercooked and the pot at risk of burning.
- Natural Release Only: Let the pressure release naturally for at least 10 minutes after cooking. Sounds weird, but it works: quick-releasing can turn your rice mushy and your chicken dry.
Storing and Reheating This Recipe
Refrigerator Storage
Let your dish cool for no more than 2 hours before transferring to airtight containers. I use glass containers with snap-tight lids from my local Charleston market. Store in the fridge at 40°F or below for up to 4-5 days. 💪
Freezer Storage
This dish freezes beautifully for up to 3 months without quality loss. Portion into freezer bags (quart size for single servings) and squeeze out excess air. Leave 1 inch of headspace for expansion. Label with the date—trust me, you’ll forget.
Stovetop Reheating
My preferred method: transfer to a heavy pot, add ¼ cup chicken broth to prevent drying, and heat over medium-low for 8-10 minutes. Stir occasionally and add a splash more broth if needed. The flavors taste even better the next day. 🔥
Microwave Reheating
For quick meals, microwave in 1-minute intervals at 70% power, stirring between each. Cover with a damp paper towel to retain moisture. Reach 165°F before serving. Single portions heat in about 2-3 minutes total.
Nutrition Facts
Frequently Asked Questions
Can I use bone-in thighs instead?
Yes, but add 5 extra minutes to the pressure cooking time. Bone-in pieces take longer to cook through. Ensure they reach 165°F internally.
Why do I need to rinse the rice?
Rinsing removes excess starch that could make your dish gummy. Continue until the water runs clear for perfectly separate grains.
What if my rice turns out mushy?
This usually means too much liquid or not enough deglazing. Stick to the 1:1 rice-to-broth ratio and scrape the bottom well.
Can I make this with brown rice?
Yes, but increase the liquid to 2.25 cups and cook for 22 minutes under pressure. Brown rice needs more time and hydration.

- Jollof Rice Sauce Recipe: West African Tomato and Spice Infusion - September 25, 2026
- Japanese Rice Soup Recipe: Umami-Rich Comfort in a Bowl - September 25, 2026
- Homemade Cream Of Rice Recipe: Silk-Smooth Breakfast in Minutes - September 25, 2026