
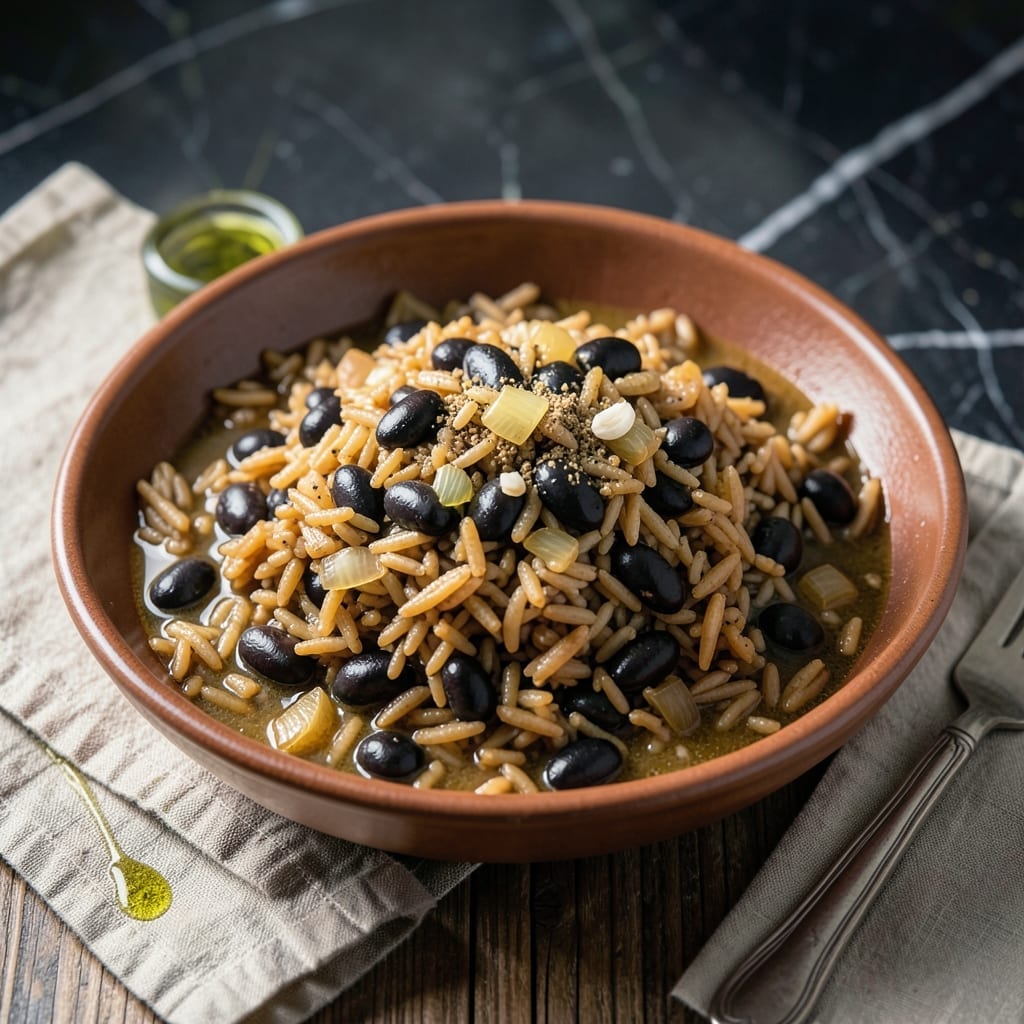
This hands-off method delivers perfectly cooked brown rice and beans with minimal effort. The Instant Pot transforms simple ingredients into a flavor-packed side dish that’s both nutritious and satisfying. No soaking, no stirring—just set it and forget it.
Brown rice and beans cook together in the same pot, absorbing each other’s flavors while maintaining distinct textures. The result is tender rice and creamy beans, all infused with aromatic spices. It’s a no-fuss way to get a complete protein on the table.
This dish works as a base for bowls, a side for grilled meats, or a standalone meal. The Instant Pot ensures consistent results every time, with no risk of burning or uneven cooking.
Ready in under an hour, it’s a practical solution for busy weeknights. Let’s make this staple with confidence.
Ingredients for Instant Pot Brown Rice and Beans
Simple, wholesome ingredients transform into a hearty, hands-off meal with ease.
| Ingredient | Amount | Notes |
|---|---|---|
| Long-Grain Brown Rice 🌾 | 1 ½ cups | Rinsed thoroughly before cooking |
| Dried Black Beans 🫘 | 1 cup | Unsoaked, picked over for debris |
| Vegetable Broth 🥣 | 3 ½ cups | Low-sodium preferred for control |
| Onion 🧅 | 1 whole | Medium, finely diced |
| Garlic Cloves 🧄 | 3 cloves | Minced for even flavor distribution |
| Ground Cumin 🌿 | 1 tsp | Toasted briefly for depth |
| Smoked Paprika 🌶️ | ½ tsp | Adds a subtle smoky note |
| Dried Oregano 🍃 | ½ tsp | Crushed between fingers to release oils |
| Bay Leaf 🌿 | 1 whole | Removed before serving |
| Salt 🧂 | 1 tsp | Adjust to taste after cooking |
| Black Pepper 🌶️ | ½ tsp | Freshly ground preferred |
| Olive Oil 🫒 | 1 tbsp | Extra-virgin for sautéing aromatics |
| Lemon Juice 🍋 | 1 tbsp | Freshly squeezed for brightness |
| Fresh Cilantro 🌿 | ¼ cup | Chopped, for garnish |
The rice and beans are the foundation—organic long-grain brown rice and dried black beans (no canned here) deliver the best texture. Whole Foods or Trader Joe’s have great bulk options for both. The broth matters too: low-sodium vegetable broth lets you control the salt. I always keep a carton of Imagine Foods or Pacific on hand for recipes like this.
No dried beans? Canned black beans work in a pinch (drain and rinse, then reduce broth by half a cup). Swap the rice for quinoa or farro if you prefer—both hold up well to pressure cooking. Missing smoked paprika? Regular paprika plus a pinch of chipotle powder gets you close. The cilantro is optional but highly recommended (the fresh, leafy kind, not the sad bunches with yellow stems).
Leftover rice and beans keep 4-5 days in the fridge—actually taste better the next day once flavors meld. Freezes beautifully for up to 3 months. Portion into containers for easy grab-and-go lunches (just reheat with a splash of water).
Why You’ll Love This Recipe
- Set and Forget: I toss everything in the Instant Pot, press a button, and walk away—no babysitting required.
- Deep, Savory Bite: The garlic and onion soak into the brown rice and black beans while cooking, making every forkful rich and satisfying.
- Meal Prep Hero: This makes enough for three lunches in a row, and it reheats like a dream.
Step-by-Step Instructions for Brown Rice and Beans
This hands-off method delivers perfectly cooked rice and beans with minimal effort.
Step 1: Sauté Aromatics for Flavor Foundation
Set your Instant Pot to the Sauté function and add the 1 tbsp Olive Oil. When it shimmers, add the finely diced 1 whole Onion and cook for 3-4 minutes until it begins to soften and turn translucent.
Stir in the minced 3 cloves Garlic Cloves, 1 tsp Ground Cumin, 0.5 tsp Smoked Paprika, and 0.5 tsp Dried Oregano. Cook for another 30-60 seconds until fragrant. This step builds the flavor base that will infuse the entire dish.
Step 2: Add Remaining Ingredients and Pressure Cook
Add the 1.5 cups Long-Grain Brown Rice (rinsed), 1 cup Dried Black Beans (picked over), 3.5 cups Vegetable Broth, 1 whole Bay Leaf, 1 tsp Salt, and 0.5 tsp Black Pepper. Stir well to combine, ensuring no grains stick to the bottom of the pot.
Secure the lid, set the valve to Sealing, and cook on High Pressure for 25 minutes. The pot will take about 10-15 minutes to come to pressure before the cooking time begins. This is when the magic happens—flavors meld and ingredients soften perfectly.
Step 3: Natural Release and Final Touches
Allow the pressure to release naturally for 15 minutes, then quick-release any remaining pressure. Open the lid carefully, tilting it away from you to avoid steam. Remove and discard the 1 whole Bay Leaf.
Drizzle the 1 tbsp Lemon Juice over the top and stir gently to distribute the bright, citrusy flavor. This step wakes up all the earthy, savory notes with a touch of acidity. Taste and adjust the seasoning with additional Salt if needed.
Step 4: Rest and Garnish for Serving
Let the dish sit for 5 minutes to allow the liquid to absorb fully and the flavors to settle. The rice should be tender but still hold its shape, and the black beans should be creamy inside with a slight bite.
Sprinkle with the chopped 0.25 cup Fresh Cilantro just before serving. This fresh, herbal garnish adds a vibrant finish that complements the hearty, spiced rice and beans beautifully.
Pro Tips For Making Instant Pot Brown Rice And Beans
- Soak the Beans: I learned this the hard way—soak dried black beans for at least 4 hours or overnight to cut cooking time and prevent that dreaded “undercooked crunch.”
- Sauté the Aromatics: Cook the onion and garlic in the Instant Pot first (about 3 minutes) to build a flavor base—it makes a real difference compared to dumping everything in raw.
- Use Enough Liquid: Brown rice and beans need more liquid than you think. Stick to a 2:1 broth-to-rice ratio and add an extra ½ cup for the beans to avoid a dry, stuck-on mess.
- Natural Release Only: Resist the urge to quick-release. Letting the pressure drop naturally (about 15 minutes) guarantees tender beans and rice every time.
Essential Equipment for This Recipe
Instant Pot Essentials
You’ll need a 6-quart or 8-quart Instant Pot for this recipe—the standard size for most households. I use my Instant Pot Duo Crisp with the pressure cooking function, but any model with high pressure capability works perfectly. The size matters because the rice and beans need room to expand. 🔥
Sealing Ring Check
Always inspect your silicone sealing ring before starting. If it’s cracked or smells like last week’s chili, replace it. A good seal is critical for proper pressure building. I keep a backup ring in my pantry just in case.
Wooden Spoon Helper
A wooden spoon is my go-to tool for scraping the bottom of the pot after sautéing. It won’t scratch the stainless steel insert, and it’s sturdy enough to deglaze any stuck bits. This prevents the dreaded Burn notice on your Instant Pot.
Measuring Tools
Accurate measurements ensure consistent results. I use OXO Good Grips measuring cups for dry ingredients and a liquid measuring cup for the broth. A fine-mesh strainer helps rinse the rice thoroughly.
Release Valve Safety
Never place your hand directly over the quick-release valve. Use a long-handled spoon or tongs to switch it from Sealing to Venting. Steam releases at 212°F, so keep your face and hands clear. Safety first! 💡
Long-Handled Utensils
For stirring and serving, I prefer long-handled silicone utensils. They’re heat-resistant and won’t scratch your pot. A ladle also comes in handy for serving this dish directly from the Instant Pot.
Nutrition Facts
Frequently Asked Questions
Do I need to soak the beans first?
No soaking required! The 25 minutes of high pressure is enough to soften dried beans completely. Just pick over and rinse them before adding to the pot.
Can I use canned beans instead?
Yes, but reduce the broth by 1/2 cup since canned beans are pre-cooked. Add them after pressure cooking to prevent mushiness.
Why did I get a Burn notice?
This happens if ingredients stick to the bottom. Always deglaze the pot after sautéing with a splash of broth, and ensure nothing is burned on.
How do I store leftovers?
Keep in an airtight container in the fridge for up to 5 days or freeze for 3 months. Reheat with a splash of water.

- Jamaican Jollof Rice Recipe: Island Spice in Every Bite - October 18, 2026
- Hamburger Rice Hot Dish Recipe: Midwest Comfort in One Pan - October 18, 2026
- Iranian Cabbage Rice Recipe: Aromatic Herbs and Spiced Layers - October 18, 2026