
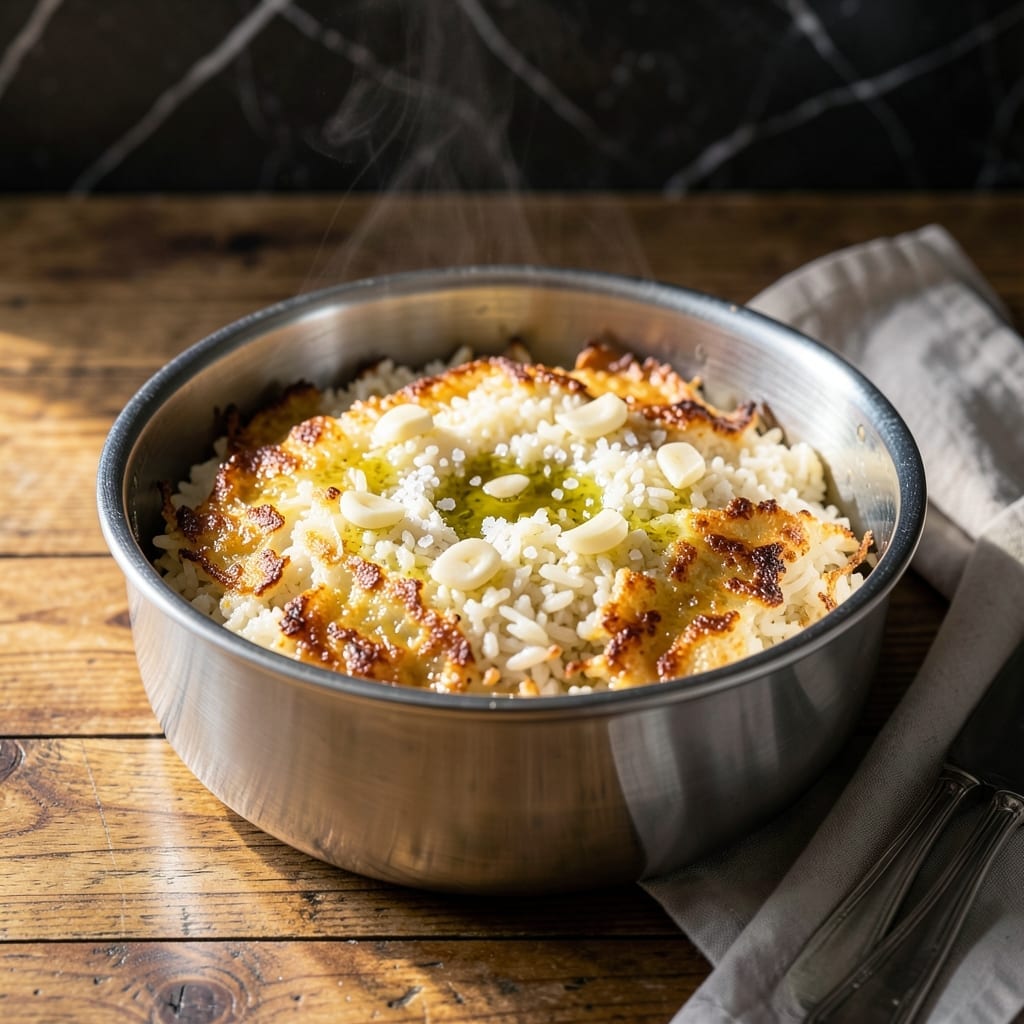
This Instant Pot Pro method delivers perfectly tender rice with a golden, crispy bottom every time.
I developed this technique after countless tests, discovering the exact water ratio and cooking time for ideal texture. The Pro Crisp lid creates that coveted crunch without monitoring.
What you get is fluffy grains with a caramelized crust that rivals traditional methods. No stirring, no burning—just consistent results.
This approach works for white or brown rice, making it a versatile addition to any meal. Let’s get started.
Ingredients for Instant Pot Pro Crisp Rice
A few simple ingredients deliver restaurant-quality rice with caramelized crust at home.
| Ingredient | Amount | Notes |
|---|---|---|
| Jasmine Rice 🌾 | 2 cups | Rinsed until water runs clear |
| Water 💧 | 2 ½ cups | Or chicken broth for extra flavor |
| Unsalted Butter 🧈 | 2 tbsp | Melted for crisping layer |
| Olive Oil 🫒 | 1 tbsp | Extra-virgin preferred |
| Garlic Cloves 🧄 | 3 cloves | Minced for aromatic base |
| Sea Salt 🧂 | 1 tsp | Fine grain for even distribution |
| Black Pepper 🌶️ | ½ tsp | Freshly ground for best flavor |
| Onion Powder 🧅 | 1 tsp | Enhances depth of flavor |
| Bay Leaf 🍃 | 1 whole | Optional for subtle aroma |
| Fresh Parsley 🌿 | 2 tbsp | Chopped for garnish |
The rice variety matters here. Jasmine rice yields the best texture for this method, but basmati works too (just adjust water slightly). Rinsing is non-negotiable—removes excess starch for fluffier grains. For the butter, Plugrá or Kerrygold give superior richness. Most grocery stores carry these, but any unsalted variety will do for the crisping layer.
No jasmine? Long-grain white rice at a 1:1.25 rice-to-water ratio works. For brown rice, increase water to 3 cups and cooking time to 25 minutes. Vegetable oil can replace butter for a dairy-free version. The garlic and onion powder add depth, but fresh shallots or scallions work if you prefer their milder bite.
Store uncooked rice in an airtight container for up to 6 months. Leftovers keep 4-5 days in the fridge, though the crust softens. Reheat in a skillet to revive the crispiness. Fresh parsley is best used within 3-4 days.
Why You’ll Love This Recipe
- Set and Forget: I toss everything in the Instant Pot Pro, press a button, and walk away—no babysitting required.
- Garlic Butter Magic: The butter and garlic turn plain jasmine rice into something ridiculously good, with that crispy bottom layer I can never resist.
- Meal Prep Hero: I make a big batch on Sunday and it reheats beautifully for lunches all week.
- Budget Friendly: Jasmine rice and a few pantry staples stretch into a filling side that feeds my family for pennies per serving.
Step-by-Step Instructions for Instant Pot Pro Crisp Rice
This method delivers perfectly tender grains with a golden, crispy bottom layer every time.
Step 1: Rinse and Prepare the Jasmine Rice
Place the 2 cups jasmine rice in a fine-mesh strainer and rinse under cold water until the water runs completely clear. This step removes excess starch that could make the rice gummy. I rinse for about 2-3 minutes, swirling the rice with my hand to ensure all surfaces are cleaned.
After rinsing, drain the rice thoroughly and let it sit in the strainer for 5 minutes while you prepare the other ingredients. Properly rinsed rice ensures each grain remains separate and tender after cooking, rather than clumping together.
Step 2: Sauté Aromatics in the Instant Pot
Select the Sauté function on your Instant Pot Pro Crisp and set it to Normal/Medium heat. Add the 1 tbsp olive oil and 2 tbsp unsalted butter, swirling to coat the bottom of the pot. Once the butter melts and begins to foam, add the 3 cloves minced garlic cloves.
Cook the garlic for 30-60 seconds until it becomes fragrant and just starts to turn light golden brown. Immediately add the 1 tsp sea salt, 0.5 tsp black pepper, 1 tsp onion powder, and 1 whole bay leaf. Stir for 15 seconds to toast the spices, which deepens their flavor.
Step 3: Toast the Rice and Add Liquid
Add the rinsed and drained 2 cups jasmine rice to the pot and stir to coat it in the butter and oil mixture. Toast the rice for 2-3 minutes, stirring frequently, until the edges of the grains become translucent and the rice emits a nutty aroma.
This toasting step is critical for achieving that coveted crispy bottom layer. Pour in the 2.5 cups water and stir once to distribute the rice evenly in the liquid. Do not stir again after this point to preserve the crisping layer.
Step 4: Pressure Cook and Crisp
Secure the lid on the Instant Pot and set the valve to Sealing. Cook on High Pressure for 5 minutes. Once the cooking cycle completes, allow for a natural pressure release for 10 minutes, then quick-release any remaining pressure.
Remove the lid and carefully transfer the pot to the air fryer basket (if your model supports this). Set the Air Fry function to 400°F and cook for 8-10 minutes to develop a golden brown crust on the bottom. If your model doesn’t support air frying, use the Sauté function on High for 5-7 minutes, watching closely to prevent burning.
Step 5: Rest and Garnish
Turn off the Instant Pot and let the rice rest, covered, for 5 minutes. This allows the grains to steam and become fully tender while the crispy bottom sets. Gently run a silicone spatula around the edges to loosen the crispy layer before serving.
Discard the bay leaf, then fluff the rice with a fork, taking care to preserve the crispy bottom. Garnish with 2 tbsp chopped fresh parsley and serve immediately, ensuring each portion includes some of the golden crust.
Pro Tips For Making Instant Pot Pro Crisp Rice
- Rinse the Rice: Jasmine rice needs a good rinse to remove excess starch—I learned this the hard way after my first few batches turned out gummy instead of crisp.
- Sauté the Garlic: Cook the minced garlic in the butter and olive oil for just 30 seconds before adding rice; any longer and it burns, ruining the flavor.
- Use Less Water: For that perfect crisp texture, cut the water by 2 tablespoons less than usual—sounds weird, but it works.
- Let It Crisp: After pressure cooking, leave the rice in the pot for 10 minutes with the lid off to let the bottom develop that golden crust.
Wine and Beer Pairings for These Flavors
Light White Wines
A crisp Sauvignon Blanc from New Zealand cuts through the richness of the buttery crust beautifully. The bright acidity and citrus notes complement the nutty, toasted rice flavors without overpowering them. I love Kim Crawford for this pairing.
Medium-Bodied Whites
An unoaked Chardonnay works wonderfully, especially one from California’s Central Coast. The subtle apple and pear notes enhance the garlic and onion undertones in the dish. Try Kendall-Jackson Avant for a reliable option.
Asian Beer Styles
The clean, crisp profile of a Japanese lager like Sapporo or Asahi pairs perfectly with the savory notes of this dish. The light body won’t compete with the delicate flavors of the jasmine rice and its crispy bottom. 🍺
Wheat Beers
A Belgian witbier with its citrus and spice notes offers an interesting contrast to the caramelized crust. Look for Blue Moon or Hoegaarden—their subtle sweetness balances the savory elements beautifully.
Rosé Options
A dry Provence rosé with its crisp acidity and red fruit notes can be surprisingly good with this. The versatility of rosé makes it a crowd-pleaser that works with both the rice and any accompanying proteins. 🍷
Non-Alcoholic Pairings
For a non-alcoholic option, try sparkling yuzu juice or a ginger beer like Fever-Tree. The citrus and spice notes cleanse your palate between bites of the crispy, buttery rice.
Nutrition Facts
Frequently Asked Questions
Can I use a different rice variety?
Yes! While jasmine works best, basmati or long-grain white rice also work. For basmati, reduce water to 2.25 cups. Brown rice needs 3 cups water and 25 minutes pressure time.
What if the crust burns during crisping?
Lower the temperature to 375°F and check every 2 minutes. If using Sauté mode, stir gently and reduce time to 3-4 minutes. Prevents over-browning while still achieving crunch.
Can I make this dairy-free?
Replace butter with 2 tbsp coconut oil or extra olive oil. The crispy layer forms just as well, and the flavor remains rich and satisfying.

- Mujadara Rice and Lentils Recipe: Earthy Spiced Lentils With Caramelized Onions - November 1, 2026
- Naija Fried Rice Recipe: Street-Style Spice With Veggie Crunch - November 1, 2026
- Mushy Rice Recipe: Fluffy Grains Transformed in Minutes - November 1, 2026