
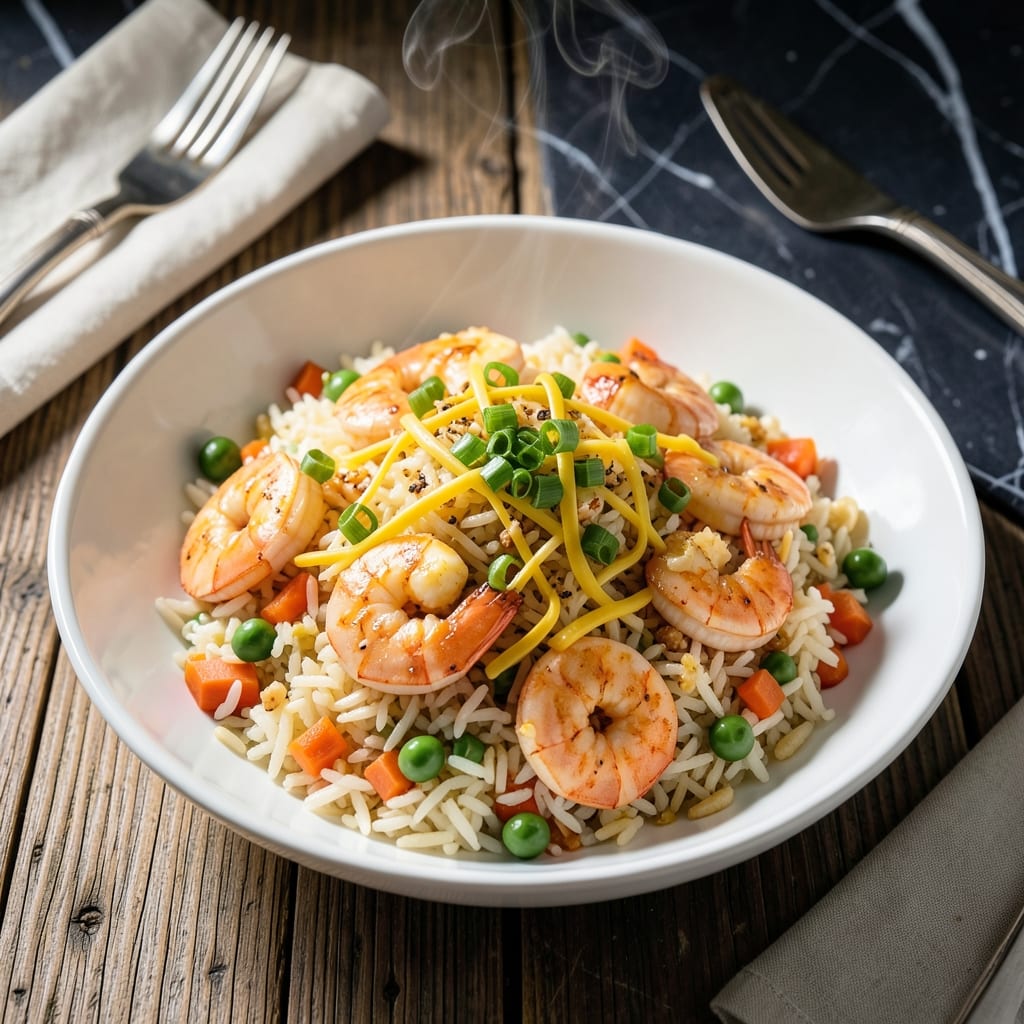
This Instant Pot method delivers the wok-style flavor of shrimp fried rice without the constant stirring.
By using the sauté function and pressure cooking, you achieve perfectly cooked shrimp and rice with minimal effort. The key is layering ingredients strategically to prevent burning while maximizing flavor development.
What emerges is a dish with distinct, charred bits of egg and shrimp, tender rice grains, and that signature savory-sweet depth. The entire process takes 30 minutes from start to finish.
This technique proves that authentic takeout flavor can be achieved in your own kitchen, with far less cleanup than traditional methods. The results are consistently impressive and restaurant-quality.
Ingredients for Instant Pot Shrimp Fried Rice
Rice, shrimp, and pantry staples create this Instant Pot takeout classic with ease.
| Ingredient | Amount | Notes |
|---|---|---|
| Jasmine Rice 🍚 | 2 cups | Rinsed until water runs clear |
| Large Shrimp 🍤 | 1 lb | Peeled, deveined, tails off |
| Large Eggs 🥚 | 3 whole | Lightly beaten for scrambling |
| Frozen Peas and Carrots Mix 🥕 | 1 cup | No need to thaw |
| Green Onions 🧅 | 4 whole | Thinly sliced, whites and greens separated |
| Garlic Cloves 🧄 | 3 cloves | Minced for aromatic base |
| Fresh Ginger Root 🌿 | 1 tbsp | Finely grated or minced |
| Low-Sodium Soy Sauce 💧 | 3 tbsp | For umami depth |
| Oyster Sauce 🍶 | 1 tbsp | Vegetarian oyster sauce optional |
| Sesame Oil 🫒 | 1 tsp | Toasted, for finishing |
| Vegetable Oil 🫒 | 2 tbsp | Neutral flavor for sautéing |
| Granulated Sugar 🧂 | ½ tsp | Balances savory flavors |
| White Pepper 🌶️ | ¼ tsp | Ground, traditional touch |
| Chicken Stock 🥣 | ½ cup | Or substitute vegetable stock |
The shrimp quality matters most here. Wild-caught from a reputable seafood counter yields superior texture and flavor, but frozen shrimp (thawed properly) works well too—just avoid pre-cooked varieties. For rice, jasmine is traditional for its fragrant, slightly sticky texture, though long-grain white rice can substitute in a pinch. The green onions add freshness, so look for crisp, bright green bunches without wilting.
No jasmine rice? Basmati or long-grain white will do, though texture may vary slightly. For a vegetarian version, replace oyster sauce with vegetarian oyster sauce or hoisin. The shrimp can be swapped for diced chicken or extra vegetables if preferred. Frozen peas and carrots are non-negotiable for convenience—they hold up perfectly to pressure cooking without turning mushy.
Store cooked rice in the fridge for up to 4 days in an airtight container. The dish reheats well on the stovetop with a splash of water or soy sauce. For best results, consume within 3 days—the shrimp texture degrades slightly after that. Leftovers freeze for up to 1 month.
Why You’ll Love This Recipe
- One Pot Magic: I toss in the rice, shrimp, and frozen veggies, set the timer, and walk away—no babysitting required.
- Umami Bomb: The shrimp soak up the soy and garlic while the eggs add this rich, creamy bite that makes every forkful addictive.
- Weeknight Rescue: Between us, this is my Tuesday night lifesaver when I need dinner on the table faster than the kids can argue about homework.
- Leftovers? Please.: Honestly, it tastes even better the next day—if there’s any left, which there rarely is.
Step-by-Step Instructions for Instant Pot Shrimp Fried Rice
Achieve perfect texture and flavor with this streamlined approach to a classic dish.
Step 1: Cook and Prep the Rice Foundation
Rinse the 2 cups jasmine rice in a fine-mesh strainer until the water runs completely clear. This removes excess starch that would make your fried rice gummy. Transfer the rinsed rice to your Instant Pot along with 0.5 cup chicken stock and 1 cup of water.
Secure the lid and set to cook on high pressure for 3 minutes, followed by a natural pressure release for 10 minutes. Spread the cooked rice on a baking sheet to cool completely—this prevents it from turning to mush when stir-fried later.
Step 2: Sauté Aromatics and Protein
Set your Instant Pot to the sauté function on normal heat. Add 2 tbsp vegetable oil and swirl to coat. Add the 1 lb large shrimp in a single layer and cook undisturbed for 1-2 minutes per side until they turn opaque and pink. Remove the shrimp and set aside.
In the same pot, add the minced 3 cloves garlic cloves and 1 tbsp fresh ginger root. Sauté for 30 seconds until fragrant but not browned. Push these to one side, then pour in the 3 whole large eggs and scramble until just set but still slightly moist.
Step 3: Combine All Elements
Add the cooled rice to the pot, breaking up any clumps with your spatula. Stir in the 1 cup frozen peas and carrots mix, the reserved shrimp, and the white portions of the 4 whole green onions. Drizzle with 3 tbsp low-sodium soy sauce, 1 tbsp oyster sauce, 0.5 tsp granulated sugar, and 0.25 tsp white pepper.
Stir-fry everything together for 2-3 minutes until the rice is heated through and the vegetables are tender. The peas and carrots should be bright and slightly softened, with no frozen centers remaining.
Step 4: Finish and Serve
Turn off the sauté function. Drizzle with 1 tsp sesame oil and toss to combine. The sesame oil adds a nutty aroma that signals the dish is complete. Garnish with the green portions of the green onions for a pop of color and freshness.
Let the fried rice sit for 2 minutes before serving to allow the flavors to meld. Each grain of rice should be distinct and slightly chewy, coated in the savory sauce with visible flecks of shrimp, egg, and vegetables throughout.
Pro Tips For Making Instant Pot Shrimp Fried Rice
- Sauté shrimp first: Cook the shrimp separately in the Instant Pot first, then set aside—this prevents them from overcooking into rubbery bits when you add the rice and veggies later.
- Use day-old rice: Fresh rice turns to mush under pressure; I learned this the hard way after three soggy batches. Spread leftover jasmine rice on a tray to dry out for 30 minutes before starting.
- Skip the thaw: Toss the frozen peas and carrots straight in with the rice and liquid—no need to thaw, and it actually keeps them from turning to mush.
- Press, don’t stir: After adding eggs, let them sit undisturbed for 20 seconds before gently folding—this gives you those nice, distinct ribbons instead of scrambled bits.
Pro Cooking Tips for Perfect Results
Prevent Sticking
Always use 2 tbsp vegetable oil when sautéing shrimp to create a protective barrier. I deglaze with 2 tbsp chicken stock between steps to lift browned bits. This prevents the dreaded burn notice on your Instant Pot. 💡
Rice Texture Secret
Spread cooked rice on a baking sheet and cool completely before stir-frying. This mimics day-old rice texture, preventing mushiness. I use a rimmed baking sheet for even cooling.
Shrimp Timing
Cook shrimp in a single layer for 1-2 minutes per side until just opaque. Remove immediately to avoid overcooking—they’ll finish when added back to the hot rice. I check the thickest piece for doneness.
Sauce Layering
Add soy sauce and oyster sauce in stages rather than all at once. This builds flavor depth. I drizzle 1 tbsp at a time, tossing between additions.
Final Touch
Let the finished dish rest for 2 minutes before serving. This allows the sesame oil to distribute evenly. I always garnish with extra green onions for freshness. ✨
Nutrition Facts
Frequently Asked Questions
Can I use pre-cooked shrimp?
Yes, but add them at the very end to avoid overcooking. Pre-cooked shrimp only need 1-2 minutes to warm through. Fresh shrimp are preferred for better texture and flavor.
What if my rice is mushy?
Cool the rice completely before stir-frying. Spread it on a baking sheet for 10-15 minutes to remove excess moisture. This prevents the dreaded mushy texture.
Can I substitute other proteins?
Swap shrimp for diced chicken, tofu, or extra veggies. Adjust cooking time: chicken needs 3-4 minutes per side, while tofu requires 2-3 minutes.
How do I store leftovers?
Keep in an airtight container in the fridge for up to 3 days. Reheat in a skillet with a splash of soy sauce to restore moisture and flavor.

- Mujadara Rice and Lentils Recipe: Earthy Spiced Lentils With Caramelized Onions - November 1, 2026
- Naija Fried Rice Recipe: Street-Style Spice With Veggie Crunch - November 1, 2026
- Mushy Rice Recipe: Fluffy Grains Transformed in Minutes - November 1, 2026