
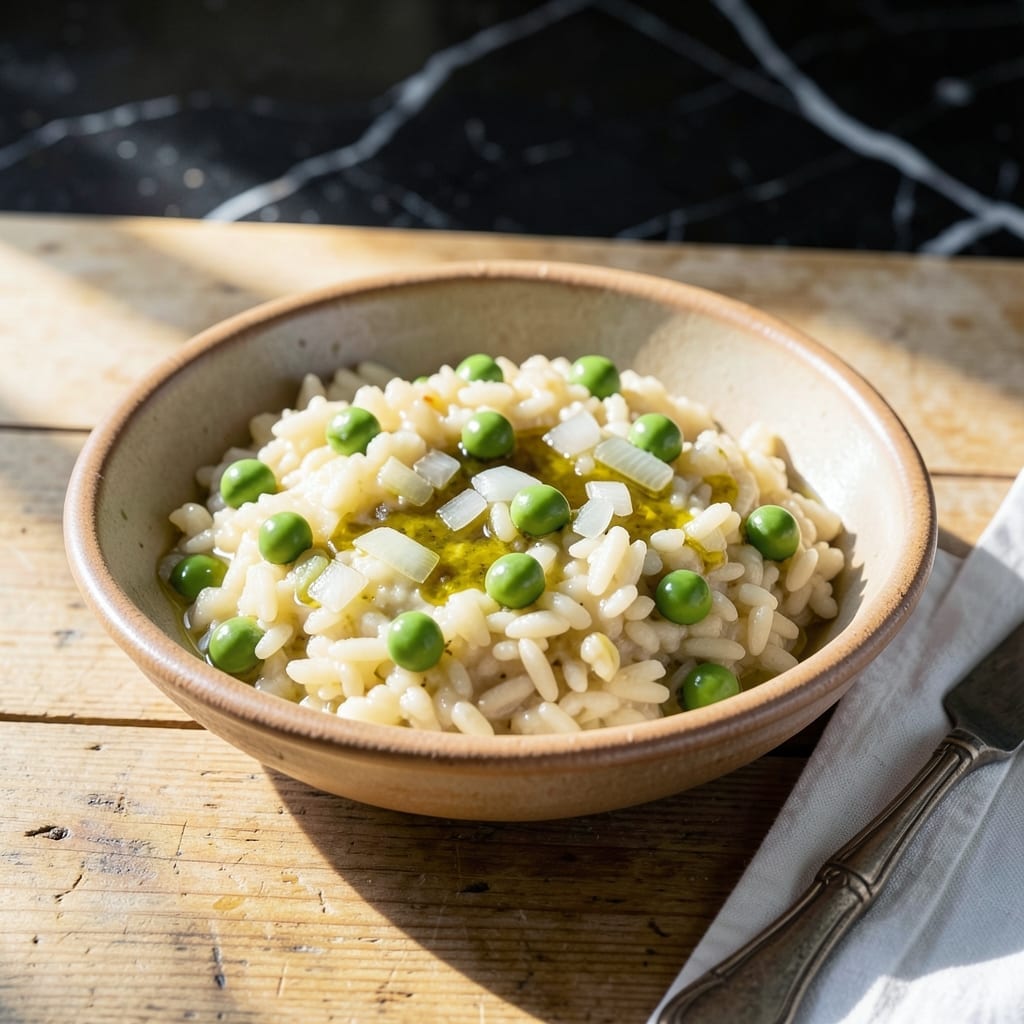
This dish brings the essence of Italian home cooking to your table with garden-fresh simplicity. The combination of tender peas and fragrant rice creates a side that complements any meal beautifully.
I developed this recipe in my small Boston kitchen, testing it until the balance of herbs and vegetables felt just right. The technique is straightforward, using basic pantry staples and fresh produce for maximum flavor impact.
What emerges is a dish with bright green peas, perfectly cooked rice, and aromatic herbs that fill your kitchen with an inviting scent. The textures balance perfectly between the soft grains and crisp vegetables.
Serve it alongside roasted meats or as part of a vegetarian spread. Here’s how to make this Italian classic at home.
Ingredients for Italian Rice and Peas
Fresh rice, bright peas, and aromatic herbs make this Italian side dish sing.
| Ingredient | Amount | Notes |
|---|---|---|
| Arborio Rice 🍚 | 1 ½ cups | Rinsed before cooking |
| Fresh Green Peas 🌱 | 2 cups | Frozen works in a pinch |
| Vegetable Stock 💧 | 3 ½ cups | Low-sodium preferred |
| White Onion 🧅 | 1 whole | Finely diced |
| Garlic Cloves 🧄 | 3 cloves | Minced for aroma |
| Extra-Virgin Olive Oil 🫒 | 3 tbsp | For sautéing vegetables |
| Fresh Parsley 🌿 | ½ cup | Chopped, for garnish |
| Fresh Basil 🍃 | ¼ cup | Torn for freshness |
| Parmesan Cheese 🧀 | ½ cup | Freshly grated from block |
| Butter 🧈 | 2 tbsp | Unsalted for control |
| Salt 🧂 | 1 tsp | Kosher or sea salt |
| Black Pepper 🌶️ | ½ tsp | Freshly ground preferred |
| Dry White Wine 🍷 | ½ cup | Optional for depth |
The Arborio rice is key here—Trader Joe’s or Lundberg have solid options. Look for medium-grain rice with a pearly sheen. Fresh peas are ideal in spring, but frozen petite peas work year-round (no need to thaw). The vegetable stock should be full-flavored; Imagine brand is my go-to for pantry staples. Parmesan-wise, skip the pre-grated stuff—it doesn’t melt as well.
No white wine? Extra vegetable stock plus lemon juice gets you close. Swap parsley for cilantro if you’re feeling bold (it’s not traditional but tastes great). Out of fresh herbs? Dried at one-third the amount works, but add them earlier in the cooking process. For a richer version, double the butter—European-style butter (like Plugrá) adds extra creaminess.
This keeps 3-4 days in the fridge. Reheat with a splash of water to loosen the rice. The peas will soften over time, so eat within a few days for best texture. Freezing isn’t recommended—rice gets mushy when thawed.
Why You’ll Love This Recipe
- One Pot Wonder: I toss everything in a single pan—Arborio, peas, stock—and let it simmer while I set the table.
- Garlic-Kissed Comfort: The onion and garlic cook down into the rice, giving each bite that warm, savory depth.
- Feeds a Crowd: Honestly, it’s my go-to for family dinners or when friends drop by unexpectedly.
- Budget Stretcher: Arborio and peas are affordable, and leftovers taste even better the next day.
Step-by-Step Instructions for Italian Rice and Peas
Here’s how I make this comforting dish with perfect texture every time.
Step 1: Sauté Aromatics Until Fragrant
Heat the 3 tbsp extra-virgin olive oil in a large pot over medium heat. Add the finely diced white onion and cook for 4-5 minutes, stirring often, until it turns translucent and soft.
Add the 3 minced garlic cloves and cook for 30 seconds until fragrant. Watch carefully—garlic burns quickly. This base of onion and garlic creates the flavor foundation for the entire dish.
Step 2: Toast Rice and Add Liquid
Stir in the 1.5 cups Arborio rice and cook for 2 minutes, allowing the grains to become lightly translucent at the edges. This toasting step enhances the nutty flavor of the rice and prevents it from becoming mushy.
Pour in the 0.5 cup dry white wine and stir until the liquid has mostly absorbed. Then add 1 cup of the 3.5 cups vegetable stock along with the 2 cups fresh green peas, 1 tsp salt, and 0.5 tsp black pepper. Stir well to combine.
Step 3: Simmer Until Rice is Tender
Bring the mixture to a gentle simmer, then reduce heat to medium-low. Cook, stirring occasionally, for about 15 minutes. As the liquid absorbs, add the remaining 2.5 cups vegetable stock in ½ cup increments, allowing each addition to absorb before adding more.
The rice is done when it’s tender but still has a slight bite and the mixture has a creamy consistency. The peas should be bright green and warmed through. This gradual addition of stock is key to achieving the perfect texture.
Step 4: Finish with Butter, Cheese, and Herbs
Remove the pot from heat and stir in the 2 tbsp butter and 0.5 cup freshly grated Parmesan cheese. The butter adds richness, while the Parmesan gives it a salty, umami depth. Taste and adjust seasoning if needed.
Gently fold in the 0.5 cup chopped fresh parsley and 0.25 cup torn fresh basil. These herbs add a burst of freshness that balances the creamy rice. Let the dish sit, covered, for 5 minutes to allow the flavors to meld together beautifully.
Pro Tips For Making Italian Rice And Peas
- Toast the Rice: Cook the Arborio in the onions and garlic for 2-3 minutes before adding liquid—this builds a nutty base that makes the dish taste far more complex than it is.
- Use Warm Stock: I learned this the hard way: cold vegetable stock slows down cooking and can make the rice gluey. Keep it simmering in a pot next to the stove.
- Skip Frozen Peas: Fresh peas add a sweetness and texture that frozen just can’t match in this dish. If you must use frozen, thaw and drain them first to avoid watering down the rice.
- Finish with Butter: After the rice is done, stir in a tablespoon of butter off the heat—it adds a richness that ties the peas and rice together beautifully.
Dietary Considerations for These Flavors
Vegetarian-Friendly
This dish is naturally vegetarian as written, using vegetable stock and Parmesan cheese as the base. I love that it delivers rich, satisfying flavors without any meat—perfect for meatless Mondays or plant-based diets. 💪
Gluten-Free Option
To make it gluten-free, simply swap the dry white wine for extra vegetable stock and a splash of lemon juice. All other ingredients are naturally gluten-free, so you won’t sacrifice any of that creamy, herby goodness.
Dairy-Free Adaptation
Skip the butter and Parmesan cheese, and use olive oil and nutritional yeast instead. The nutritional yeast adds a cheesy, umami flavor that works surprisingly well. I’ve tested this version in my Boston kitchen, and it still feels indulgent.
Vegan Modifications
For a fully vegan version, combine the dairy-free swaps above and ensure your Parmesan substitute is plant-based. Brands like Violife or Follow Your Heart melt beautifully. The dish loses none of its comforting appeal. 🌱
Allergen Notes
This recipe is nut-free and soy-free as written. If you have a dairy allergy, use the dairy-free adaptation above. Always check labels on your vegetable stock and Parmesan to avoid hidden allergens.
Low-Sodium Adjustments
Use low-sodium vegetable stock and reduce the salt to ½ tsp. The Parmesan cheese adds natural saltiness, so taste as you go. I often make this adjustment for friends watching their sodium intake.
Nutrition Facts
Frequently Asked Questions
Can I use frozen peas instead of fresh?
Yes, frozen peas work perfectly. Add them directly to the pot without thawing. They’ll cook in the same 15 minutes as fresh peas.
Why toast the rice before adding liquid?
Toasting the rice enhances its nutty flavor and prevents mushiness. It creates a protective layer on the grains, helping them stay firm during cooking.
How do I know when the rice is done?
Check for a slight bite in the center of the grains with a creamy consistency. The rice should absorb most of the liquid in about 15-20 minutes.
Can I make this ahead of time?
It keeps well for 3-4 days refrigerated. Reheat gently with a splash of water to restore creaminess. Avoid freezing, as rice becomes mushy.

- Jimmy Dean Sausage and Rice Recipe: Hearty One-Pot Savory Delight - October 19, 2026
- Indian Jasmine Rice Recipe: Fragrant Basmati-Free Elegance - October 19, 2026
- KFC Rizo Rice Recipe: Copycat Side Dish With Savory Spice Blend - October 19, 2026