
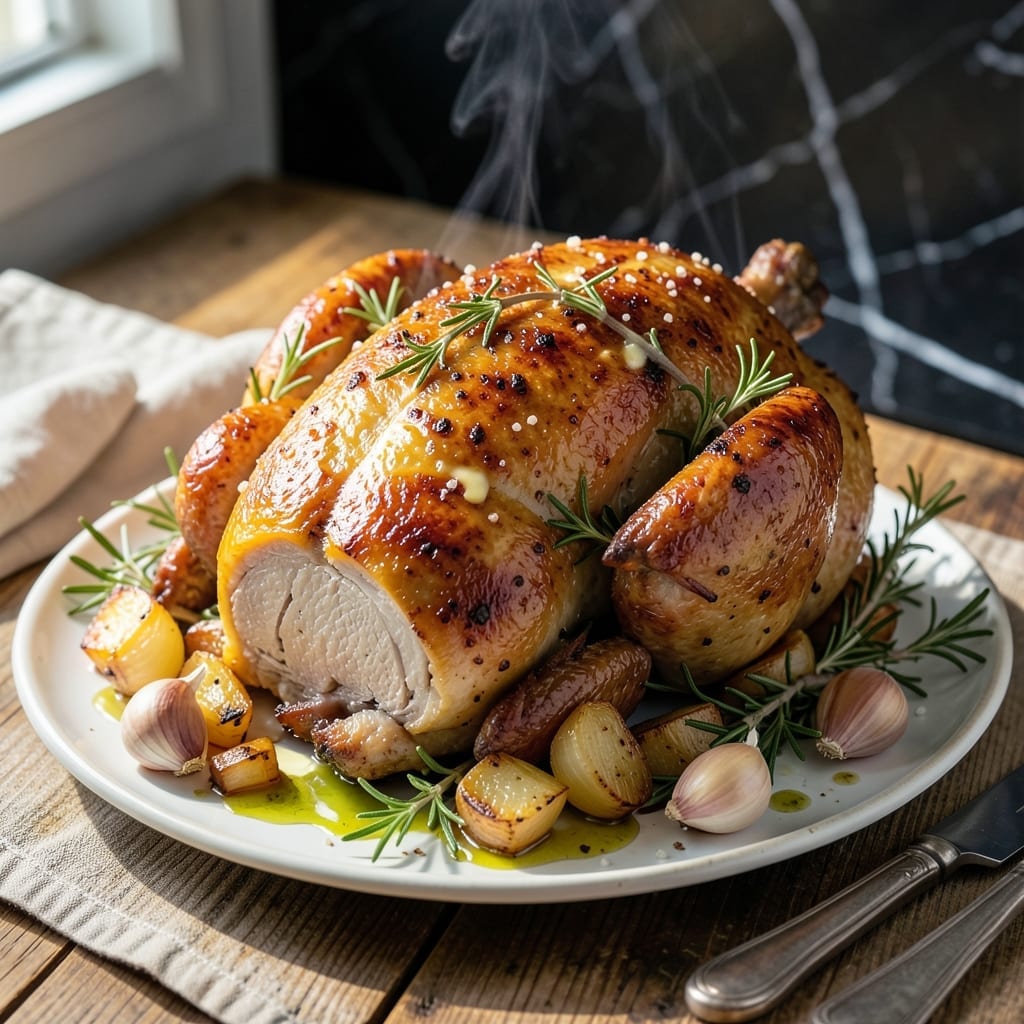
This herb-roasted chicken delivers on its promise of crispy skin and juicy meat every time. I’ve refined this method to achieve professional results without complicated techniques.
The key is high heat and dry skin before roasting. A simple herb rub enhances flavor while allowing the skin to brown perfectly. This approach guarantees consistent results with minimal effort.
What emerges from the oven is golden, crispy skin giving way to tender, flavorful meat. The herbs create an aromatic crust that complements the natural richness of the chicken.
Ready in under 90 minutes, this dish proves that exceptional roast chicken doesn’t require all-day preparation. The technique works for whole chickens or individual portions.
Ingredients for Jamie Oliver Chicken
Whole chicken and fresh herbs create this restaurant-quality roast with crispy skin every time.
| Ingredient | Amount | Notes |
|---|---|---|
| Whole Chicken 🍗 | 4 lb | Pat dry thoroughly before seasoning |
| Unsalted Butter 🧈 | 4 tbsp | Softened to room temperature |
| Fresh Rosemary Sprigs 🌿 | 4 sprigs | Finely chopped, stems discarded |
| Fresh Thyme Sprigs 🍃 | 6 sprigs | Leaves stripped from stems |
| Garlic Cloves 🧄 | 6 cloves | Minced for maximum flavor infusion |
| Kosher Salt 🧂 | 1 ½ tbsp | Diamond Crystal preferred for texture |
| Freshly Ground Black Pepper 🌶️ | 1 tbsp | Coarse grind for crust texture |
| Lemon 🍋 | 1 whole | Zested and juiced separately |
| Yellow Onion 🧅 | 1 whole | Roughly chopped for roasting |
| Carrots 🥕 | 3 whole | Peeled and cut into chunks |
| Celery Stalks 🌿 | 3 stalks | Cut into large pieces |
| Olive Oil 🫒 | 2 tbsp | Extra-virgin for finishing |
| Chicken Stock 🍲 | ½ cup | Low-sodium for controlled seasoning |
The chicken quality is paramount. Air-chilled birds from Whole Foods or local butchers yield superior texture and flavor compared to water-chilled supermarket options. Ensure the skin is completely dry before seasoning—this is non-negotiable for achieving that golden crispness. Fresh herbs from farmers markets offer more aromatic potency than packaged grocery store varieties, which can be weeks old.
No fresh rosemary or thyme? Dried herbs at one-third the quantity work in a pinch, though the flavor profile will be more concentrated. Substitute shallots for onion if desired, or add a head of garlic cut horizontally through the middle for a more intense aroma. Kosher salt is essential here—iodized table salt will make the rub taste metallic. For the stock, homemade is ideal but quality store-bought works.
The roasted vegetables can be prepped 1 day ahead and stored refrigerated. Leftovers keep 3-4 days in the fridge, though the skin loses crispness. Reheat gently in a 350°F oven to revive texture. The herb butter can be made 2 days in advance and stored chilled.
Why You’ll Love This Recipe
- I’ll be real: the meat tastes even better sliced into sandwiches or tossed into salads the next day.
- One Pan Wonder: I love that this roasts the chicken and herbs together—just toss everything in and let the oven do the work.
- Garlic & Herb Magic: The butter, rosemary, and thyme create this insane aroma that fills the whole house, and the flavor? Ridiculously good.
- Crowd Pleaser: Honestly, this works for Sunday dinner with the in-laws or a casual weeknight with the kids.
Step-by-Step Instructions for Herb-Roasted Chicken
This method delivers perfectly crispy skin and succulent meat using a professional approach to roasting.
Step 1: Prepare and Season the Chicken
Pat the 4 lb Whole Chicken completely dry inside and out with paper towels. I emphasize thorough drying as moisture prevents crisping. Season the cavity and exterior generously with the 1.5 tbsp Kosher Salt and 1 tbsp Freshly Ground Black Pepper.
Loosen the skin over the breast and thighs by gently sliding your fingers underneath. This creates pockets for the herb butter. Combine the 4 tbsp Unsalted Butter with the chopped 4 sprigs Fresh Rosemary Sprigs, stripped leaves from the 6 sprigs Fresh Thyme Sprigs, and the minced 6 cloves Garlic Cloves.
Rub this herb butter under the skin and over the entire exterior of the chicken. The butter should be evenly distributed but not pooling in the cavity.
Step 2: Prepare the Aromatics and Truss
Roughly chop the 1 whole Yellow Onion into quarters. Peel and cut the 3 whole Carrots into 2-inch chunks. Cut the 3 stalks Celery Stalks into similar large pieces. These vegetables will form a flavorful bed for roasting.
Zest the 1 whole Lemon and add the zest to the remaining herb butter. Halve the zested lemon for later use. Truss the chicken legs together with kitchen twine to maintain shape during roasting, which promotes even cooking and better presentation.
Arrange the chopped vegetables in a single layer in a roasting pan. Place the chicken breast-side up on top of the vegetables. This elevation allows hot air to circulate underneath for all-over crispiness.
Step 3: Roast to Perfection
Preheat your oven to 425°F. Once fully preheated, place the chicken in the oven and roast undisturbed for 1 hour. The high initial temperature ensures the skin starts crisping immediately.
After 1 hour, reduce the oven temperature to 375°F and continue roasting. Begin basting the chicken with the 2 tbsp Olive Oil every 15 minutes. This step enhances browning and adds an extra layer of flavor.
Check the internal temperature in the thickest part of the thigh (avoiding bone) with an instant-read thermometer. The chicken is done when it reaches 165°F, typically after 1 hour 15 minutes to 1 hour 30 minutes total cooking time.
Step 4: Rest and Serve
Transfer the chicken to a cutting board. Squeeze the roasted lemon halves over the chicken and let it rest for 15-20 minutes. This allows the juices to redistribute, ensuring moist meat when carved.
While the chicken rests, use the roasting pan to make a quick pan sauce. Place the pan on the stovetop over medium heat. Add the 0.5 cup Chicken Stock and scrape up all the browned bits from the bottom. Simmer for 3-4 minutes until slightly reduced.
Carve the chicken and arrange on a platter. Drizzle with the pan sauce and any accumulated juices from the cutting board. The skin should be deep golden brown and crisp, while the meat remains tender and flavorful.
Pro Tips For Making Jamie Oliver Chicken
- Dry the Chicken: Pat the whole chicken thoroughly dry with paper towels before buttering—this guarantees crispy skin instead of steamed, soggy results. I learned this the hard way after my first few attempts came out pale and limp.
- Soften the Butter: Take the unsalted butter out of the fridge 30 minutes before starting so it spreads easily under the skin. Sounds simple, but cold butter tears the skin and makes a mess.
- Don’t Overstuff Herbs: Use 3-4 rosemary and thyme sprigs max inside the cavity—any more and you’ll end up with an herb-flavored chicken instead of a balanced roast. I was heavy-handed once and it tasted like eating a garden.
- Start Breast-Side Down: Roast the chicken breast-side down for the first 45 minutes, then flip it—this keeps the breast meat juicy while the dark meat cooks through. My grandmother swore by this, and she was right.
Make-Ahead Tips for This Dish
Prep the Chicken
I always prep my chicken the night before. Pat the 4 lb Whole Chicken dry, season inside and out with 1.5 tbsp Kosher Salt and 1 tbsp Freshly Ground Black Pepper, then refrigerate uncovered. This drying step is crucial for crispy skin. 💡
Herb Butter Advance
Make the herb butter 2 days ahead by combining 4 tbsp Unsalted Butter with chopped Fresh Rosemary and Fresh Thyme. Store in an airtight container in the fridge. The flavors meld beautifully over time.
Veggie Prep
Chop the Yellow Onion, Carrots, and Celery the morning of cooking. Store in a sealed container in the fridge. This saves 15 minutes of prep time on the day of cooking.
Day-of Assembly
On cooking day, simply loosen the chicken skin and spread the pre-made herb butter underneath. Arrange the pre-chopped veggies in your roasting pan. This streamlined approach cuts active prep to 10 minutes.
Resting Strategy
After roasting, tent the chicken loosely with foil and rest for 15-20 minutes. Use this time to make the pan sauce with 0.5 cup Chicken Stock. The chicken stays warm while you finish the sauce.
Storage Tip
Leftovers keep well in the fridge for 3-4 days. Store carved meat separately from bones for easier reheating. Reheat in a 350°F oven to maintain moisture. 💛
Nutrition Facts
Frequently Asked Questions
What’s the best way to get extra crispy skin?
Pat the chicken completely dry before seasoning. Use paper towels inside and out, then refrigerate uncovered for 12-24 hours to dry the skin further. Roast at 425°F initially for maximum crispiness.
Can I use dried herbs instead of fresh?
Yes, substitute dried herbs at 1/3 the amount. The flavor will be more concentrated, so taste as you go. Fresh herbs provide better aroma, but dried work in a pinch.
How do I know when it’s done without a thermometer?
Pierce the thickest part of the thigh with a knife. If the juices run clear, it’s done. The meat should pull away from the bone easily. For safety, aim for 165°F internal temperature.
How long can I keep leftovers?
Store in an airtight container in the fridge for 3-4 days. Reheat in a 350°F oven to maintain moisture. Freeze for up to 3 months for longer storage.

- Jollof Rice Sauce Recipe: West African Tomato and Spice Infusion - September 25, 2026
- Japanese Rice Soup Recipe: Umami-Rich Comfort in a Bowl - September 25, 2026
- Homemade Cream Of Rice Recipe: Silk-Smooth Breakfast in Minutes - September 25, 2026