
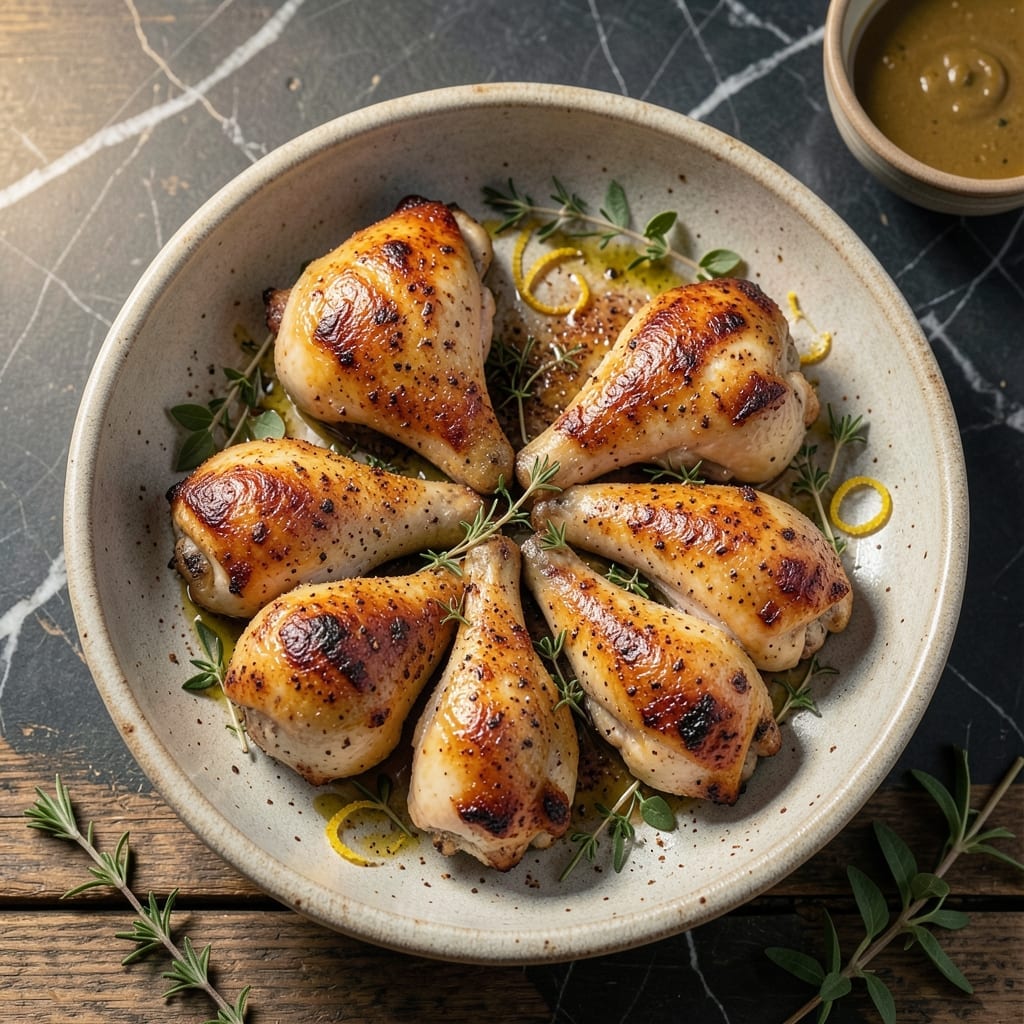
I’ve burned more chicken than I care to admit, but these thighs come out juicy every time. The secret is high heat and patience—let that skin crisp up before flipping.
Bone-in thighs stay moist while developing a smoky char that’ll make your neighbors jealous. I keep the seasoning simple: salt, pepper, and a touch of paprika for color.
What you get is meat that pulls away from the bone with ease, skin that shatters with each bite, and that unmistakable grill flavor. No fancy techniques, just perfect execution.
Serve with corn on the cob and potato salad for the ultimate backyard meal. Fire up that grill—dinner’s almost ready.
Ingredients for Grilled Chicken Thighs
Short list. Big flavor. Bone-in thighs keep things juicy every time.
| Ingredient | Amount | Notes |
|---|---|---|
| Bone-In, Skin-On Chicken Thighs 🍗 | 2 lb | About 8 thighs, trimmed |
| Kosher Salt 🧂 | 1 ½ tsp | Diamond Crystal preferred |
| Black Pepper 🌶️ | 1 tsp | Freshly ground preferred |
| Garlic Powder 🧄 | 1 tsp | Not garlic salt |
| Smoked Paprika 🌶️ | 1 tsp | For depth of flavor |
| Olive Oil 🫒 | 2 tbsp | For brushing grill and chicken |
| Lemon Juice 🍋 | 1 tbsp | Freshly squeezed |
| Brown Sugar 🍚 | 1 tbsp | Light or dark |
| Dried Oregano 🌿 | ½ tsp | Mediterranean variety |
| Dried Thyme 🌿 | ½ tsp | Rub between fingers |
| Cayenne Pepper 🔥 | ¼ tsp | Adjust for heat preference |
The chicken matters most here—bone-in, skin-on thighs are non-negotiable for that juicy texture. Look for plump pieces with smooth skin (no tears or bruising). Costco has great bulk packs, but any supermarket with a good meat counter will work. If you see thighs labeled ‘air-chilled,’ grab those—they brown better on the grill.
No smoked paprika? Regular paprika plus a pinch of liquid smoke gets close. Brown sugar can be swapped for honey or maple syrup (just brush it on carefully—it burns fast). Out of fresh lemon? Lime juice or apple cider vinegar adds the acidity you need. The spices are flexible—use what you like, but don’t skip the salt and pepper.
Marinate the thighs up to 24 hours ahead (they’ll taste even better). Leftovers keep in the fridge for 3-4 days or freeze for 3 months. Reheat gently in a pan to keep the skin crispy (microwave = sad, soggy skin).
Why You’ll Love This Recipe
- One Pan Wonder: I just toss the thighs with salt, pepper, and smoked paprika, then let the grill do the rest—no flipping, no fuss.
- Smoky Crisp Perfection: That skin turns impossibly crisp while the garlic and paprika give it a deep, smoky flavor I can’t resist.
- Meal Prep MVP: I make a big batch on Sunday and it tastes just as good cold in salads or reheated for tacos.
- Wallet-Friendly Feast: Bone-in thighs are cheap, filling, and honestly, I think they taste better than pricier cuts.
Step-by-Step Instructions for Grilled Chicken Thighs
Here’s my method for achieving that smoky char and juicy interior every single time.
Step 1: Season the Chicken Thighs Generously
Pat the 2 lb Bone-In, Skin-On Chicken Thighs dry with paper towels. The drier the skin, the crispier it’ll get on the grill. In a small bowl, mix together the 1.5 tsp Kosher Salt, 1 tsp Black Pepper, 1 tsp Garlic Powder, 1 tsp Smoked Paprika, 0.5 tsp Dried Oregano, 0.5 tsp Dried Thyme, and 0.25 tsp Cayenne Pepper.
Rub this spice blend all over the chicken thighs, including under the skin. I like to massage it in really well to ensure every bite is flavorful. Then drizzle the 1 tbsp Lemon Juice and 1 tbsp Brown Sugar over the thighs, rubbing them in as well. Let them sit for 10-15 minutes while you prep the grill.
Step 2: Preheat and Clean the Grill
Preheat your grill to medium-high heat (about 400°F). I use all burners to get it hot, then turn off one side for indirect heat if I need it. While it’s heating, brush the grates thoroughly with a grill brush to remove any debris. This prevents sticking and ensures those beautiful grill marks.
Once hot, use tongs to rub the 2 tbsp Olive Oil onto the grates with a folded paper towel. This creates a non-stick surface and adds extra flavor. You’ll know it’s ready when you can hold your hand 3-4 inches above the grates for only 3-4 seconds.
Step 3: Grill to Perfection
Place the chicken thighs skin-side down on the direct heat. Close the lid and let them cook undisturbed for 6-8 minutes. You’ll see the edges start to turn white and the skin will begin to crisp—that’s your signal they’re ready to flip.
Flip the thighs and move them to indirect heat. Cook for another 8-10 minutes with the lid closed. The internal temperature should reach 165°F when done. I always check the thickest piece with an instant-read thermometer to be sure.
Step 4: Rest and Serve
Transfer the chicken to a clean plate and let it rest for 5 minutes. This allows the juices to redistribute, ensuring every bite is moist and flavorful. The skin should have a beautiful deep golden-brown color with some charred spots.
Serve immediately while still warm. The meat should pull away from the bone easily, and the skin should be crispy. If you’ve cooked them right, the juices will run clear when you pierce the thickest part.
Pro Tips For Making Grilled Chicken Thighs
- Dry the Skin: Pat the thighs very dry with paper towels before seasoning—this guarantees crispy skin instead of steamed. I learned this the hard way after too many soggy results.
- High Heat First: Start skin-side down on the hottest part of the grill for 3-4 minutes to render fat and set the crust, then move to medium heat to finish cooking through.
- Don’t Rush the Rest: Let the thighs rest 5-10 minutes off the grill before serving so the juices redistribute. Sounds tedious, but it actually changes the outcome.
- Season Generously: Use more kosher salt and spices than you think—especially smoked paprika—for flavor that penetrates the meat, not just the surface.
Make-Ahead Tips for Leftovers
Marinate Ahead
Mix the seasoning blend with 2 tbsp olive oil and 1 tbsp lemon juice up to 24 hours before grilling. I use a zip-top bag for easy coating and cleanup. The flavors penetrate deeper the longer it sits. 💡
Prep the Grill
Clean and oil your grill grates 30 minutes before cooking while the coals heat. This prevents sticking and ensures those perfect char marks. I keep a dedicated grill brush and tongs by the grill for this.
Partial Cook Method
Start cooking the thighs 1-2 hours before serving, then hold them in a 170°F oven until needed. This works great for parties when timing is tight. The skin stays crispy if you place them on a wire rack.
Refrigerator Storage
Cooked thighs keep in an airtight container for 3-4 days. I recommend storing them without stacking to maintain the skin’s texture. Reheat in a skillet over medium heat for best results.
Freezer Method
Freeze cooked thighs in a single layer first, then transfer to a freezer bag for up to 3 months. Thaw overnight in the fridge before reheating. This prevents them from sticking together.
Cold Serving Idea
Slice chilled thighs thin for salads or wraps. The flavors intensify as they cool. I love adding them to a greek salad with feta and cucumbers for a quick lunch. ✨
Nutrition Facts
Frequently Asked Questions
Should I remove the skin before grilling?
No, leave the skin on! It protects the meat and creates that crispy texture we all love. Just pat it dry first for maximum crispness.
How do I prevent chicken from sticking to the grill?
Clean and oil your grill grates thoroughly before cooking. Let the thighs cook undisturbed for 6-8 minutes before flipping to develop a natural non-stick crust.
Can I use boneless thighs instead?
Yes, but reduce cooking time to 5-6 minutes per side. Bone-in thighs stay juicier and handle high heat better, but boneless works in a pinch.
What if my chicken cooks unevenly?
Rotate the thighs occasionally and use indirect heat for thicker pieces. A meat thermometer is your best friend—pull them at 165°F.

- Jollof Rice Sauce Recipe: West African Tomato and Spice Infusion - September 25, 2026
- Japanese Rice Soup Recipe: Umami-Rich Comfort in a Bowl - September 25, 2026
- Homemade Cream Of Rice Recipe: Silk-Smooth Breakfast in Minutes - September 25, 2026