
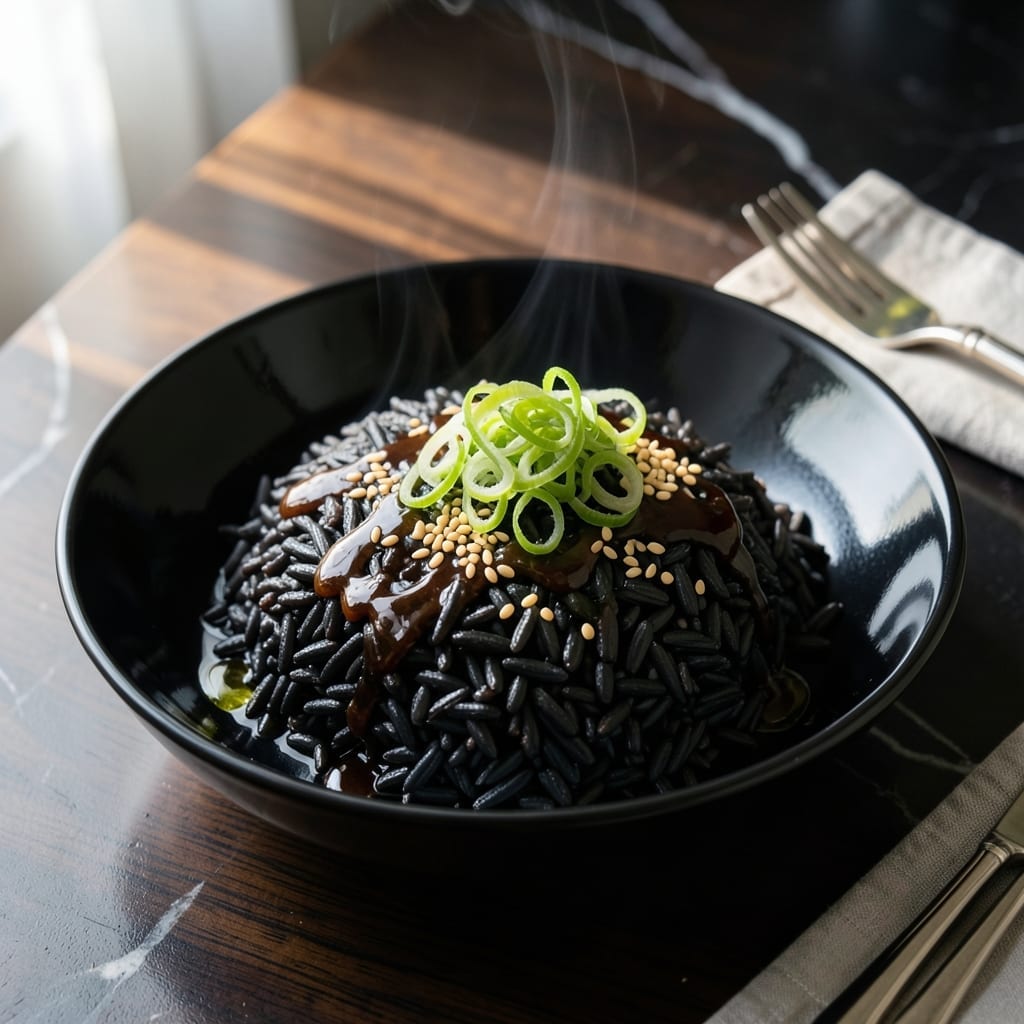
This dish showcases the rare beauty and nutritional power of black rice, once reserved for Japanese emperors. Its deep purple hue signals rich anthocyanin antioxidants.
Cooking this grain requires a precise ratio of water to rice and a 45-minute simmer to achieve the ideal tender-yet-chewy texture. The process unlocks its natural nutty sweetness.
What emerges is a visually stunning side or base for bowls, with each grain holding its shape while delivering complex, earthy flavors. It pairs equally well with savory proteins or fresh vegetables.
This method transforms an exotic ingredient into an accessible, impressive addition to any meal. The results speak for themselves.
Ingredients for Japanese Black Rice
Exotic black rice plus everyday pantry staples create a dish fit for royalty.
| Ingredient | Amount | Notes |
|---|---|---|
| Japanese Black Rice 🍚 | 1 ½ cups | Rinsed until water runs clear |
| Water 💧 | 3 ½ cups | Filtered or spring water preferred |
| Vegetable Stock 🥕 | ½ cup | Low-sodium for control |
| Coconut Oil 🥥 | 1 tbsp | Melted, or substitute neutral oil |
| Soy Sauce 🫙 | 1 tbsp | Low-sodium or tamari for gluten-free |
| Rice Vinegar 🍶 | 1 tsp | Seasoned or unseasoned works |
| Sesame Oil 🫒 | ½ tsp | Toasted for depth |
| Scallions 🧅 | 3 whole | Thinly sliced for garnish |
| Garlic Cloves 🧄 | 2 cloves | Minced for aroma |
| Fresh Ginger 🌿 | 1 tsp | Grated, peeled |
| Sea Salt 🧂 | ½ tsp | Adjust to taste after cooking |
| Sesame Seeds 🌰 | 1 tbsp | Toasted, for garnish |
| Red Bell Pepper 🌶️ | 1 whole | Diced, optional for color |
The black rice is non-negotiable here. Look for Japanese black rice (kurogome) at Asian markets or specialty grocers like Whole Foods. It’s pricier than regular rice, but the deep purple hue and nutty flavor justify it. Rinse it thoroughly—this removes excess starch and prevents a gummy texture. The water-to-rice ratio must be precise, so use a measuring cup, not a mug.
No coconut oil? Any neutral oil (avocado, grapeseed) works. Tamari stands in for soy sauce without gluten. For extra umami, add a dash of miso paste (white or red). The ginger and garlic can be swapped for powders at one-third the amount. Scallions not on hand? Chives or red onion add a similar fresh bite.
Cooked rice keeps in the fridge for 4-5 days in an airtight container. Freeze for up to 3 months—portion into bags for easy reheating. The garnishes (scallions, sesame seeds) are best added fresh, so store them separately.
Why You’ll Love This Recipe
- Set and Forget: I just toss the rice, water, and stock in a pot, let it simmer, and walk away—no stirring, no fuss.
- Umami Bomb: The soy sauce and coconut oil give it this deep, savory richness that makes every bite satisfying.
- Meal Prep Hero: I make a big batch on Sunday and it keeps beautifully for lunches all week.
- Budget Stretch: A little goes a long way, and the ingredients are pantry staples I always have on hand.
Step-by-Step Instructions for Japanese Black Rice
This method ensures perfectly tender grains with the signature deep purple hue and nutty flavor.
Step 1: Rinse and Prepare the Rice
Place the 1.5 cups Japanese Black Rice in a fine-mesh strainer and rinse under cold water until the water runs completely clear. This step removes excess starch that could make the rice gummy and ensures each grain stays distinct. I find it takes 4-5 rinses to achieve truly clear water.
Drain the rice thoroughly in the strainer for 5 minutes, shaking occasionally to remove all excess water. Proper drainage prevents the rice from becoming mushy during cooking. The grains should appear slightly swollen and deep purple-black when properly rinsed.
Step 2: Sauté Aromatics for Depth
In a medium saucepan with a tight-fitting lid, heat the 1 tbsp Coconut Oil over medium heat until it shimmers. Add the 2 cloves minced Garlic Cloves and 1 tsp Fresh Ginger, stirring constantly for 30 seconds until fragrant but not browned.
Quickly add the diced 1 whole Red Bell Pepper and sauté for 2-3 minutes until slightly softened. The aromatics should release their essence without burning, creating a fragrant base that will infuse the rice with subtle complexity. Remove the pan from heat temporarily if the garlic begins to color too quickly.
Step 3: Toast the Rice and Add Liquids
Add the drained 1.5 cups Japanese Black Rice to the saucepan and stir to coat with the coconut oil and aromatics. Toast the rice for 1-2 minutes, stirring constantly, until the grains become slightly translucent at the edges and emit a nutty aroma.
Pour in the 3.5 cups Water, 0.5 cup Vegetable Stock, 1 tbsp Soy Sauce, 1 tsp Rice Vinegar, and 0.5 tsp Sea Salt. Stir well to combine, ensuring all the rice is submerged. The liquid should appear dark from the soy sauce, which will enhance the rice’s natural color.
Step 4: Simmer Until Tender
Bring the mixture to a full boil over high heat. Once boiling, immediately reduce the heat to low, cover the pan with the lid, and simmer for 35-40 minutes. Do not lift the lid during this time, as the steam is crucial for even cooking.
After 35 minutes, check the rice. The grains should be tender with just a slight bite, and the liquid should be fully absorbed. If the rice is still firm or liquid remains, replace the lid and cook for another 5 minutes. The finished rice will have a deep purple hue with a slightly chewy texture.
Step 5: Rest and Garnish
Remove the pan from heat and let the rice rest, covered, for 10 minutes. This allows the grains to absorb any remaining moisture and firm up slightly. During this time, the rice will develop its characteristic sticky texture.
Fluff the rice gently with a fork and drizzle with the 0.5 tsp Sesame Oil. Transfer to a serving dish and garnish with the 3 whole Scallions (thinly sliced) and 1 tbsp Sesame Seeds. The sesame oil adds a nutty finish, while the scallions and sesame seeds provide freshness and crunch.
Pro Tips For Making Japanese Black Rice
- Soak the Rice: I learned this the hard way—soak the black rice for at least 4 hours (overnight is even better) to cut cooking time nearly in half and guarantee even tenderness.
- Use a 1:2 Ratio: For perfectly cooked grains, stick to 1 part black rice to 2 parts liquid (water or veg stock), and don’t skimp—this grain drinks up moisture like a sponge.
- Skip the Boil: After bringing to a boil, drop to the lowest simmer and cover tightly; I burned two batches before realizing high heat turns the rice mushy and the coconut oil bitter.
- Finish with Soy: Stir in the soy sauce after cooking, not before—adding it early makes the rice tough, but a final drizzle (about 1 tablespoon per cup of rice) deepens the flavor without overpowering it.
Essential Equipment for japanese black rice
Rice Cooker Option
While stovetop works perfectly, I love using my Zojirushi rice cooker for hands-off cooking. Use the same 1.5 cups rice to 4 cups liquid ratio and select the “brown rice” setting. The cooker handles the timing automatically, usually taking 50-55 minutes including the steam cycle.
Essential Saucepan
A heavy-bottomed saucepan with a tight-fitting lid is crucial for even heat distribution. I recommend a 3-quart stainless steel pot like All-Clad D3. The heavy base prevents scorching, and the tight lid traps steam essential for proper cooking. Avoid non-stick unless it’s oven-safe to 350°F.
Fine-Mesh Strainer
Rinsing black rice properly requires a fine-mesh strainer to catch the small grains. I use a 10-inch stainless steel strainer from OXO. The fine mesh prevents rice from slipping through while allowing thorough rinsing. Look for one with sturdy handles for stability under running water.
Wooden Spoon
A wooden spoon is ideal for stirring the rice while toasting to prevent scratching your cookware. The flat edge helps press rice against the pan for even toasting. Avoid metal utensils with non-stick pans. I keep a 12-inch bamboo spoon dedicated to rice cooking. 💡
Measuring Tools
Precision matters with this grain. I use a clear 2-cup glass measuring cup for liquids and a dry measuring cup set for rice. The clear markings let you verify exact amounts. For the oils and vinegar, a 1-tablespoon measure ensures accuracy with these small but important quantities.
Resting Space
After cooking, the rice needs a 10-minute rest off heat. I use a folded kitchen towel under the lid to absorb excess steam. This prevents condensation from dripping back into the rice. A large heatproof bowl works if you need to transfer it from the pan.
Nutrition Facts
Frequently Asked Questions
Do I need to soak the rice beforehand?
Soaking isn’t necessary but can cut cooking time by 5-10 minutes. If you do soak, use room temperature water for 30 minutes maximum. Drain thoroughly before cooking to maintain the ideal texture.
Why does my rice turn out gray instead of purple?
Over-rinsing or using hard water can dull the color. Rinse just until water clears, not longer. For vibrant hue, use filtered water and avoid stirring after adding liquid. The purple deepens as it cooks.
Can I use a rice cooker instead?
Yes! Use the same 1:2.3 rice-to-liquid ratio and select the brown rice setting. Expect 50-55 minutes total time. Let it rest 10 minutes after cooking for best results.
How do I prevent mushy texture?
Rinse well, use the exact water amount, and resist peeking while cooking. Each lift of the lid releases steam that’s crucial for even cooking. The rice should be tender but still hold its shape.

- Mujadara Rice and Lentils Recipe: Earthy Spiced Lentils With Caramelized Onions - November 1, 2026
- Naija Fried Rice Recipe: Street-Style Spice With Veggie Crunch - November 1, 2026
- Mushy Rice Recipe: Fluffy Grains Transformed in Minutes - November 1, 2026