
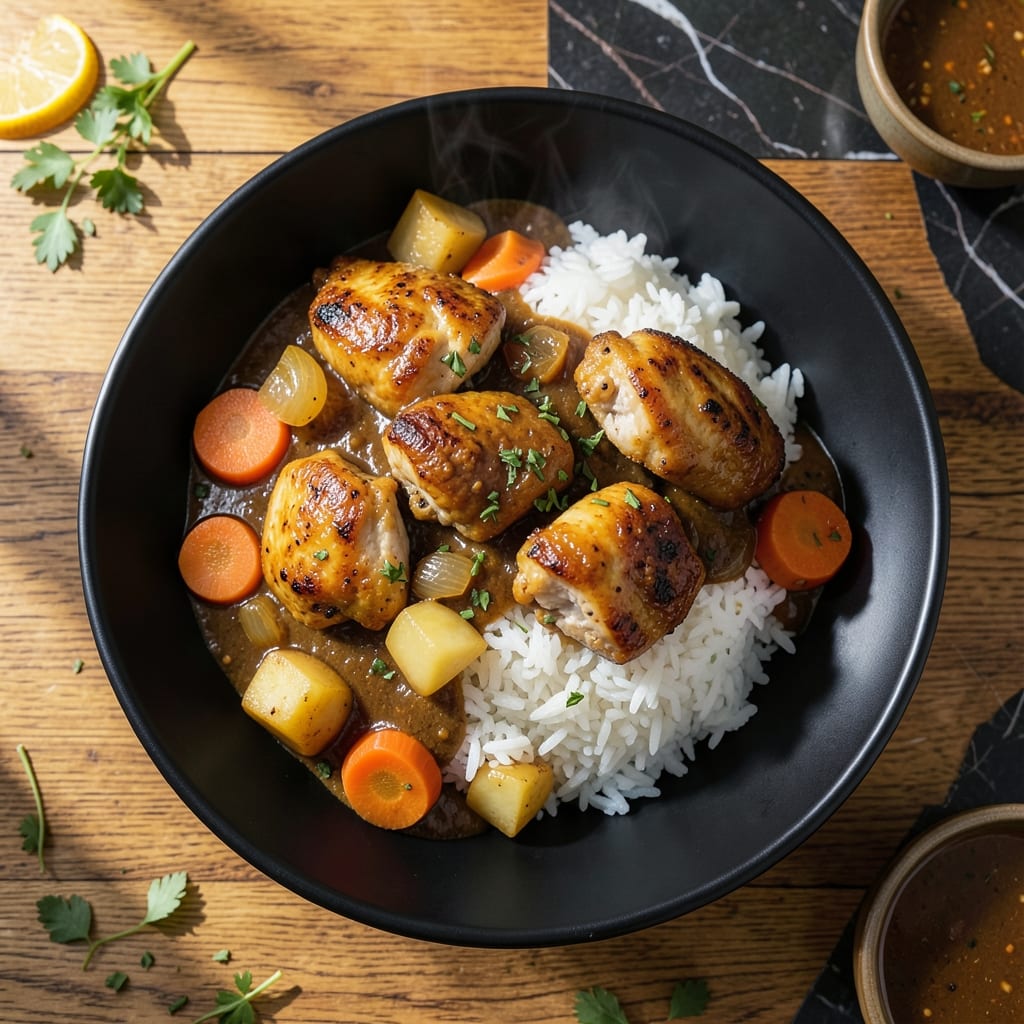
This rice cooker method delivers hands-free Japanese curry with minimal effort and maximum flavor. The one-pot approach simplifies traditional techniques while preserving authentic taste.
By combining tender meat, vegetables, and curry roux in the same pot as the rice, you create a complete meal with deep, comforting flavors. The rice absorbs the rich sauce as it cooks, resulting in perfectly seasoned grains.
What emerges is a hearty, aromatic curry with fall-apart meat, soft vegetables, and rice that carries the sauce in every bite. The rice cooker handles the timing and temperature, ensuring consistent results.
This dish brings restaurant-quality Japanese comfort food to your kitchen with minimal cleanup. The process is straightforward and foolproof for any home cook.
Ingredients for Japanese Curry Recipe Rice Cooker
One pot, minimal effort, maximum flavor. All the classics for authentic Japanese comfort.
| Ingredient | Amount | Notes |
|---|---|---|
| Japanese Curry Roux Blocks 🧈 | 4 pieces | S&B Golden or Vermont brand |
| Jasmine Rice 🍚 | 2 cups | Rinsed until water runs clear |
| Chicken Thighs 🍗 | 1 ½ lb | Boneless, skinless, cut into bite-sized pieces |
| Carrots 🥕 | 2 whole | Peeled, sliced into rounds |
| Russet Potatoes 🥔 | 2 whole | Peeled, cubed into 1-inch pieces |
| Yellow Onion 🧅 | 1 whole | Thinly sliced |
| Garlic Cloves 🧄 | 3 cloves | Minced |
| Fresh Ginger 🌿 | 1 tbsp | Grated or minced |
| Low-Sodium Chicken Broth 💧 | 2 cups | Or substitute water in a pinch |
| Soy Sauce 🫒 | 1 tbsp | Low-sodium preferred |
| Honey 🍯 | 1 tbsp | Or substitute maple syrup |
| Vegetable Oil 🫒 | 1 tbsp | Neutral flavor like canola |
| Green Peas 🌱 | ½ cup | Fresh or frozen |
| Bay Leaf 🍃 | 1 piece | Optional for depth |
The curry roux is non-negotiable here. S&B Golden or Vermont brands are the gold standard—find them at Asian grocery stores or the international aisle. I always grab an extra box (they keep forever). For the meat, chicken thighs stay juicy through the long cook, but pork shoulder would work too (just cube it small). Jasmine rice is ideal, but short-grain sushi rice gives a slightly stickier result.
No curry roux? Make your own with flour, curry powder, and oil, but store-bought really does taste better. Vegetarian? Swap the chicken for tofu or chickpeas. The veggies can be flexible—sweet potatoes or zucchini work great. Skip the honey? Maple syrup or sugar adds the right sweetness. The ginger and garlic are the flavor base—don’t skimp.
Leftovers taste even better the next day once the flavors meld. Keeps for 4-5 days in the fridge, freezes for 3 months. I always double the batch—curry reheats like a dream (the rice soaks up extra sauce).
Why You’ll Love This Recipe
- One Pot Wonder: I just dump everything—chicken thighs, carrots, potatoes, and curry roux—right into the rice cooker with the jasmine rice. No extra pans, no fuss.
- Rich Comfort: The roux melts into the broth creating this thick, velvety sauce that coats every bite of rice and veggies. Honestly, it tastes like a hug in a bowl.
- Meal Prep Hero: I make a big batch on Sunday and portion it out—tastes even better the next day when the flavors really settle in.
- Budget Stretcher: Chicken thighs and potatoes keep it affordable, and one block of roux makes enough for my family of four with leftovers. Between us, it’s cheaper than takeout.
Step-by-Step Instructions for Japanese Curry in a Rice Cooker
This hands-free method delivers rich, comforting curry with minimal effort and maximum flavor.
Step 1: Prepare and Sear the Chicken and Aromatics
Heat the 1 tablespoon vegetable oil in a skillet over medium-high heat. Add the 1.5 lb chicken thighs and sear until lightly browned on all sides, about 4-5 minutes. This step builds a flavor foundation that the rice cooker can’t achieve on its own.
Transfer the chicken to a plate and set aside. In the same skillet, add the 1 whole yellow onion, 3 cloves garlic cloves, and 1 tablespoon fresh ginger. Sauté for 2-3 minutes until the onion softens and the aromatics become fragrant. This ensures the flavors bloom before they’re added to the rice cooker.
Step 2: Layer Ingredients in the Rice Cooker
Rinse the 2 cups jasmine rice until the water runs clear, then add it to the rice cooker insert. Pour in the 2 cups low-sodium chicken broth, 1 tablespoon soy sauce, and 1 tablespoon honey. Stir gently to combine, ensuring the rice is evenly distributed.
Add the seared chicken, sautéed aromatics, 2 whole carrots, 2 whole russet potatoes, and 1 piece bay leaf on top of the rice. Do not stir—layering prevents the rice from becoming mushy. The rice cooker will steam the vegetables and chicken to perfection while the rice absorbs the flavors.
Step 3: Cook and Finish with Curry Roux
Close the rice cooker lid and set it to the standard “cook” setting. Let it run its full cycle, which typically takes 25-30 minutes. Once the rice cooker switches to “keep warm,” let it sit for an additional 10 minutes to ensure everything is fully tender.
Carefully open the lid and remove the 1 piece bay leaf. Break the 4 pieces Japanese curry roux blocks into smaller chunks and stir them into the pot. Add the 0.5 cup green peas and gently fold everything together. The residual heat will dissolve the roux and thicken the curry into a rich, velvety sauce.
Step 4: Rest and Serve
Let the curry rest in the rice cooker on the “keep warm” setting for 5-10 minutes. This allows the flavors to meld and the sauce to reach its ideal consistency. The 1.5 lb chicken thighs should be fall-apart tender, and the 2 whole carrots and 2 whole russet potatoes should be soft but still hold their shape.
Serve the curry directly from the rice cooker, ensuring each portion has a mix of rice, chicken, and vegetables. The curry should be thick and glossy, with every bite bursting with the deep, savory-sweet flavors that make this dish so comforting.
Pro Tips For Making Japanese Curry Recipe Rice Cooker
- Pre-Cook the Potatoes: Cut the russet potatoes into 1-inch chunks and microwave them for 3-4 minutes before adding to the rice cooker. I learned this the hard way—without it, they stay rock-hard while the chicken overcooks.
- Brown the Chicken First: Sear the chicken thighs in a pan for 2-3 minutes per side before adding to the rice cooker. Sounds like an extra step, but it locks in flavor and keeps the meat from turning rubbery in the curry.
- Dissolve the Roux Properly: Break the curry roux blocks into small pieces and stir them into hot liquid until fully dissolved. After burning a batch, I finally figured out that clumps of roux ruin the texture.
- Use Less Water: Reduce the water by about 1/4 cup compared to normal rice cooking—jasmine rice absorbs the curry sauce better this way. My grandmother swore by this, and she was right: it makes the curry thicker and more flavorful.
Storing and Reheating This japanese curry recipe rice cooker
Refrigerator Storage
Let the curry cool for no more than 2 hours before storing. Transfer to airtight containers—I prefer glass for better heat retention. It keeps beautifully in the fridge for up to 4-5 days. The flavors deepen overnight as the sauce seeps into the rice. ❄️
Freezer Storage
This dish freezes exceptionally well for up to 3 months without texture loss. I use quart-sized freezer bags laid flat to save space. Leave 1 inch headspace for expansion and squeeze out excess air to prevent freezer burn.
Microwave Reheating
For quick meals, microwave individual portions covered with a damp paper towel. Heat on 70% power for 2-3 minutes, stir, then continue in 30-second intervals until reaching 165°F. Add a splash of water if the sauce looks dry.
Stovetop Reheating
My preferred method for best texture. Add curry to a pot with ¼ cup water or broth and heat over medium-low heat for 8-10 minutes, stirring occasionally. The extra liquid revives the sauce beautifully. 🔥
Pro Tips
For meal prep, freeze in individual portions. When reheating from frozen, thaw overnight in the fridge first. The rice may absorb more sauce during storage—just add a little water when reheating to restore the perfect consistency.
Nutrition Facts
Frequently Asked Questions
Can I use a different type of rice?
Yes, short-grain sushi rice works but yields a stickier texture. For best results, stick with jasmine rice as it absorbs flavors well while staying fluffy.
Why sear the chicken first?
Searing builds a deep flavor base that the rice cooker can’t achieve alone. It takes just 4-5 minutes but makes a noticeable difference in the final taste.
Can I make this vegetarian?
Replace chicken with tofu or chickpeas. Use vegetable broth instead of chicken broth. The cooking time and method remain the same.
What if my curry is too thick?
Stir in ¼ cup water or broth and let it sit on “keep warm” for 5 minutes. The rice cooker’s residual heat will help distribute the liquid evenly.

- Jeera Rice Recipe by VahChef: Cumin-Infused Basmati Perfection - October 20, 2026
- Jollof Rice Recipe Instant Pot: West African Flavor in a Fraction of the Time - October 20, 2026
- Keema Fried Rice Recipe: Spiced Minced Meat and Fluffy Grains - October 20, 2026