
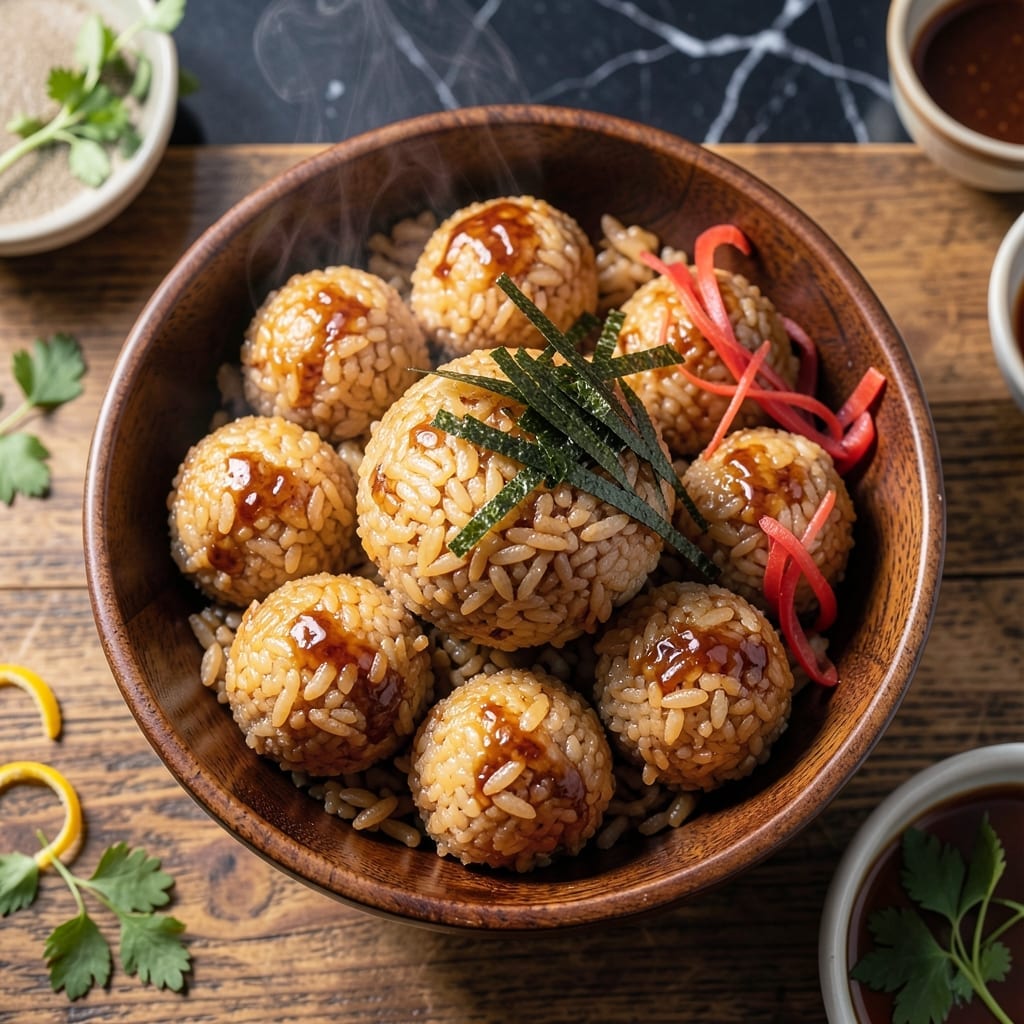
There’s a special satisfaction in creating crispy rice balls with soft, sticky centers that capture the essence of Japanese home cooking. This method transforms simple ingredients into an impressive dish that’s surprisingly easy to master.
The key lies in using day-old rice, which holds its shape better than fresh, and maintaining the right oil temperature for even frying. Each bite delivers a perfect contrast between the golden exterior and the tender rice within, often with a hidden savory filling.
What makes this recipe stand out is its versatility—you can customize the fillings or keep them simple with just seasoned rice. The technique ensures consistent results every time, making it ideal for both beginners and experienced cooks.
Serve these warm as an appetizer or side dish for a taste of authentic Japanese comfort food. The process is straightforward and rewarding from start to finish.
Ingredients for Japanese Fried Rice Balls
Day-old rice, crispy coating, and savory fillings transform into these authentic Japanese treats.
| Ingredient | Amount | Notes |
|---|---|---|
| Sushi Rice 🍚 | 4 cups | Day-old, cooked and cooled |
| Dashi Stock 💧 | ½ cup | Japanese-style, for seasoning |
| Soy Sauce 🫒 | 2 tbsp | Low-sodium preferred |
| Rice Vinegar 🍶 | 1 tbsp | Seasoned variety ideal |
| Sugar 🧂 | 1 tsp | Granulated white sugar |
| Neutral Oil 🫒 | 3 cups | For deep frying (vegetable or canola) |
| Nori Seaweed Sheets 🌿 | 2 sheets | Cut into small strips |
| Bonito Flakes 🐟 | ¼ cup | Optional, for garnish |
| Sesame Seeds 🌰 | 1 tbsp | Toasted for garnish |
| Green Onions 🧅 | 2 whole | Thinly sliced for garnish |
| Eggs 🥚 | 2 whole | Optional, for filling |
| Panko Breadcrumbs 🍞 | ½ cup | For extra crispiness |
| Salt 🧂 | ½ tsp | Adjust to taste |
The rice is non-negotiable—day-old sushi rice holds its shape for that perfect sticky center. Japanese markets carry the best dashi stock, but instant dashi granules from Asian grocery stores work in a pinch. Use Kikkoman soy sauce for authentic flavor. For nori, look for roasted seaweed sheets (not raw) at Whole Foods or any well-stocked international aisle.
No dashi? Chicken or vegetable stock works, but add a splash of soy for depth. Skip bonito flakes? Toasted sesame seeds still add crunch. Fresh rice can be used if thoroughly cooled and dried first (spread on a tray, fan it for 10 minutes). For filling, finely chopped mushrooms or pickled plums add traditional flavor without complexity.
Fry in small batches to maintain 350°F oil temperature. Drain on a rack, not paper towels, to keep them crisp. Best served immediately—they lose crunch after 1 hour. Leftovers? Reheat in a toaster oven at 375°F for 5-7 minutes to revive texture.
Why You’ll Love This Recipe
- One-Bowl Wonder: I love how I can mix the sushi rice, dashi, and soy sauce right in one bowl—no fancy equipment, just my hands and a spatula.
- Umami Bomb: That first bite with the dashi-soaked rice and the tang of rice vinegar? Ridiculously good.
- Lunchbox Hero: I pack these for my kid’s school lunch, and they stay fresh for hours—no soggy leftovers here.
- Budget Stretch: Sushi rice is cheap, and a little dashi goes a long way. I make a big batch and freeze half for later.
Step-by-Step Instructions for Japanese Fried Rice Balls
Master the technique that delivers crisp exteriors with tender, flavorful centers.
Step 1: Season the Cooked Sushi Rice
Combine the 4 cups sushi rice with 0.5 cup dashi stock, 2 tbsp soy sauce, 1 tbsp rice vinegar, 1 tsp sugar, and 0.5 tsp salt in a large bowl. Use your hands to gently fold everything together until the rice is evenly coated and slightly sticky.
This step ensures every grain carries the umami depth of the seasonings. The rice should glisten but not be wet—if it seems too moist, add a pinch more sushi rice to balance it. Let it rest for 5 minutes so the flavors meld completely.
Step 2: Form and Fill the Rice Balls
Wet your hands with water to prevent sticking and scoop about ½ cup of the seasoned rice into your palm. Press a small indentation into the center and, if using, add a piece of 2 whole eggs (soft-boiled or scrambled) for a rich filling. Fold the rice around the egg to encase it completely.
Gently shape the rice into a ball, applying even pressure to keep it compact. Repeat with the remaining rice and eggs. For extra texture, roll each ball in 0.5 cup panko breadcrumbs to coat evenly. This creates a crunchy layer that contrasts beautifully with the soft rice inside.
Step 3: Heat the Oil and Fry in Batches
Pour the 3 cups neutral oil into a deep, heavy-bottomed pot and heat to 350°F. Use a thermometer for precision—the oil should shimmer but not smoke. While the oil heats, cut the 2 sheets nori seaweed sheets into small strips and set aside for garnish.
Carefully lower 3-4 rice balls into the hot oil, ensuring they don’t touch. Fry for 4-5 minutes, turning occasionally, until the exterior turns deep golden brown and crisp. Avoid overcrowding the pot, as this lowers the oil temperature and leads to greasy results.
Step 4: Drain and Garnish
Remove the fried rice balls with a slotted spoon and transfer them to a wire rack or paper towels to drain excess oil. Work quickly—they should be served hot to preserve the contrast between the crispy shell and warm, sticky interior.
Garnish immediately with the prepared nori strips, 0.25 cup bonito flakes, 1 tbsp sesame seeds, and 2 whole green onions (thinly sliced). The residual heat will lightly toast the bonito flakes, enhancing their smoky aroma.
Pro Tips For Making Japanese Fried Rice Balls
- Chill the Rice: Use day-old or refrigerated sushi rice—freshly cooked rice is too moist and will turn mushy when fried. I learned this the hard way after several batches fell apart in the pan.
- Season the Stock: Mix a teaspoon of sugar and a splash of soy sauce into the dashi stock before adding it to the rice. Sounds simple, but it balances the flavors in a way plain stock just can’t.
- Avoid Overmixing: When shaping the rice balls, handle the mixture gently—overworking it compacts the grains and makes them dense instead of light and crispy.
- Use Cold Hands: Wet your hands with cold water before forming the balls to prevent sticking and keep the rice from getting gummy. This small step saves a ton of frustration.
Make-Ahead Tips for This japanese fried rice balls
Prep the Rice Early
Cook the sushi rice at least 1 day ahead and refrigerate it uncovered for 1 hour to dry the surface. This prevents soggy centers. I often make the rice in the morning for evening frying. 💡
Season and Shape
Prepare and season the rice mixture up to 24 hours ahead. Keep it covered in the fridge. Shape the balls just before frying to maintain freshness and texture.
Breading Station
Set up your breading station with panko breadcrumbs in advance. Store the breadcrumbs in an airtight container to keep them crisp. This saves time when you’re ready to cook.
Fry and Reheat
Fry the rice balls and let them cool completely. Store in the fridge for up to 2 days. Reheat in a 375°F oven for 10-12 minutes to restore crispiness.
Freeze for Later
Freeze uncooked, shaped rice balls on a tray for 1 hour, then transfer to a bag. Fry from frozen, adding 1-2 minutes to the cooking time. Perfect for quick snacks.
Garnish Last
Add nori strips, bonito flakes, and sesame seeds just before serving. This keeps the garnishes fresh and vibrant. 🌟
Nutrition Facts
Frequently Asked Questions
Can I use fresh rice instead of day-old?
Fresh rice is too moist and will fall apart. Spread freshly cooked rice on a tray and let it dry at room temperature for 1-2 hours, or refrigerate uncovered for 1 hour to firm it up.
What’s the best oil for frying?
Use a neutral oil with a high smoke point like vegetable, canola, or peanut oil. Avoid olive oil—it burns at frying temperatures. Maintain 350°F for even cooking.
How do I keep them crispy after frying?
Drain on a wire rack, not paper towels, to prevent steam buildup. Serve immediately or reheat in a 375°F oven for 10-12 minutes to restore crunch.
Can I bake them instead of frying?
Yes, brush with oil and bake at 400°F for 20-25 minutes, flipping halfway. They won’t be as crispy but will still be delicious.

- Mujadara Rice and Lentils Recipe: Earthy Spiced Lentils With Caramelized Onions - November 1, 2026
- Naija Fried Rice Recipe: Street-Style Spice With Veggie Crunch - November 1, 2026
- Mushy Rice Recipe: Fluffy Grains Transformed in Minutes - November 1, 2026