
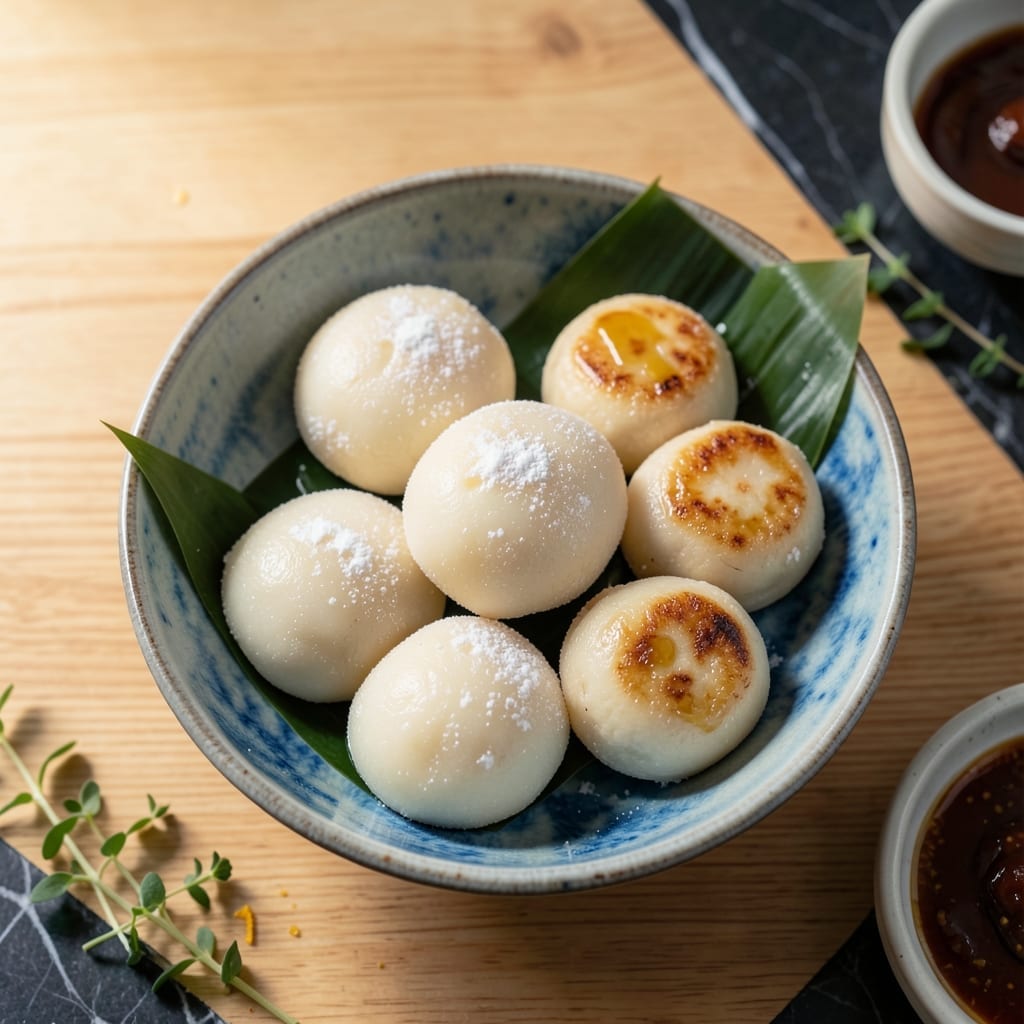
There’s something magical about the first bite of a perfectly steamed rice bun—soft, slightly chewy, and delicately sweet. This recipe captures the essence of traditional Japanese steamed buns with a texture that melts in your mouth.
I developed this method after testing countless variations to achieve that ideal balance between fluffiness and subtle sweetness. The secret lies in the precise ratio of ingredients and the steaming technique, which creates their signature pillowy texture.
The result is a batch of buns with a smooth, glossy exterior and a light, airy interior. Each one is a testament to the beauty of simple ingredients transformed through careful preparation.
Serve them warm as a snack, dessert, or alongside your favorite savory dishes. Here’s how to make these soft and chewy delights at home.
Ingredients for Japanese Rice Bun
Simple ingredients transform into pillowy, steamed perfection with careful preparation and balance.
| Ingredient | Amount | Notes |
|---|---|---|
| Glutinous Rice Flour 🌾 | 2 cups | Also called sweet rice flour |
| Granulated Sugar 🍚 | ⅓ cup | Fine grain preferred |
| Active Dry Yeast 🍞 | 1 tsp | One packet, proofed |
| Warm Water 💧 | ¾ cup | 110°F for activating yeast |
| Baking Powder 🧂 | 1 tsp | For added lift |
| Vegetable Oil 🫒 | 2 tbsp | Neutral flavor, for dough |
| Cornstarch 🌽 | ¼ cup | For dusting and texture |
| Salt 🧂 | ½ tsp | Fine sea salt |
| Vanilla Extract 🌿 | 1 tsp | Pure extract for flavor |
| Parchment Paper 📄 | 4 pieces | Cut into squares for steaming |
The glutinous rice flour is non-negotiable here—look for it in the Asian aisle at Whole Foods or any well-stocked supermarket. Brands like Koda Farms or Bob’s Red Mill are reliable. The yeast must be fresh (check the expiration date), and warm water at 110°F ensures proper activation without killing the culture. Vegetable oil should be neutral—canola or avocado oil works best to avoid overpowering the delicate flavor.
No glutinous rice flour? Mochiko flour is the same thing under a different name. Out of yeast? Baking powder alone will work in a pinch, though the texture won’t be quite as light. Vanilla extract can be swapped for almond extract for a different aromatic profile. If you’re avoiding sugar, honey or maple syrup at half the volume works but may alter the texture slightly.
Store rice flour in an airtight container in a cool, dry place for up to 1 year. The dough can be refrigerated overnight (let it come to room temperature before shaping). Buns are best eaten fresh but can be reheated in a steamer for 2-3 days.
Why You’ll Love This Recipe
- I’ll be real: the dough freezes beautifully, so I make a big batch and bake fresh whenever I need them.
- Five Ingredients Only: I love that this comes together with just glutinous rice flour, sugar, yeast, warm water, and baking powder—no fancy shopping required.
- Pillowy Sweetness: The yeast gives them that light, airy texture while the sugar adds just enough sweetness to make them irresistible.
- Breakfast or Snack: Honestly, these buns work for breakfast on the go or as a sweet afternoon pick-me-up with tea.
Step-by-Step Instructions for Japanese Rice Buns
Master the technique for achieving the perfect soft and chewy texture in these steamed delights.
Step 1: Activate the Yeast and Prepare the Dough Base
In a small bowl, combine the 1 tsp Active Dry Yeast with the 0.75 cup Warm Water and let it sit for 5-7 minutes until foamy and bubbly. This confirms the yeast is active and ready to leaven your dough properly.
Meanwhile, in a large mixing bowl, whisk together the 2 cups Glutinous Rice Flour, 0.33 cup Granulated Sugar, 1 tsp Baking Powder, 0.5 tsp Salt, and 0.25 cup Cornstarch. The cornstarch enhances the tender, slightly sticky texture characteristic of these buns.
Step 2: Combine Wet and Dry Ingredients
Once the yeast is activated, pour it into the dry ingredients along with the 2 tbsp Vegetable Oil and 1 tsp Vanilla Extract. Stir with a wooden spoon or silicone spatula until a shaggy dough forms. The dough will be slightly sticky but should hold together when pressed.
Knead the dough gently in the bowl for 3-5 minutes until smooth and elastic. Avoid adding extra flour—excess glutinous rice flour can make the buns dense rather than soft and chewy. The texture should be soft but not wet.
Step 3: Proof the Dough
Cover the bowl with a damp kitchen towel and let the dough rise in a warm, draft-free place for 1 to 1.5 hours, or until it has doubled in size. The ideal temperature for proofing is around 80-85°F—a slightly warm oven with the light on works well.
Resist the urge to rush this step. Proper proofing ensures the buns will be light and airy. If the dough hasn’t risen sufficiently, the buns may turn out dense or gummy after steaming.
Step 4: Shape and Prepare for Steaming
Once the dough has doubled, gently punch it down to release the air. Divide it into 8 equal portions (about 2.5 oz each) and roll each into a smooth ball. Flatten slightly into a disc shape, as this helps them cook evenly during steaming.
Place each portion onto a square of the 4 pieces Parchment Paper, which prevents sticking and makes handling easier. Space them out on a tray as you work to avoid them sticking together.
Step 5: Steam to Perfection
Bring water to a boil in a steamer with a tight-fitting lid. Arrange the buns in the steamer, leaving 1 inch of space between each to allow for expansion. Cover and steam over high heat for 15-18 minutes.
Turn off the heat and let them sit, covered, for an additional 5 minutes. This final rest ensures the texture sets properly. The buns are done when they look puffy and slightly glossy, with a soft, slightly sticky surface that springs back gently when touched.
Pro Tips For Making Japanese Rice Bun
- Proof the Yeast: Always activate your dry yeast in warm water (110°F) with a pinch of sugar first—I learned this the hard way after a few dense, sad buns.
- Use Room-Temp Ingredients: Take your glutinous rice flour and eggs out of the fridge 30 minutes early. Cold ingredients fight the yeast and make the dough stubborn.
- Don’t Overknead: The dough will feel sticky and soft, but resist the urge to keep adding flour. Just 5-7 minutes of gentle kneading is enough to develop the right texture.
- Steam Immediately: Pop the buns in the steamer as soon as they’ve proofed—waiting even 10 minutes lets them deflate and lose that airy lift.
Common Mistakes When Making Perfect Results
Yeast Activation Errors
Using water that’s too hot (above 115°F) will kill the yeast instantly. I always use a kitchen thermometer to confirm the water is exactly 110°F. Cold water (below 105°F) won’t activate it properly either.
Overworking the Dough
Kneading too aggressively or adding extra glutinous rice flour makes buns dense. The dough should remain slightly sticky—resist the urge to dust with more flour. I knead just until smooth, about 3-5 minutes. 💪
Insufficient Proofing
Rushing the rise leads to gummy, underdeveloped texture. The dough must double in size, which takes 1-1.5 hours at 80-85°F. I test by pressing a finger gently into the dough—it should spring back slowly.
Steamer Issues
Using a steamer without a tight lid lets steam escape, causing dry spots. I recommend a bamboo steamer with a snug lid. Also, ensure water doesn’t touch the buns—use 1-2 inches of boiling water.
Overcrowding the Steamer
Leaving less than 1 inch between buns prevents proper expansion. They’ll stick together and steam unevenly. I arrange them in a single layer with space to grow.
Skipping the Final Rest
Removing buns immediately after steaming makes them collapse. That 5-minute rest with the lid on lets the structure set. I time it precisely—no peeking! 🔥
Nutrition Facts
Frequently Asked Questions
What can I use instead of glutinous rice flour?
Mochiko flour works as a direct substitute. In a pinch, all-purpose flour with a bit of tapioca starch can mimic the texture, but results may vary.
How do I store leftover buns?
Keep them in an airtight container at room temperature for 1-2 days. Reheat by steaming for 3-5 minutes to restore softness.
Why did my buns turn out dense?
Likely causes: over-kneading, insufficient proofing, or too much extra flour. Ensure yeast is active and dough doubles in size before steaming.
Can I add fillings to these buns?
Sweet options like red bean paste or savory ones like pork floss work well. Add filling before the final shaping step.

- Mujadara Rice and Lentils Recipe: Earthy Spiced Lentils With Caramelized Onions - November 1, 2026
- Naija Fried Rice Recipe: Street-Style Spice With Veggie Crunch - November 1, 2026
- Mushy Rice Recipe: Fluffy Grains Transformed in Minutes - November 1, 2026