
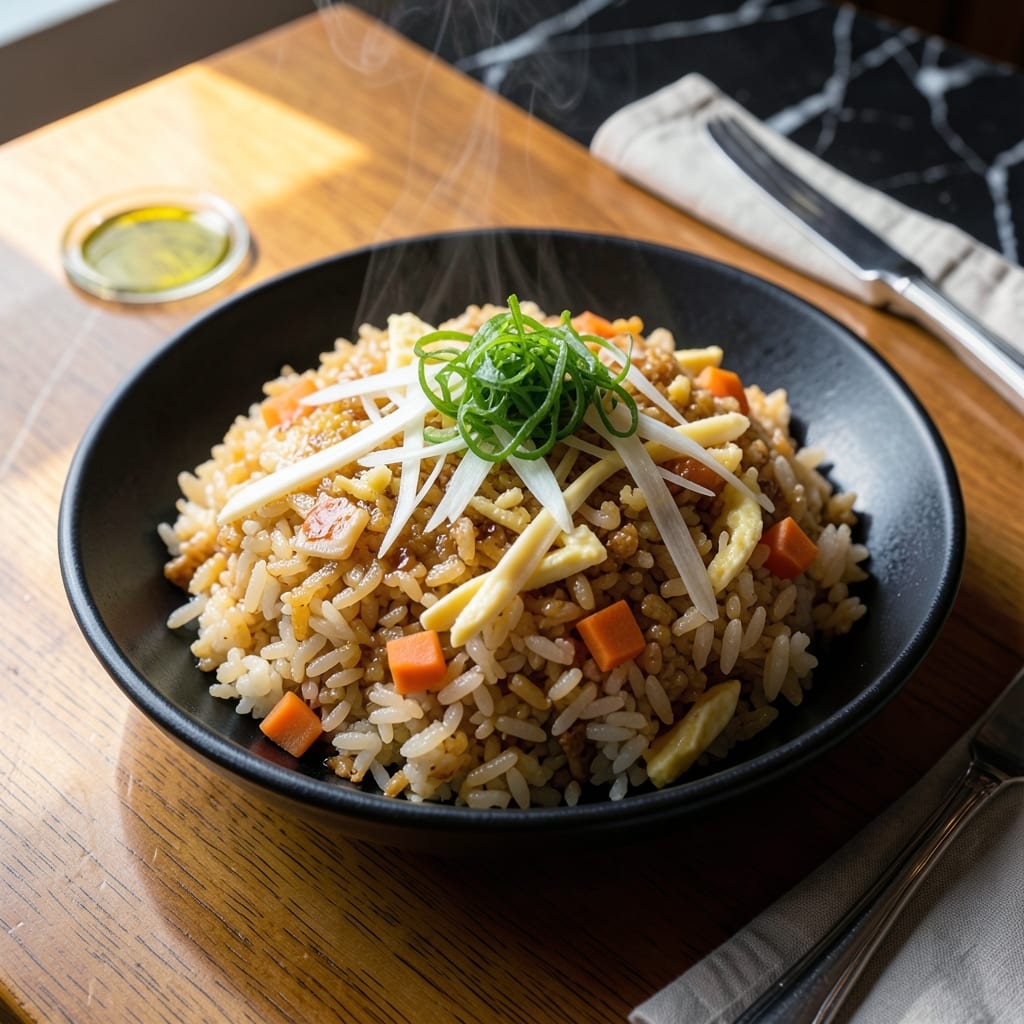
This recipe brings the authentic taste of Japanese restaurant fried rice to your home kitchen. The secret lies in using day-old rice and high heat to achieve that signature wok-seared texture and umami depth.
I’ve perfected this method through years of practice, focusing on traditional ingredients like soy sauce, mirin, and dashi. Each component plays a role in building layers of savory, slightly sweet flavor that defines this dish.
The egg adds richness while scallions provide a fresh, crisp finish. High heat and quick cooking ensure the rice stays separate and slightly crispy, just like your favorite restaurant version.
Serve it as a side or main dish—either way, it delivers restaurant-quality results with every bite.
Ingredients for Japanese Restaurant Fried Rice
Traditional Japanese ingredients create authentic restaurant-style fried rice with depth and texture.
| Ingredient | Amount | Notes |
|---|---|---|
| Day-Old Cooked White Rice 🍚 | 4 cups | Chilled, grains separated |
| Large Eggs 🥚 | 3 whole | Beaten lightly |
| Scallions 🧅 | 4 whole | Thinly sliced, whites and greens separated |
| Neutral Cooking Oil 🫒 | 3 tbsp | High smoke point preferred |
| Soy Sauce 💧 | 3 tbsp | Japanese variety preferred |
| Mirin 🍶 | 2 tbsp | Sweet cooking rice wine |
| Dashi Stock 🥣 | 2 tbsp | Homemade or instant powdered |
| Sesame Oil 🫒 | 1 tsp | Toasted variety for finishing |
| Garlic Cloves 🧄 | 2 cloves | Minced finely |
| Fresh Ginger 🌿 | 1 tbsp | Peeled and grated |
| Carrot 🥕 | 1 whole | Small dice |
| Frozen Peas 🌱 | ½ cup | Thawed briefly |
| Sea Salt 🧂 | ½ tsp | Adjust to taste |
| White Pepper 🌶️ | ¼ tsp | Freshly ground preferred |
The rice quality is non-negotiable—day-old, fully chilled white rice (jasmine or short-grain) is essential for that signature texture. Koshihikari from Asian markets is ideal, but any leftover rice works if it’s thoroughly dried out. Dashi stock can be found at Whole Foods or most international aisles, and instant powdered versions (like Hondashi) are completely acceptable for home cooking.
No mirin? Substitute 1 tbsp rice vinegar plus 1 tsp sugar. For a vegetarian version, replace dashi with vegetable stock. The soy sauce should be Japanese-style—Kikkoman or San-J are widely available. If you’re missing scallions, green onions work identically, though their flavor is slightly milder. Frozen peas can be swapped for diced bell peppers for a different texture.
Cooked rice keeps in the fridge for 3-4 days, though older rice works better for frying. The finished dish holds well for 2-3 days refrigerated but is best served immediately. Freezing isn’t recommended as it affects the rice texture. Always store dashi powder in a cool, dry place to maintain its potency for 6-12 months.
Why You’ll Love This Recipe
- One Pan Wonder: I love that this comes together in a single skillet—just toss in the day-old rice, eggs, and scallions with a splash of soy sauce, and dinner’s ready.
- Umami Bomb: The soy sauce hits the rice just right, giving that savory depth you’d expect from a restaurant, and the scallions add a fresh bite.
- Feeds a Crowd: Honestly, it’s my go-to for family dinners or when friends drop by unannounced—stretches easily with extra rice or veggies.
- Leftovers Hero: Between us, it tastes even better the next day. I’ll be real: I make extra just to have cold fried rice for lunch.
Step-by-Step Instructions for Japanese Restaurant Fried Rice
Authentic technique delivers that signature wok hei flavor with minimal effort and maximum impact.
Step 1: Prepare and Heat the Wok
Begin by separating the grains of the 4 cups day-old cooked white rice with your hands—this prevents clumping during cooking. Thinly slice the 4 whole scallions, keeping whites and greens separate, and small-dice the 1 whole carrot. Mince the 2 cloves garlic cloves and grate the 1 tbsp fresh ginger.
Place a wok or large skillet over high heat and add 2 tbsp neutral cooking oil. I use a high-smoke-point oil to achieve that characteristic sear without burning. Swirl to coat the surface evenly, then let it heat until it just begins to shimmer—this ensures your ingredients won’t stick and will develop proper color.
Step 2: Cook the Aromatics and Vegetables
Add the garlic cloves, fresh ginger, and the white parts of the scallions to the hot oil. Stir-fry for 30 seconds until fragrant but not browned. Immediately add the diced carrot and cook for 2-3 minutes until slightly softened but still crisp.
Push the aromatics and vegetables to one side of the wok, then add the remaining 1 tbsp neutral cooking oil to the empty space. Add the 0.5 cup frozen peas and stir-fry for 1 minute until heated through. The peas should retain their bright green color and slight bite.
Step 3: Scramble the Eggs
Create a well in the center of the wok and add the 3 whole large eggs. Scramble them quickly with a spatula, breaking them into small, soft curds. Cook for 1-2 minutes until just set but still slightly runny—they’ll finish cooking when combined with the rice.
Season the eggs lightly with a pinch of sea salt and white pepper. Distribute them evenly over the vegetables, then add the separated day-old cooked white rice. The cold rice will sizzle as it hits the hot surface, which is exactly what you want for that authentic texture.
Step 4: Combine and Season
Drizzle the 3 tbsp soy sauce, 2 tbsp mirin, and 2 tbsp dashi stock evenly over the rice. Stir-fry everything together for 3-4 minutes, pressing the rice against the wok surface to achieve a light crispness on some grains.
Taste and adjust seasoning with the remaining 0.5 tsp sea salt and 0.25 tsp white pepper as needed. The rice should be uniformly coated with sauce, with visible flecks of egg and vegetables throughout. The grains should be separate, not mushy, with a subtle sheen from the sauce.
Step 5: Finish and Serve
Remove the wok from heat and stir in the 1 tsp sesame oil and the green parts of the scallions. The sesame oil adds a final layer of aroma, while the scallion greens provide freshness and color contrast.
Transfer to a serving dish immediately. The finished rice should have a balanced umami flavor from the soy and dashi, a touch of sweetness from the mirin, and a pleasant texture with distinct grains, tender vegetables, and soft egg curds. Serve hot for the best experience.
Pro Tips For Making Japanese Restaurant Fried Rice
- Use Cold Rice: Always start with day-old rice straight from the fridge—fresh rice is too moist and will turn mushy. I learned this the hard way after ruining two batches with sticky, clumpy results.
- Crank the Heat: Get your wok or skillet screaming hot before adding oil, then keep it there. After burning three batches, I finally figured out that high heat is non-negotiable for that restaurant-style sear.
- Beat Eggs First: Whisk your eggs with a pinch of salt before they hit the pan, then scramble them quickly and remove them. Sounds weird, but it works: this prevents rubbery egg bits in your final dish.
- Add Soy Last: Drizzle soy sauce at the very end and toss fast—adding it too early makes the rice steam instead of fry. My grandmother swore by this, and she was right.
Health Benefits of These Flavors
Rich in Essential Amino Acids
This dish delivers complete protein from the eggs, providing all nine essential amino acids your body needs. With 3 eggs, you’re getting about 18 grams of protein to support muscle repair and energy levels throughout your day.
Low-Calorie Energy Boost
At roughly 300-350 calories per serving, this fried rice offers sustained energy without excess calories. The carrots and peas add fiber and vitamins while keeping the dish light and satisfying. I often make this for lunch when I need fuel without heaviness. 💪
Antioxidant-Rich Ingredients
The garlic, ginger, and scallions are packed with antioxidants that help combat inflammation. Ginger specifically contains gingerol, a compound with powerful anti-inflammatory and digestive benefits that I notice helps settle my stomach.
Healthy Fats from Sesame Oil
That final drizzle of 1 tsp sesame oil adds more than flavor—it provides polyunsaturated fats that support heart health. These healthy fats help your body absorb the fat-soluble vitamins from the vegetables more effectively.
B Vitamin Complex
The combination of rice, eggs, and vegetables creates a B vitamin powerhouse. You’ll get thiamine, riboflavin, and niacin from the rice, plus B12 from the eggs—all crucial for metabolism and nervous system function. This dish keeps me energized for hours. ✨
Low Sodium Control
Unlike takeout versions, making this at home lets you control the sodium. With just 3 tbsp soy sauce for four servings, you’re using about 600mg sodium per serving—significantly less than most restaurant preparations, which can contain 1,200mg or more.
Nutrition Facts
Frequently Asked Questions
Why use day-old rice for fried rice?
Day-old rice is drier, which prevents mushiness when stir-fried. Fresh rice contains too much moisture, leading to a sticky texture instead of the desired separate grains.
Can I substitute mirin with something else?
Yes! Use 1 tbsp rice vinegar plus 1 tsp sugar for every 2 tbsp mirin. This mimics the sweet-tangy balance mirin adds to the dish.
How do I prevent my fried rice from getting soggy?
Cook over high heat and avoid overcrowding the wok. Press the rice against the hot surface for 30 seconds at a time to crisp some grains.
What’s the best oil for high-heat cooking?
Use oils with a high smoke point like canola, vegetable, or peanut oil. Avoid sesame oil for cooking—it burns easily and is best for finishing.

- Mujadara Rice and Lentils Recipe: Earthy Spiced Lentils With Caramelized Onions - November 1, 2026
- Naija Fried Rice Recipe: Street-Style Spice With Veggie Crunch - November 1, 2026
- Mushy Rice Recipe: Fluffy Grains Transformed in Minutes - November 1, 2026