
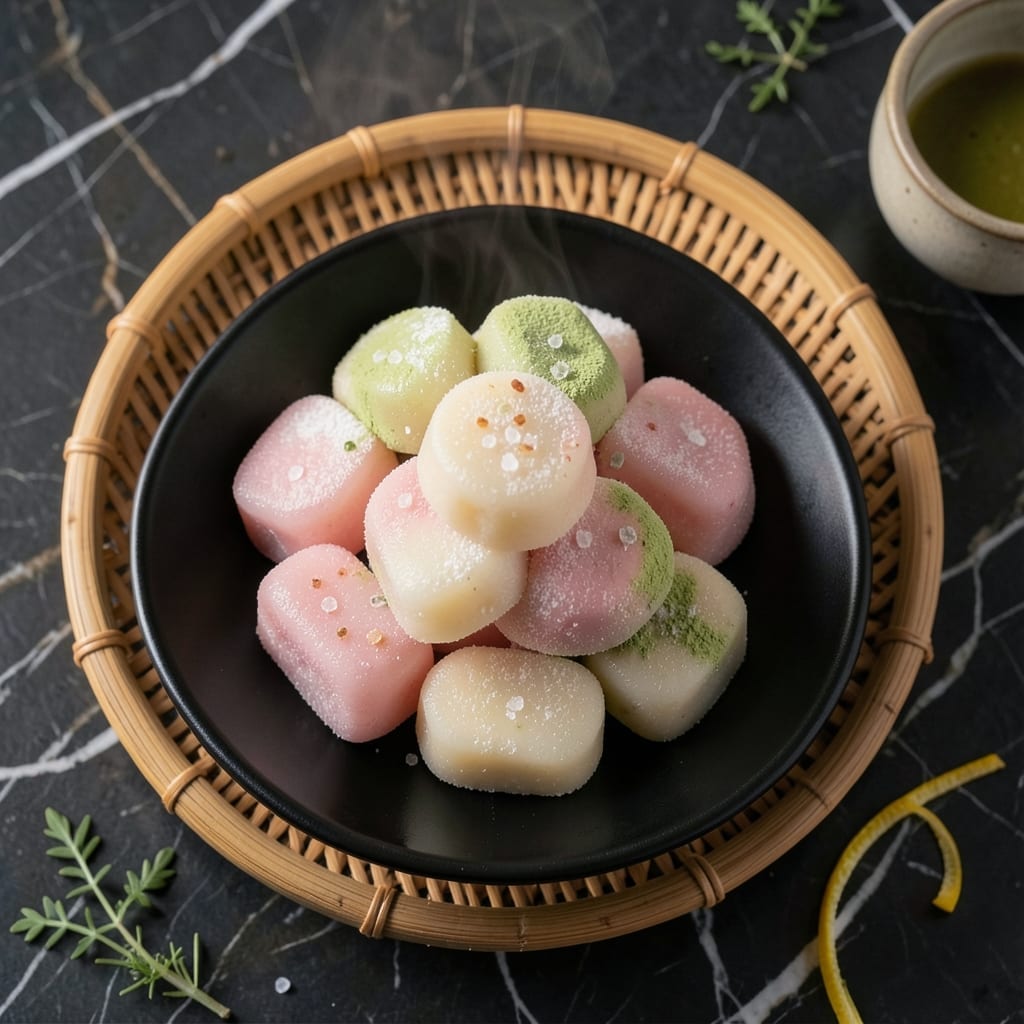
There’s something magical about the chewy, stretchy texture of traditional Japanese rice candy that sets it apart from other sweets. This recipe captures that perfect mochi-like consistency with a fruity twist that’s both nostalgic and exciting.
The process involves steaming glutinous rice flour until it forms a smooth, elastic dough. The key is in the kneading – it needs just the right amount of work to develop that signature chewy texture. I’ve perfected the timing to ensure it’s never gummy or tough.
Once shaped, these candies stay fresh for days, making them ideal for gifting or enjoying as a homemade treat. The subtle sweetness pairs beautifully with the natural rice flavor, creating a confection that’s both delicate and satisfying.
While traditional versions are often filled, this recipe keeps it simple yet authentic. The result is a candy that’s soft, slightly sticky, and utterly addictive.
Ingredients for Japanese Rice Candy
Simple ingredients create that signature chewy, stretchy texture with a fruity twist.
| Ingredient | Amount | Notes |
|---|---|---|
| Glutinous Rice Flour 🌾 | 2 cups | Mochiko brand recommended |
| Granulated Sugar 🍚 | ¾ cup | Fine white sugar preferred |
| Water 💧 | 1 cup | For steaming dough |
| Cornstarch 🌾 | ¼ cup | For dusting surface |
| Fruit Puree 🍓 | ½ cup | Strawberry or mango works well |
| Matcha Powder 🍵 | 1 tsp | Optional for green tea flavor |
| Vanilla Extract 🌿 | 1 tsp | Pure extract preferred |
| Red Bean Paste 🫘 | ½ cup | Optional for filling |
| Food Coloring 🎨 | ¼ tsp | Optional for vibrant colors |
| Vegetable Oil 🫒 | 1 tbsp | For greasing hands |
Glutinous rice flour is essential here—Mochiko brand is the gold standard and widely available at Asian markets or online. The texture depends on this specific type, so don’t substitute regular rice flour. For the fruit puree, use whatever’s in season (strawberry and mango are my go-tos). The sugar should be fine granulated—organic cane sugar dissolves beautifully and adds a subtle depth.
No matcha powder? Skip it entirely or add a bit more vanilla for flavor. Red bean paste can be swapped for nut butter or jam if you prefer a different filling. For food coloring, gel-based works best and won’t thin the dough. If you’re out of cornstarch, potato starch is an equal substitute. The vegetable oil can be any neutral oil—grapeseed or canola are great alternatives.
Store in an airtight container at room temperature for up to 5 days. For longer storage, wrap individually and freeze for 1 month. The texture is best the first day but remains delightfully chewy. Dust with extra cornstarch before storing to prevent sticking (worth the extra minute).
Why You’ll Love This Recipe
- One Bowl Wonder: I mix everything in a single pot—glutinous rice flour, sugar, water—and let the stove do the rest.
- Fruit Burst: The strawberry puree gives each chewy piece that bright, natural sweetness I crave.
- Party Ready: Honestly, these little squares disappear faster than I can cut them at gatherings.
- Stays Fresh: Leftovers keep for days in an airtight container, so I always have a sweet snack on hand.
Step-by-Step Instructions for Japanese Rice Candy
This method ensures the perfect chewy texture and vibrant flavor in every bite.
Step 1: Prepare the Dough Mixture
In a microwave-safe bowl, whisk together the 2 cups Glutinous Rice Flour, 0.75 cup Granulated Sugar, and 1 cup Water until smooth. The mixture should resemble a thick pancake batter with no lumps.
For flavored variations, add the 1 tsp Matcha Powder or 0.25 tsp Food Coloring at this stage. Stir thoroughly to distribute evenly. The color will deepen slightly during cooking, so adjust intensity accordingly.
Step 2: Steam the Dough to Perfection
Cover the bowl with plastic wrap, leaving a small vent. Microwave on high for 2 minutes, then stir well. Return to the microwave and heat in 30-second intervals for another 2-3 minutes, stirring between each, until the mixture becomes translucent and stretchy.
Alternatively, steam the mixture in a bamboo steamer over boiling water for 15-20 minutes, stirring once halfway through. The dough is ready when it pulls away from the sides of the bowl and has a glossy, elastic appearance.
Step 3: Dust and Shape the Candy
Lightly dust a clean surface with 0.25 cup Cornstarch to prevent sticking. Transfer the hot dough onto the surface and let it cool for 2-3 minutes until safe to handle. The dough should be pliable but not sticky at this point.
Rub your hands with 1 tbsp Vegetable Oil to prevent sticking, then divide the dough into 16 equal portions. Roll each portion between your palms to form smooth balls. Work quickly while the dough is still warm for easiest handling.
Step 4: Add Fillings (Optional)
For filled candies, flatten a dough ball into a ¼-inch thick disc. Place 1 tsp Red Bean Paste or 1 tsp Fruit Puree mixed with a drop of 1 tsp Vanilla Extract in the center. Pinch the edges together to seal completely, then roll gently to smooth the surface.
The filling should be completely enclosed to prevent leakage during the final steaming. If the dough tears, patch it immediately with a small piece of extra dough, sealing the edges well.
Step 5: Final Steam and Serve
Arrange the shaped candies on a plate lined with parchment paper, leaving space between each. Cover with plastic wrap and steam for 5-7 minutes until the surface becomes slightly glossy and the texture is uniformly chewy throughout.
Let cool for 5 minutes before serving. The candies should be soft and slightly tacky to the touch when fresh, firming up slightly as they cool. Store in an airtight container with parchment between layers to prevent sticking.
Pro Tips For Making Japanese Rice Candy
- Steam the Dough: I learned this the hard way—kneading the glutinous rice flour mixture while it’s still hot makes it smoother and more pliable, so steam it for 10-12 minutes before shaping.
- Dust with Cornstarch: After burning two batches to the pan, I now generously dust my work surface and hands with cornstarch to prevent sticking while rolling and cutting the candy.
- Strain the Puree: Sounds weird, but it works: strain your fruit puree to remove seeds or pulp, which can make the candy texture uneven or cause it to crack.
- Use Warm Water: My grandmother swore by this, and she was right: mixing the glutinous rice flour with warm (not hot) water—around 110°F—helps dissolve the sugar evenly and avoids graininess.
Make-Ahead Tips for This Recipe
Prep Ahead Tips
You can prepare the dough mixture up to 24 hours in advance. Store it covered in the fridge, then bring to room temperature before steaming. This actually improves the texture as the flour hydrates fully. 💡
Shaping in Advance
Shape the candies completely, then arrange them on parchment paper. Cover tightly with plastic wrap and refrigerate for up to 12 hours. The cold dough is easier to handle, reducing sticking during shaping.
Freeze for Later
For longer storage, freeze shaped candies on a tray first, then transfer to a freezer bag. They’ll keep for 1 month. Thaw at room temperature for 30 minutes before the final steaming step.
Filling Prep
Prepare fillings like red bean paste up to 3 days ahead. Store in an airtight container. Cold fillings are firmer and easier to work with when stuffing the candies.
Room Temperature Note
Always let chilled dough warm slightly before final steaming. Cold dough takes 2-3 extra minutes to cook through and may develop a slightly denser texture.
Storage Trick
Dust candies with extra cornstarch before storing to prevent sticking. This creates a protective layer that keeps them separate and fresh for days. ✨
Nutrition Facts
Frequently Asked Questions
What kind of rice flour works best?
Mochiko brand glutinous rice flour is ideal for authentic texture. Regular rice flour won’t give the same chewy result. Look for it in Asian markets or online.
Why did my candy turn out hard?
Overcooking or insufficient kneading causes hardness. Stick to 2-3 minutes in the microwave and knead until smooth. Steam for 5-7 minutes max for perfect softness.
Can I make these without a steamer?
A microwave works just as well. Use 30-second intervals and stir between each until translucent. The texture will be identical to steamed versions.
How do I prevent sticking when shaping?
Dust your surface with cornstarch and rub hands with 1 tbsp oil. Work quickly while warm. Chilling dough briefly can also help reduce stickiness.

- Jimmy Dean Sausage and Rice Recipe: Hearty One-Pot Savory Delight - October 19, 2026
- Indian Jasmine Rice Recipe: Fragrant Basmati-Free Elegance - October 19, 2026
- KFC Rizo Rice Recipe: Copycat Side Dish With Savory Spice Blend - October 19, 2026