
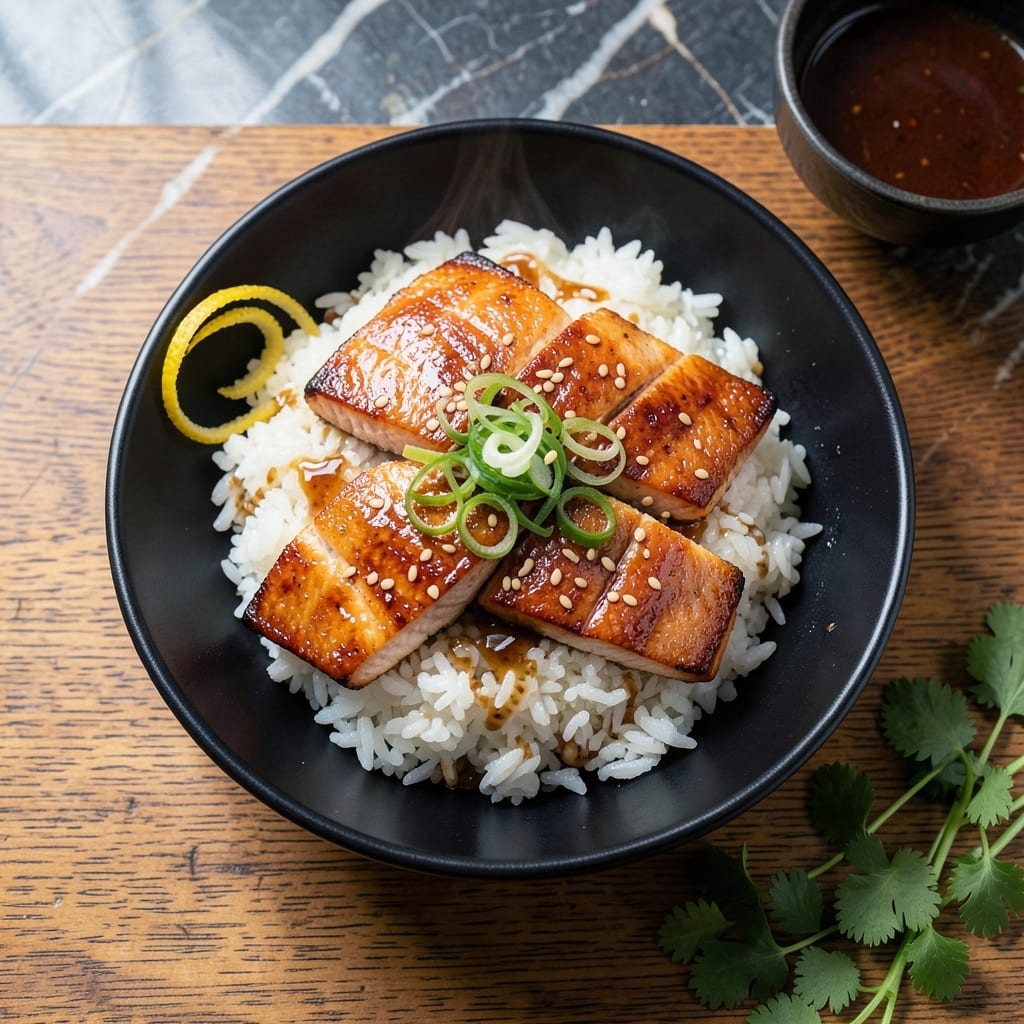
This rice cooker method delivers perfectly flaky salmon with tender rice every time. I developed this technique after years of experimenting with one-pot Japanese meals, and it never fails to impress.
The secret is layering the salmon over partially cooked rice, allowing both to finish together. This ensures the fish stays moist while the rice absorbs its rich flavors. No special equipment is needed beyond your trusty rice cooker.
You’ll end up with a complete meal that’s both elegant and effortless. The salmon emerges with a delicate texture, and the rice takes on a subtle seafood richness that makes every bite satisfying.
This approach turns a simple weeknight dinner into something truly special. The hands-off method means you can set it and forget it until it’s time to serve.
Ingredients for Japanese Salmon Rice Cooker
Short list. Big flavor. Everything you need for that perfect flaky salmon over rice.
| Ingredient | Amount | Notes |
|---|---|---|
| Salmon Fillets 🐟 | 1 ½ lb | Skin-on or skinless, boneless |
| Japonica Rice 🍚 | 2 cups | Short-grain or sushi rice |
| Water 💧 | 2 ½ cups | For cooking rice |
| Soy Sauce 🫒 | 2 tbsp | Low-sodium preferred |
| Sake 🍶 | 2 tbsp | Dry variety for cooking |
| Mirin 🍯 | 1 tbsp | Sweet cooking rice wine |
| Green Onions 🧅 | 4 whole | Thinly sliced for garnish |
| Ginger Root 🌿 | 1 piece | 1-inch piece, grated |
| Garlic Cloves 🧄 | 2 cloves | Minced for seasoning |
| Sesame Oil 🫒 | 1 tsp | Toasted for aroma |
| Salt 🧂 | ½ tsp | Kosher or sea salt |
| Black Pepper 🌶️ | ¼ tsp | Freshly ground preferred |
| Sesame Seeds 🌾 | 1 tsp | Toasted, for garnish |
The salmon is the star, so wild-caught if you can swing it. Whole Foods or Trader Joe’s have great fresh options, but frozen from Costco works too (just thaw overnight). For the rice, Koshihikari or Nishiki are my go-to brands—short-grain is non-negotiable for that sticky texture. Don’t skip the sake and mirin; they add depth you can’t fake.
No sake? Dry white wine with a pinch of sugar gets you close. Mirin can be swapped for 1 tbsp honey plus 1 tsp rice vinegar (but skip if vegan). Green onions can be subbed with chives or scallions. The ginger and garlic are flexible—use ground versions at half the amount if fresh isn’t handy.
Leftovers keep 3-4 days in the fridge, but the salmon’s best fresh. Rice freezes well for 1 month—reheat with a splash of water. I always make extra rice; it’s great for fried rice the next day (don’t tell anyone).
Why You’ll Love This Recipe
- Set & Forget: I toss everything in the rice cooker, press a button, and walk away—no babysitting required.
- Umami Bomb: The soy and sake soak into the salmon and rice, creating that deep, savory flavor I crave.
- Weeknight Hero: Honestly, it’s my Tuesday lifesaver when I need dinner fast but still want it to feel special.
- Leftovers? Yes Please: The flavors actually get better overnight, so I make extra for lunch the next day.
Step-by-Step Instructions for Japanese Salmon and Rice
Here’s the hands-off method that delivers tender salmon and perfectly cooked rice every time.
Step 1: Prepare the Rice and Marinade
Rinse the 2 cups Japonica Rice under cold water until the water runs clear. This removes excess starch and prevents sticky rice. Drain well in a fine-mesh strainer and transfer it to your rice cooker bowl.
Add the 2.5 cups Water, 2 tbsp Soy Sauce, 2 tbsp Sake, 1 tbsp Mirin, 0.5 tsp Salt, and 1 tsp Sesame Oil. Stir gently to combine. The liquid should look lightly seasoned—this builds the foundation of flavor for both the rice and salmon.
Step 2: Season the Salmon
Pat the 1.5 lb Salmon Fillets dry with paper towels to ensure even cooking and better browning. Place them skin-side down (if using skin-on) on top of the rice mixture in the cooker.
Grate the 1 piece Ginger Root and mince the 2 cloves Garlic Cloves, then sprinkle both evenly over the salmon. Finish with 0.25 tsp Black Pepper. The aromatics will infuse into the salmon and rice as everything cooks together.
Step 3: Cook in the Rice Cooker
Secure the lid on your rice cooker and select the standard white rice setting. The cooker will handle the timing, but expect it to take about 25-30 minutes. The salmon will steam gently on top of the rice, absorbing all the savory, umami-rich flavors from the liquid below.
Resist the urge to open the lid during cooking—steam is critical here. You’ll know it’s done when the rice cooker switches to warm mode and the salmon flakes easily with a fork. The rice should be tender with all the liquid absorbed, and the salmon should be opaque and flaky.
Step 4: Rest and Garnish
Once cooking is complete, let the dish rest with the lid closed for an additional 10 minutes. This allows the salmon to finish cooking gently and the rice to steam to perfect texture.
Thinly slice the 4 whole Green Onions and toast the 1 tsp Sesame Seeds in a dry pan over medium heat for 1-2 minutes until fragrant. Sprinkle both over the salmon and rice just before serving to add freshness and crunch.
Pro Tips For Making Japanese Salmon Rice Cooker
- Pat Salmon Dry: I learned this the hard way—wipe the fillets with a paper towel before adding to the rice cooker. It prevents the fish from steaming in its own moisture and keeps the texture firm.
- Rinse the Rice: Swirl the japonica rice in a bowl of water 2-3 times until the water runs nearly clear. Skipping this leaves a gummy, starchy mess at the bottom of your cooker.
- Delay the Soy: Add soy sauce and sake after the first 10 minutes of cooking, not at the start. Dumping it in early can make the salmon tough and the rice mushy.
- Rest Before Serving: Let the rice cooker sit covered for 5-10 minutes after it switches to warm. Sounds weird, but it lets the salmon finish cooking gently without overdoing it.
Pro Cooking Tips for Perfect Results
Rice Prep Precision
Rinsing the 2 cups Japonica Rice is non-negotiable—do it until the water runs completely clear. I use a fine-mesh strainer and rinse for at least 2 minutes to remove excess starch. This prevents gummy rice and ensures each grain stays separate while still absorbing all those delicious flavors. 💡
Salmon Placement
Always place your 1.5 lb Salmon Fillets skin-side down on top of the rice mixture. This creates a natural barrier that prevents the fish from breaking apart during cooking. Pat the fillets completely dry first—this helps the seasonings adhere better.
Timing the Cook
Set your rice cooker to the standard white rice setting and let it work its magic. The salmon will be perfectly done when the cooker switches to warm mode, usually after 25-30 minutes. Don’t peek! Every time you open the lid, you’re adding 5-10 minutes to your cook time.
Aromatic Infusion
The 1-inch grated ginger and 2 minced garlic cloves are key. I sprinkle them directly over the salmon so their oils infuse into both the fish and rice. This creates a depth of flavor that’s distinctly Japanese—subtle but unmistakable.
Resting Period
That 10-minute rest with the lid closed is crucial. It lets the salmon finish cooking gently and allows the rice to absorb any remaining liquid. I’ve skipped this step before and regretted it—the texture just isn’t the same. 🔥
Garnish Last
Always add the toasted sesame seeds and sliced green onions right before serving. Toast the seeds in a dry pan for just 1-2 minutes until fragrant—they’ll add a nutty crunch that contrasts beautifully with the tender salmon.
Nutrition Facts
Frequently Asked Questions
Can I use frozen salmon for this?
Yes, but thaw it completely in the fridge overnight first. Pat it very dry before seasoning to prevent excess moisture in the cooker.
What if I don’t have sake or mirin?
Use dry white wine plus 1/2 tsp sugar for sake. For mirin, mix 1 tbsp honey with 1 tsp rice vinegar. These swaps work in a pinch.
Can I cook this with brown rice?
Yes, but increase water to 3 cups and cook time to 45-50 minutes. The salmon may dry out slightly, so add it halfway through cooking.
How do I prevent the salmon from falling apart?
Pat it completely dry and place it skin-side down on the rice. Don’t stir or move it during cooking. This keeps the fillets intact.

- Mujadara Rice and Lentils Recipe: Earthy Spiced Lentils With Caramelized Onions - November 1, 2026
- Naija Fried Rice Recipe: Street-Style Spice With Veggie Crunch - November 1, 2026
- Mushy Rice Recipe: Fluffy Grains Transformed in Minutes - November 1, 2026