
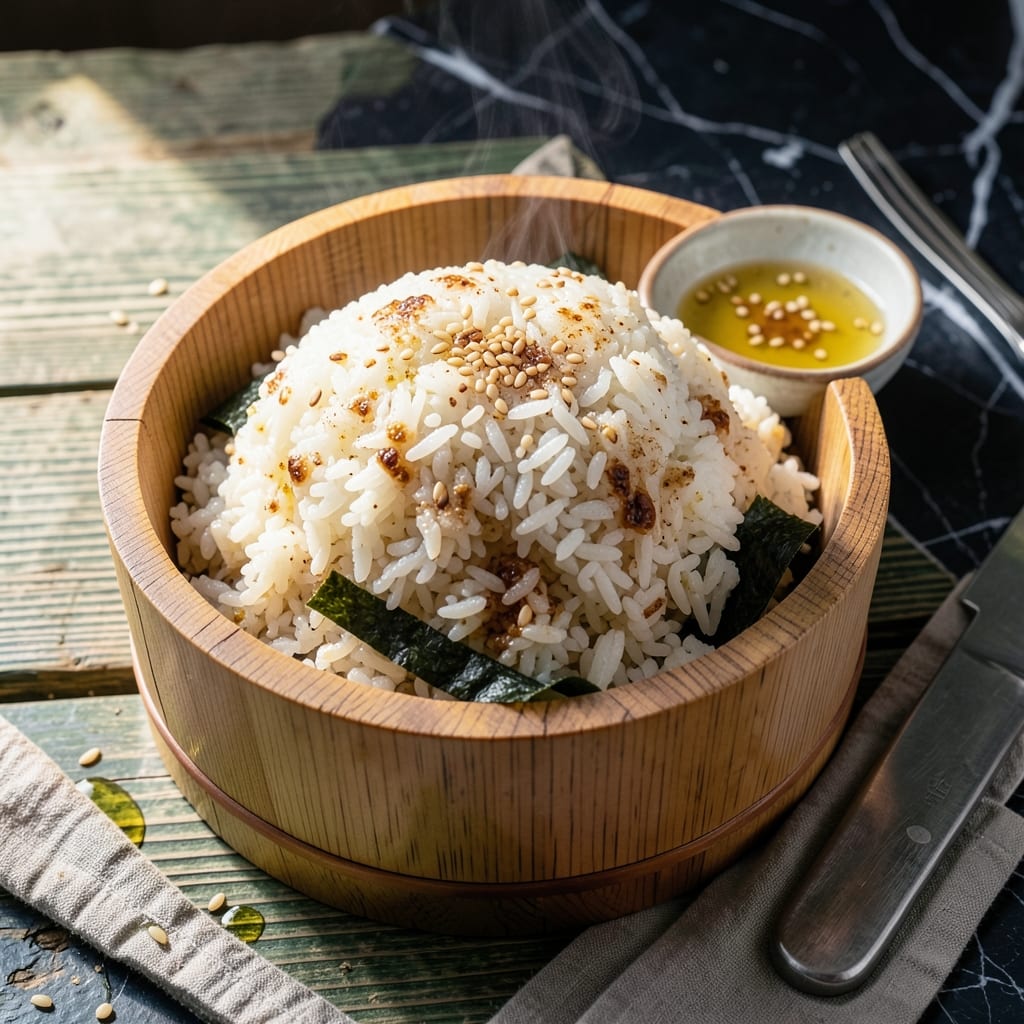
Achieving perfect Japanese rice requires attention to detail and the right technique. Short grain varieties are essential for that signature sticky texture that holds together beautifully.
I’ve refined this method over years of practice, focusing on precise water ratios and gentle cooking. The result is fragrant, glossy rice with just the right bite—consistently reliable for any meal.
The key is soaking the grains before cooking, which ensures even hydration and a tender finish. A tight-fitting lid traps steam, creating the ideal environment for fluffy, cohesive rice.
Serve this as a base for sushi, alongside teriyaki dishes, or simply on its own. This method delivers perfect results every time.
Ingredients for Japanese Style Rice
Short grain rice plus a few pantry staples create this fragrant, glossy foundation.
| Ingredient | Amount | Notes |
|---|---|---|
| Japanese Short Grain Rice 🍚 | 2 cups | Rinsed until water runs clear |
| Water 💧 | 2 ½ cups | Filtered or spring recommended |
| Rice Vinegar 🍶 | 2 tbsp | Seasoned or unseasoned |
| Sugar 🍚 | 1 tbsp | Granulated white or caster |
| Salt 🧂 | 1 tsp | Fine sea salt preferred |
| Kombu 🌿 | 1 piece | 4-inch square, optional for umami |
| Sake 🍶 | 1 tbsp | Dry cooking variety |
| Mirin 🍶 | 1 tbsp | Sweet cooking rice wine |
The rice is non-negotiable here. Japanese short grain (Koshihikari or Nishiki) delivers the signature sticky texture. Most Asian markets carry these varieties, but Trader Joe’s also stocks a solid option. Look for labels specifying ‘sushi rice’ or ‘Calrose’—these work too. Kombu adds subtle depth (find it dried in the international aisle), but don’t stress if it’s missing.
No rice vinegar? Apple cider vinegar at half the amount works in a pinch. Skip the kombu? A pinch of MSG or mushroom powder mimics the umami. For a sweeter profile, increase mirin to 1.5 tbsp and reduce sake. The sugar can be swapped for agave or maple syrup (vegan-friendly). Always use filtered water—tap water minerals can affect texture.
Rice stays fresh for 3-4 days in the fridge, though it’s best served immediately. Freeze cooked rice in portions for up to 1 month—reheat with a splash of water to restore moisture. Store uncooked rice in an airtight container away from light and heat.
Why You’ll Love This Recipe
- Set and Forget: I just rinse the rice, add water, and let the rice cooker do the rest—no stirring, no stress.
- Sweet-Tangy Bite: That perfect balance of rice vinegar, sugar, and salt makes every grain pop with flavor.
- Meal Prep Hero: It pairs with everything from teriyaki chicken to veggie bowls, and keeps beautifully for days.
- Budget Stretch: A pound of short grain rice costs pennies and feeds my family for multiple meals.
Step-by-Step Instructions for Japanese Style Rice
Master the technique for consistently perfect results with this traditional preparation method.
Step 1: Rinse and Soak the Japanese Short Grain Rice
Place the 2 cups Japanese Short Grain Rice in a fine-mesh strainer and rinse under cold water, swirling with your hand until the water runs completely clear. This removes excess starch that could make the grains gummy. I typically rinse 4-5 times to ensure purity.
Once rinsed, transfer the rice to a bowl and add the 2.5 cups Water. Let it soak for 30 minutes at room temperature. This hydration step is crucial for even cooking and achieving that signature sticky texture. Don’t skip this—it prevents hard centers in the finished grains.
Step 2: Cook the Rice with Kombu for Umami Depth
Drain the soaked rice completely in a fine-mesh strainer for 2 minutes. Transfer to a heavy-bottomed pot with a tight-fitting lid. Add the 2.5 cups Water and the 1 piece Kombu (if using) to the pot. The kombu infuses subtle oceanic depth during cooking.
Cover and bring to a boil over medium-high heat. Once boiling, immediately reduce to low heat and cook undisturbed for 15 minutes. Resist the urge to lift the lid—released steam affects the cooking environment and can lead to uneven texture.
Step 3: Prepare the Seasoned Rice Vinegar Mixture
While the rice cooks, combine the 2 tbsp Rice Vinegar, 1 tbsp Sugar, and 1 tsp Salt in a small saucepan. Warm over low heat just until the sugar and salt dissolve completely, stirring occasionally. This takes about 2-3 minutes.
Remove from heat and stir in the 1 tbsp Sake and 1 tbsp Mirin. The sake adds complexity while the mirin contributes a touch of sweetness that balances the acidity of the vinegar. Set aside to cool slightly.
Step 4: Finish and Season the Rice
After 15 minutes of cooking, turn off the heat and let the rice steam, covered, for an additional 10 minutes. This resting period allows the grains to absorb any remaining moisture and achieve their final texture.
Remove the kombu piece (if used) and transfer the rice to a large wooden or glass bowl. Using a rice paddle or wooden spoon, gently fold in the vinegar mixture with a cutting motion—this separates the grains while coating them evenly. The rice should glisten slightly and hold together when pressed lightly.
Step 5: Cool and Serve
Let the seasoned rice cool to room temperature, stirring occasionally to release excess steam and prevent clumping. This cooling step is essential for sushi rice applications, but also enhances the flavor for any preparation.
Serve warm or at room temperature. The grains should be individually distinct yet cling together slightly, with a subtle sweetness and tang from the seasoning. This preparation yields rice suitable for sushi, onigiri, or as a side dish for any Japanese meal.
Pro Tips For Making Japanese Style Rice
- Rinse Thoroughly: Wash the rice in 3-4 changes of cold water until it runs clear—I learned this the hard way after ending up with gummy, starchy grains.
- Soak 30 Minutes: Let the drained rice soak in water for a full 30 minutes before cooking; it guarantees even cooking and that signature sticky texture.
- Use the Right Ratio: Stick to a 1:1.1 rice-to-water ratio by volume for Japanese short grain—any more and you’ll get mush, any less and it’ll be undercooked.
- Season While Warm: Mix the rice vinegar, sugar, and salt into the rice while it’s still hot; the warmth helps it absorb the flavors better than when it’s cooled.
Best Sauces and Condiments for These Flavors
Classic Sushi Vinegar
The seasoned rice vinegar mixture from the recipe already makes a perfect pairing—tangy, slightly sweet, with subtle depth from sake and mirin. I often drizzle an extra 1 tsp over the top for serving. This enhances the natural flavors without overpowering. 💛
Soy Sauce Variations
For dipping or drizzling, low-sodium soy sauce keeps the salt balanced. I prefer Kikkoman or Yamasa brands. For a richer experience, mix 1 tbsp soy sauce with 1 tsp sesame oil and a drop of chili oil for heat.
Spicy Mayo
Combine ¼ cup mayonnaise (I use Kewpie for authenticity) with 1 tbsp sriracha and ½ tsp sugar. This creamy, spicy condiment adds a luxurious touch to bowls or onigiri. It’s a crowd-pleaser at my dinner table.
Furikake Seasoning
Sprinkle 1-2 tbsp of this dry Japanese seasoning over the rice for an instant flavor boost. Look for nori komi furikake (with seaweed) or sesame furikake at Asian markets. It adds texture and umami without extra moisture.
Miso Butter
Blend 2 tbsp softened butter with 1 tbsp white miso paste until smooth. Dollop a small amount onto hot rice for a decadent, savory finish. This works especially well for rice served alongside grilled proteins.
Pickled Ginger
Serve 1-2 thin slices of pickled ginger (gari) on the side to cleanse the palate between bites. The vinegary crunch contrasts beautifully with the soft, sticky rice. I always keep a jar in my fridge for quick meals. ✨
Nutrition Facts
Frequently Asked Questions
What kind of rice works best?
Use Japanese short grain like Koshihikari or Nishiki for authentic texture. Avoid long grain varieties—they lack the sticky consistency. Look for labels marked “sushi rice” or “Calrose” as good alternatives.
Why rinse the rice before cooking?
Rinsing removes excess starch that could make the grains gummy. Continue until the water runs completely clear, usually 4-5 times. This step ensures fluffy, separate grains with perfect stickiness.
Can I skip the soaking step?
Don’t skip it! Soaking for 30 minutes allows even hydration, preventing hard centers. The grains absorb water uniformly, resulting in consistent texture throughout.
How do I fix undercooked rice?
If the grains are still firm, add 2-3 tbsp water, cover, and cook on low heat for an additional 5 minutes. Then let it steam off-heat for 10 minutes to finish absorbing moisture.

- Indian Jasmine Rice Recipe: Fragrant Basmati-Free Elegance - October 19, 2026
- KFC Rizo Rice Recipe: Copycat Side Dish With Savory Spice Blend - October 19, 2026
- Jeerakasala Rice Recipe: Fragrant Cumin-Infused Kerala Delight - October 19, 2026