
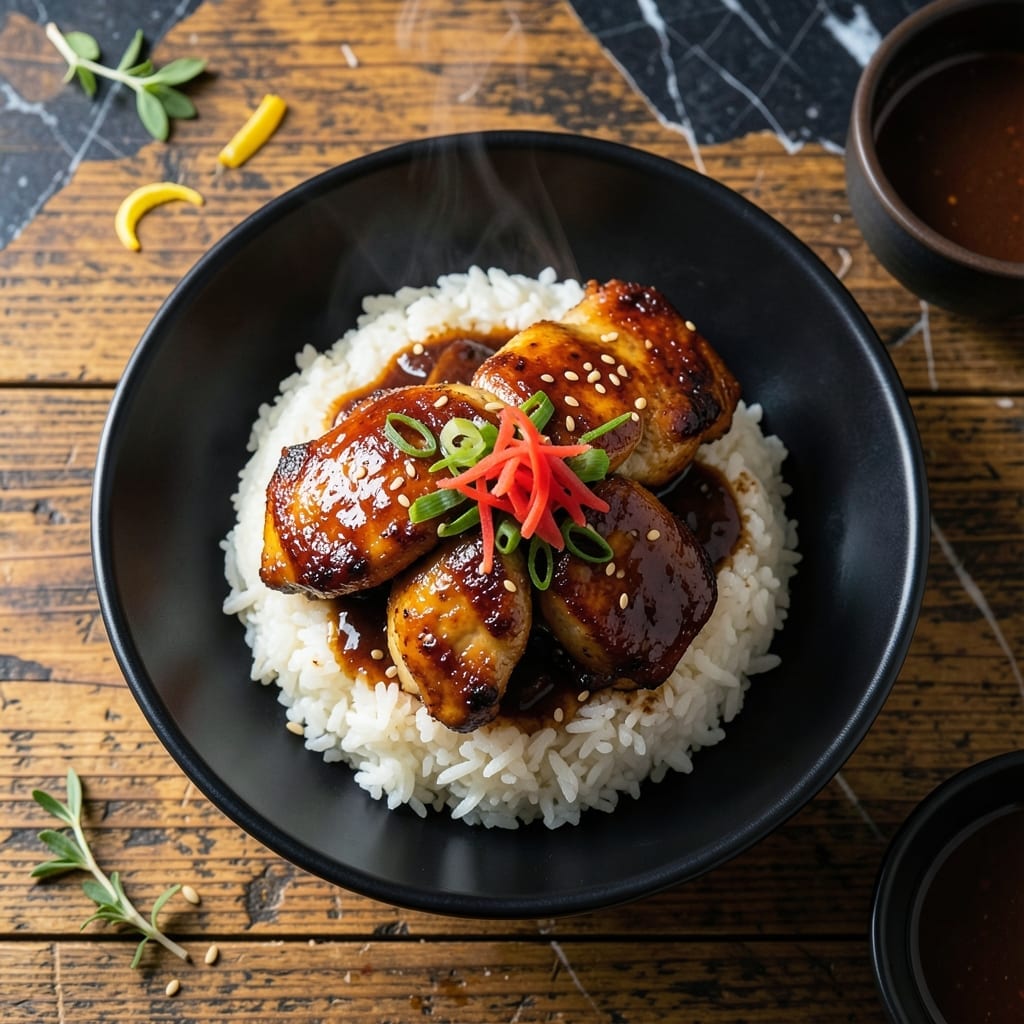
There’s a reason teriyaki chicken rice bowls remain a global favorite—this dish balances sweet, savory, and umami in every bite. I’ve refined this method to ensure the chicken stays juicy while the glaze caramelizes to perfection. The rice, fluffy and fragrant, serves as the ideal canvas.
This isn’t just a meal; it’s a foolproof system. The chicken marinates in a simple yet bold teriyaki sauce, then sears to lock in flavor. Meanwhile, the rice cooks to tender consistency, ready to soak up every drop of that sticky, glossy glaze.
The assembly is where it all comes together. Layer the rice, top with sliced chicken, and drizzle with extra sauce. Each component shines, but the combination is what makes it unforgettable.
Serve hot for a dish that’s both comforting and impressive.
Ingredients for Japanese Teriyaki Chicken Rice Bowl
Pantry staples plus a few Asian market finds. Nothing exotic, just bold flavor.
| Ingredient | Amount | Notes |
|---|---|---|
| Boneless Skinless Chicken Thighs 🍗 | 1 ½ lb | Cut into bite-sized pieces |
| Soy Sauce 🫒 | ½ cup | Low-sodium preferred |
| Mirin 🍶 | ¼ cup | Sweet rice wine |
| Sake 🍶 | ¼ cup | Dry cooking wine |
| Brown Sugar 🍚 | 3 tbsp | Packed for sweetness |
| Fresh Ginger 🌿 | 1 tbsp | Grated for sauce |
| Garlic Cloves 🧄 | 3 cloves | Minced for depth |
| Jasmine Rice 🍚 | 2 cups | Uncooked, rinsed |
| Green Onions 🧅 | 4 whole | Thinly sliced for garnish |
| Vegetable Oil 🫒 | 2 tbsp | For searing chicken |
| Cornstarch 🌾 | 1 tbsp | For thickening glaze |
| Water 💧 | 2 tbsp | For cornstarch slurry |
| Sesame Seeds 🌰 | 1 tsp | Toasted for garnish |
| Red Pepper Flakes 🌶️ | ¼ tsp | Optional for heat |
The chicken is the star here. Thighs stay juicier than breasts—look for skinless, boneless at Whole Foods or your local butcher. The soy sauce should be Japanese-style (like Kikkoman), not Chinese. Mirin and sake are in the international aisle at most Kroger stores, but H-Mart or Uwajimaya will have the best selection if you’re near one.
No mirin? Dry sherry plus 1/2 tsp sugar works in a pinch. Sake can be swapped for dry white wine. Brown sugar substitution? Coconut sugar or honey (though honey changes the flavor slightly). For a gluten-free version, use tamari instead of soy sauce. The ginger and garlic can be pre-minced (frozen works too) if you’re short on time.
The glaze keeps in the fridge for 1 week (great for meal prep). Cooked chicken and rice are best fresh but reheat well—store separately for 3-4 days. Toast sesame seeds just before serving for maximum crunch.
Why You’ll Love This Recipe
- One Pan Wonder: I sear the thighs in the same pan I use for the teriyaki glaze—soy, mirin, and sake simmer right in the browned bits. Honestly, cleanup is just one spatula and a quick rinse.
- Sticky Sweet Magic: That brown sugar caramelizes with the soy and mirin into this glossy, finger-licking glaze that clings to every bite of chicken.
- Meal Prep Hero: I make a big batch on Sunday and it reheats beautifully—rice stays fluffy, chicken stays juicy, and the flavors just get better.
- Budget-Friendly Feast: Chicken thighs are cheap, and a little soy, mirin, and sake go a long way for maximum flavor without breaking the bank.
Step-by-Step Instructions for Japanese Teriyaki Chicken Rice Bowl
Here’s the method. Straightforward, tested, works every time.
Step 1: Cook the Jasmine Rice
Rinse the 2 cups Jasmine Rice under cold water until the water runs clear. This removes excess starch and prevents gummy rice. Combine the rinsed rice with 2 ½ cups water in a saucepan, bring to a boil, then reduce heat to low, cover, and simmer for 15 minutes.
Remove from heat and let it sit covered for 10 minutes. The rice should be tender and the water fully absorbed. Fluff with a fork before serving to separate the grains and release steam.
Step 2: Sear the Chicken Thighs
Cut the 1.5 lb Boneless Skinless Chicken Thighs into bite-sized pieces. Heat the 2 tbsp Vegetable Oil in a large skillet over medium-high heat. Add the chicken in a single layer and cook for 5-6 minutes until golden brown on all sides.
The chicken won’t be fully cooked yet—that happens in the next step. Avoid crowding the pan; cook in batches if needed to ensure even browning. Transfer the seared chicken to a plate and set aside.
Step 3: Make the Teriyaki Glaze
In the same skillet, add the 0.5 cup Soy Sauce, 0.25 cup Mirin, 0.25 cup Sake, 3 tbsp Brown Sugar, 1 tbsp Fresh Ginger, and 3 cloves Garlic Cloves. Bring to a simmer over medium heat and cook for 3-4 minutes, stirring frequently.
In a small bowl, whisk together the 1 tbsp Cornstarch and 2 tbsp Water until smooth. Stir this slurry into the sauce and simmer for 1-2 minutes until it thickens to a glossy glaze that coats the back of a spoon.
Step 4: Finish the Chicken and Assemble
Return the seared chicken to the skillet with the glaze. Reduce heat to low and simmer for 5-6 minutes, stirring occasionally, until the chicken is fully cooked through and coated in the thick, glossy sauce.
Divide the cooked rice among bowls. Top with the glazed chicken, drizzle any remaining sauce from the pan over the top, and garnish with thinly sliced Green Onions, 1 tsp Sesame Seeds, and 0.25 tsp Red Pepper Flakes if using. Serve immediately while hot.
Pro Tips For Making Japanese Teriyaki Chicken Rice Bowl
- Score the Thighs: Cut 2-3 shallow slits into each thigh before marinating—this lets the teriyaki sauce penetrate deeper and cook the meat more evenly.
- Reduce the Sauce First: Simmer the soy sauce, mirin, sake, and brown sugar for 3-4 minutes before adding chicken; this builds depth and prevents a watery glaze.
- Skip the Overcrowding: Cook chicken in a single layer with space between pieces, or it’ll steam instead of sear—learned this after my first sad, pale batch.
- Rest Before Slicing: Let the chicken rest 5 minutes under foil after cooking; it stays juicier and slices cleaner, even when you’re hangry and impatient.
Pro Cooking Tips for Perfect Results
Sauce Consistency
For the perfect glaze, simmer your sauce until it coats the back of a spoon. I use a cornstarch slurry of 1 tbsp cornstarch and 2 tbsp water to thicken it. Add the slurry slowly while stirring constantly to avoid lumps.
Chicken Cooking
Sear the chicken in batches to avoid steaming. I use medium-high heat and 2 tbsp vegetable oil for a golden crust. Cook until internal temp reaches 165°F in the final simmer with the glaze. 🌡️
Rice Perfection
Rinse your jasmine rice thoroughly to remove starch. Use a 1:1.25 rice-to-water ratio and let it rest covered for 10 minutes after cooking. This ensures fluffy, separate grains.
Flavor Layering
Bloom the 1 tbsp grated ginger and 3 minced garlic cloves in the skillet before adding liquids. This builds depth. I often add a pinch of red pepper flakes for subtle heat.
Resting Time
Let the chicken rest in the glaze for 2-3 minutes off heat before serving. This allows flavors to meld. The sauce will thicken slightly as it cools, coating each piece beautifully.
Garnish Timing
Toast your sesame seeds just before serving for maximum crunch. Slice green onions thinly on a bias for elegant presentation. These final touches elevate the dish significantly. ✨
Nutrition Facts
Frequently Asked Questions
Can I use chicken breast instead of thighs?
Yes, but thighs stay juicier. If using breast, reduce cooking to 4-5 minutes per side to prevent dryness. Always check internal temp reaches 165°F.
How do I make the glaze thicker?
Simmer longer after adding the cornstarch slurry. For extra thickness, mix 1 tsp cornstarch with 1 tbsp water and stir in. Cook until glossy and coats a spoon.
Can I prepare this ahead of time?
Cook rice and chicken separately, then store in the fridge for up to 3 days. Reheat chicken in the microwave with a splash of water to loosen the glaze. Assemble just before serving.
What if my sauce is too salty?
Balance it with 1 tsp honey or 1 tbsp water. Stir well and taste. The cornstarch slurry will also slightly dilute the saltiness as it thickens.

- Jollof Rice Sauce Recipe: West African Tomato and Spice Infusion - September 25, 2026
- Japanese Rice Soup Recipe: Umami-Rich Comfort in a Bowl - September 25, 2026
- Homemade Cream Of Rice Recipe: Silk-Smooth Breakfast in Minutes - September 25, 2026