
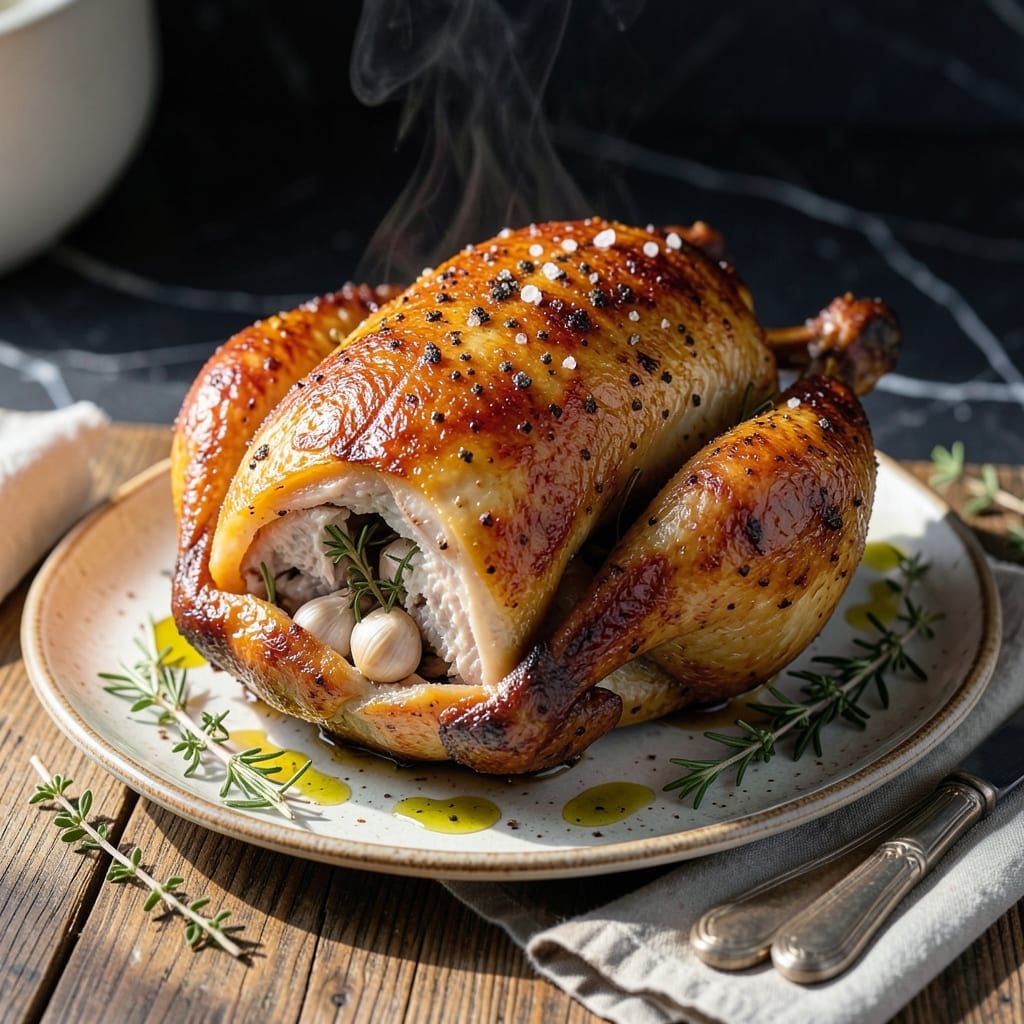
There’s a reason Jewish roast chicken has stood the test of generations—its golden crisp skin and deeply savory flavors make it unforgettable. This traditional method relies on simple techniques and time-honored seasoning to achieve perfection every time.
The secret lies in a dry brine and high-heat roasting, which guarantees juicy meat and that signature crackling skin. I’ve refined this approach to ensure consistent results, whether for a Friday night Shabbat dinner or a special family gathering.
What emerges from the oven is a bird with perfectly browned skin and tender, flavorful meat, infused with aromatic herbs and spices. The aroma alone signals a meal steeped in tradition and care.
Serve it with classic sides like roasted potatoes or a fresh green salad. This is a dish that brings people together.
Ingredients for Jewish Roast Chicken
A whole chicken and a handful of aromatic herbs. Simple, traditional, and deeply flavorful.
| Ingredient | Amount | Notes |
|---|---|---|
| Whole Chicken 🍗 | 4 lb | Pat dry, giblets removed |
| Kosher Salt 🧂 | 1 ½ tbsp | Diamond Crystal preferred for dry brine |
| Freshly Ground Black Pepper 🌶️ | 1 tsp | Coarse grind for texture |
| Garlic Cloves 🧄 | 6 cloves | Smashed, unpeeled |
| Fresh Thyme Sprigs 🌿 | 4 sprigs | Or 1 tsp dried thyme |
| Fresh Rosemary Sprigs 🍃 | 4 sprigs | Or 1 tsp dried rosemary |
| Lemon 🍋 | 1 whole | Halved for cavity |
| Onion 🧅 | 1 whole | Quartered for cavity |
| Olive Oil 🫒 | 2 tbsp | Extra-virgin for basting |
| Paprika 🌶️ | 1 tsp | Sweet variety for color |
| Dried Oregano 🌿 | 1 tsp | Mediterranean blend preferred |
| Bay Leaves 🍃 | 2 pieces | For aromatic depth |
The chicken quality is non-negotiable here. Kosher or organic birds from Whole Foods or Trader Joe’s yield the best results—look for plump, moist skin without blemishes. Dry brining (salt applied directly to skin 24 hours ahead) is key for that signature crispness. I’ve found Diamond Crystal kosher salt dissolves most evenly, but any fine kosher salt works in a pinch. The herbs should be fresh if possible (farmers market is ideal), but dried in a 1:3 ratio is acceptable.
No fresh thyme or rosemary? Dried at one-third the amount works fine—just crumble it between your fingers to release the oils. Swap paprika for smoked paprika if you want a deeper flavor. The lemon and onion in the cavity can be replaced with celery or fennel for variation. Olive oil is essential for basting, but avocado oil (with its high smoke point) is a solid substitute. For the garlic, pre-minced from a jar lacks the punch of fresh—smash the cloves yourself.
The chicken can rest uncovered in the fridge for 12-24 hours after dry brining. Leftovers keep for 3-4 days (though they’re rarely around that long). Reheat gently in the oven at 325°F to preserve moisture. The cavity aromatics can be composted, and the bones? Perfect for homemade stock.
Why You’ll Love This Recipe
- One Pan Magic: I toss the chicken with garlic, thyme, salt, and pepper, then let the oven do the work—no babysitting required.
- That Thyme Crust: Honestly, the crispy skin with those fragrant herbs and garlic? It’s the reason my family lingers at the table.
- Shabbat Ready: Between us, this is my go-to for Friday nights—impressive enough for guests, simple enough for a quiet dinner.
- Leftovers Gold: One roast chicken, three new meals: sandwiches, soup, or a quick hash. I’ll be real—sometimes I make it just for the extras.
Step-by-Step Instructions for Jewish Roast Chicken
Master this technique for perfectly crisp skin and deeply aromatic meat every time.
Step 1: Dry Brine and Season the Chicken
Pat the 4 lb Whole Chicken completely dry inside and out with paper towels. I emphasize this step because moisture prevents crispy skin. Season the chicken generously with 1.5 tbsp Kosher Salt and 1 tsp Freshly Ground Black Pepper, making sure to coat all surfaces, including the cavity.
Combine 1 tsp Paprika and 1 tsp Dried Oregano in a small bowl, then sprinkle this mixture evenly over the chicken. This dry rub adds color and depth of flavor. Let the chicken sit uncovered in the refrigerator for at least 1 hour, or up to 24 hours for maximum flavor penetration.
Step 2: Prepare the Aromatics for the Cavity
Preheat your oven to 425°F. While it heats, prepare the aromatics. Smash 6 cloves Garlic Cloves (leave the peels on for easier removal later) and place them in the chicken cavity. Halve the 1 whole Lemon and quarter the 1 whole Onion, then add these to the cavity along with the 4 sprigs Fresh Thyme Sprigs, 4 sprigs Fresh Rosemary Sprigs, and 2 pieces Bay Leaves.
These ingredients infuse the meat with bright, herbal notes as it roasts. The lemon also helps tenderize the chicken from the inside out. Secure the cavity opening with kitchen twine or skewers to keep everything contained.
Step 3: Truss and Begin Roasting
Truss the chicken legs together with kitchen twine and tuck the wings under the body. This compact shape ensures even cooking and prevents the wings from over-browning. Place the chicken breast-side up on a roasting rack set in a rimmed baking sheet.
Drizzle 2 tbsp Olive Oil over the chicken and rub it evenly across the skin. This not only helps with browning but also creates a barrier that locks in moisture. Roast the chicken in the preheated oven for 30 minutes before flipping it breast-side down.
Step 4: Finish Roasting and Rest
After 30 minutes, carefully flip the chicken breast-side down to ensure even browning. Roast for another 20-25 minutes, then flip it back breast-side up. Continue roasting for an additional 15-20 minutes, or until the skin is deep golden brown and the internal temperature reaches 165°F in the thickest part of the thigh.
Once done, transfer the chicken to a cutting board and tent loosely with foil. Let it rest for 15-20 minutes before carving. This rest allows the juices to redistribute, ensuring moist, flavorful meat in every bite.
Pro Tips For Making Jewish Roast Chicken
- Dry the Skin: Pat the chicken thoroughly dry with paper towels before seasoning—I learned this the hard way after my first few attempts came out steamed instead of crispy.
- Salt Under Skin: Gently loosen the skin over the breasts and thighs, then rub kosher salt directly on the meat; this guarantees seasoning all the way through, not just on the surface.
- Start Breast-Side Down: Roast the chicken breast-side down for the first 45 minutes, then flip it; this keeps the white meat juicy while the dark meat gets that perfect golden color.
- Rest Before Carving: Let the chicken rest 15 minutes under foil before slicing—sounds tedious but it keeps all those delicious juices from pooling on the cutting board.
Dietary Considerations for This Recipe
Kosher Compliance
This dish is naturally kosher when prepared with a certified kosher chicken. I source mine from Empire Kosher or Murray’s. The salt must be kosher-certified, like Diamond Crystal, and all produce should be checked for insects, per kosher guidelines. 💪
Gluten-Free Friendly
All ingredients in this recipe are inherently gluten-free, making it safe for those with celiac disease or gluten sensitivity. Just ensure your paprika and oregano are from dedicated gluten-free facilities to avoid cross-contamination.
Dairy-Free Naturally
This traditional roast chicken contains no dairy products, so it fits perfectly into a dairy-free or pareve diet. The olive oil and herbs provide all the flavor without any milk derivatives. It’s also safe for lactose-intolerant guests.
Low-Carb Option
With no added sugars or starchy ingredients, this dish aligns well with keto and low-carb diets. Each serving contains only 2-3 grams of net carbs, primarily from the lemon and onion used for aromatics. The protein content is excellent at about 40 grams per serving.
Allergen Considerations
This recipe is free from the top 8 allergens, including nuts, soy, and eggs. However, those with garlic allergies should omit the garlic cloves. Always verify that your spices are processed in allergen-free facilities.
Paleo Adaptation
For a paleo version, simply ensure all spices are pure with no additives. The olive oil, herbs, and chicken are all paleo-approved. This makes a wonderful centerpiece for a paleo Shabbat dinner. ✨
Nutrition Facts
Frequently Asked Questions
What’s the best way to get crispy skin?
Pat the chicken completely dry before seasoning, then let it sit uncovered in the fridge for 12-24 hours. Roast at 425°F for even browning.
Can I use a smaller or larger bird?
Adjust cooking time based on weight. For a 3 lb chicken, reduce roasting time by 10-15 minutes. For a 5 lb chicken, add 15-20 minutes and check internal temp.
Why rest the chicken before carving?
Resting for 15-20 minutes lets juices redistribute throughout the meat. Skipping this step can result in dry, less flavorful slices.
What if I don’t have fresh herbs?
Use dried herbs in a 1:3 ratio (1 tsp dried = 1 tbsp fresh). Crumble them to release oils, and add directly to the cavity or rub.

- Jollof Rice Sauce Recipe: West African Tomato and Spice Infusion - September 25, 2026
- Japanese Rice Soup Recipe: Umami-Rich Comfort in a Bowl - September 25, 2026
- Homemade Cream Of Rice Recipe: Silk-Smooth Breakfast in Minutes - September 25, 2026