
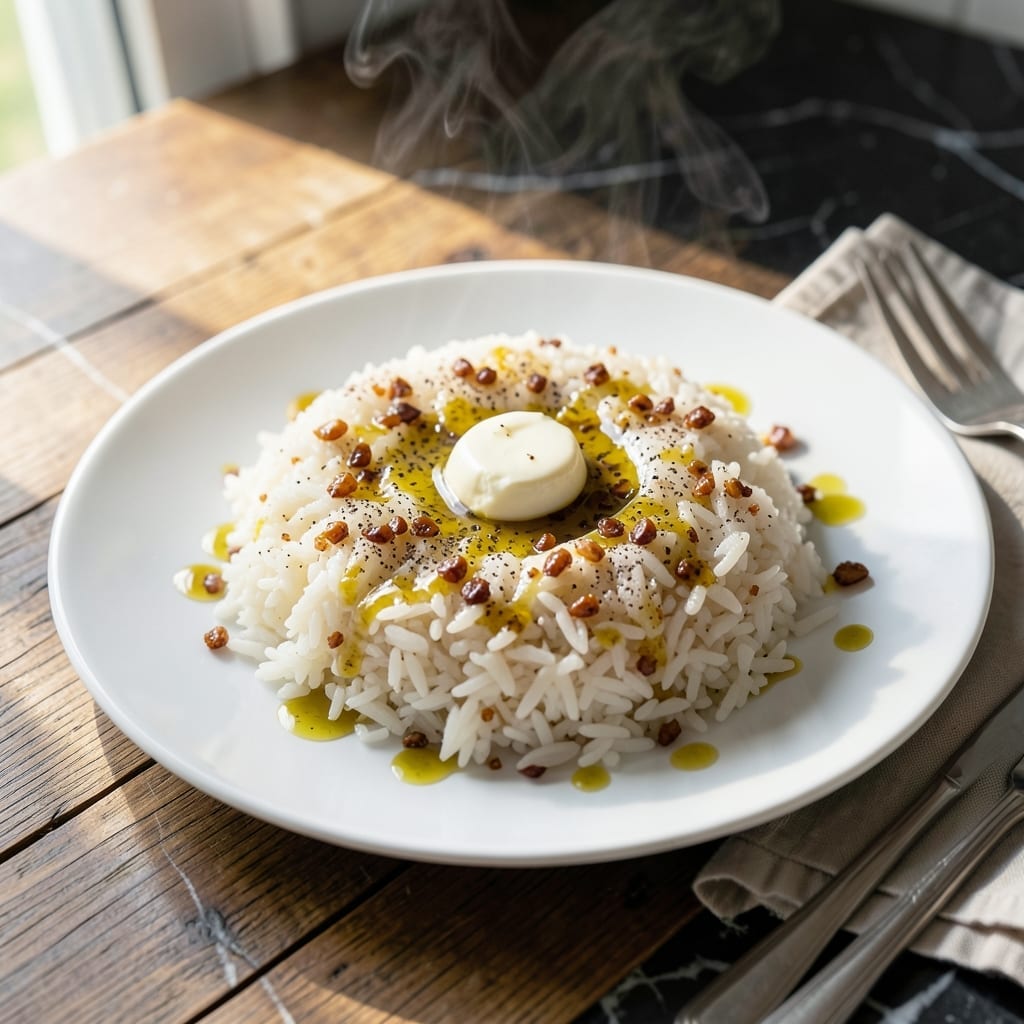
This Filipino favorite transforms day-old rice into a golden, fragrant side dish that pairs perfectly with any meal. The secret lies in the careful balance of garlic and oil, creating a rich aroma without overpowering the rice.
I’ve perfected this method to ensure every grain is evenly coated and crisp at the edges. The key is using cold rice and cooking it over medium heat until it develops that signature golden hue.
What you’ll get is a dish that’s both comforting and versatile—ideal for breakfast, lunch, or dinner. The garlic infuses the rice with a deep, savory flavor that’s hard to resist.
Serve it alongside fried chicken, grilled meats, or enjoy it on its own. This recipe stays true to the classic Jollibee style.
Ingredients for Jollibee Garlic Rice
Pantry staples and a handful of fresh ingredients for this fragrant, golden dish.
| Ingredient | Amount | Notes |
|---|---|---|
| Cooked White Rice 🍚 | 4 cups | Day-old, cold, preferably jasmine |
| Garlic Cloves 🧄 | 8 cloves | Finely minced for even flavor |
| Neutral Cooking Oil 🫒 | ½ cup | Vegetable or canola preferred |
| Unsalted Butter 🧈 | 2 tbsp | For richness and aroma |
| Salt 🧂 | 1 tsp | Adjust to taste at end |
| Ground Black Pepper 🌶️ | ½ tsp | Freshly ground preferred |
| Soy Sauce 🥣 | 1 tbsp | Light or all-purpose variety |
| Granulated Sugar 🍚 | ½ tsp | Balances savory notes |
| Green Onions 🧅 | 2 whole | Thinly sliced for garnish |
| Chicken Bouillon Cube 🍲 | 1 whole | Optional, enhances depth |
The rice is everything here. Day-old jasmine from the fridge (the cold, dry kind) fries up crispest. I grab mine from any Asian market—they’ve got the right texture. Don’t skimp on the garlic—8 cloves sounds like a lot, but it mellows into sweet, golden perfection. Use fresh, firm cloves (the paper-white ones, not the green sprouting kind).
No jasmine rice? Long-grain white works fine—just avoid instant. Out of fresh garlic? Garlic powder at one-eighth the amount (so about 1 tsp here), but fresh is way better. Vegetable oil can be swapped for corn or peanut oil. The bouillon cube? Skip it if you’re vegetarian—soy sauce adds enough umami.
Leftover rice keeps in the fridge for 3-4 days—perfect for meal prep. The fried rice itself is best eaten fresh but reheats okay in a skillet with a splash of water. Doesn’t freeze well (gets mushy).
Why You’ll Love This Recipe
- 5-Minute Upgrade: I just toss day-old rice with minced garlic, butter, and a pinch of salt—no fancy steps, just big flavor.
- Garlic Butter Bliss: The sizzling garlic in butter makes the rice taste like it’s straight from Jollibee, only fresher.
- Breakfast or Midnight Snack: Honestly, it’s my go-to whether I’m pairing it with eggs at dawn or devouring it solo after a long day.
- Pantry Hero: Between us, it’s the cheapest way to turn leftover rice into something everyone fights over.
Step-by-Step Instructions for Golden Garlic Fried Rice
Here’s my foolproof method for achieving that signature crispy, aromatic result at home.
Step 1: Prep the Garlic and Rice
Finely mince all 8 cloves Garlic Cloves until they’re nearly paste-like—this ensures even flavor distribution throughout the dish. I’ve found that pressing down with the knife blade while rocking it back and forth gives the best texture.
Break up the 4 cups Cooked White Rice with your hands to separate any clumps. Day-old rice works best because it’s drier and will fry up crispier instead of turning mushy. If using fresh rice, spread it on a tray and let it sit uncovered for 30 minutes to dry out slightly.
Step 2: Infuse the Oil with Garlic Flavor
Heat the 0.5 cup Neutral Cooking Oil in a large wok or skillet over medium heat. When it shimmers (but isn’t smoking), add the minced garlic. Cook for 2-3 minutes, stirring constantly, until the garlic turns light golden brown.
Watch closely—garlic burns easily. You’ll smell its aroma intensify as it cooks. Once golden, immediately remove the pan from heat and strain the garlic bits from the oil using a fine-mesh sieve, reserving both the oil and the crispy garlic separately. The oil will carry that incredible garlic flavor throughout the rice.
Step 3: Fry the Rice to Crispy Perfection
Return the garlic-infused Neutral Cooking Oil to the pan over medium-high heat. Add the rice and press it down with a spatula. Let it cook undisturbed for 3-4 minutes until the bottom layer becomes golden brown and crispy.
Break up the rice and stir-fry for another 2-3 minutes. Add the 2 tbsp Unsalted Butter, 1 tsp Salt, 0.5 tsp Ground Black Pepper, 1 tbsp Soy Sauce, and 0.5 tsp Granulated Sugar. Stir well to coat every grain evenly. The butter adds richness while the sugar balances the savory notes.
Step 4: Add the Crispy Garlic and Finish
Stir the reserved crispy garlic back into the rice. If using, crumble the 1 whole Chicken Bouillon Cube over the rice and mix well—this adds depth to the flavor. Cook for another 1-2 minutes to allow all the flavors to meld together.
Taste and adjust seasoning if needed. The rice should be crispy in spots with a beautiful golden color throughout. The garlic flavor should be prominent but not overpowering, with each grain coated in that delicious seasoned oil.
Step 5: Garnish and Serve Immediately
Transfer the garlic rice to a serving dish and top with thinly sliced 2 whole Green Onions. The green onions add a fresh contrast to the rich, savory rice. Serve immediately while hot and crispy.
This dish is best enjoyed fresh from the pan when the garlic is still fragrant and the rice has that perfect crispy texture. The contrast between the crispy bits and the tender grains is what makes it so addictive.
Pro Tips For Making Jollibee Garlic Rice
- Use Day-Old Rice: Fresh rice is too moist and will turn mushy—I learned this the hard way after my first batch turned into garlic porridge. Day-old, cold rice from the fridge holds its shape and crisps up perfectly.
- Low and Slow Garlic: Cook the minced garlic on low heat in the oil for 3-4 minutes until golden, not brown. After burning a few batches, I finally figured out that high heat makes it bitter fast.
- Salt the Butter: Since you’re using unsalted butter, add a pinch of salt to it as it melts into the rice—more than you think, especially if serving with savory dishes. My grandmother swore by this, and she was right.
- Press the Garlic: Skip mincing if you’re short on time—just smash the garlic cloves with the flat of your knife, peel, and roughly chop. Sounds weird, but it works and saves 5 minutes.
Creative Variations of jollibee garlic rice
Spicy Kick Variation
Add 1 finely chopped siling labuyo (Filipino bird’s eye chili) or ½ tsp red chili flakes when frying the garlic. This gives your rice a subtle heat that pairs well with the savory notes. I love this version with fried eggs on top for a spicy silog twist. 🌶️
Cheesy Indulgence
Stir in ½ cup grated Edam cheese or ¼ cup parmesan during the final minute of cooking. The cheese melts beautifully into the warm rice, creating a gooey, savory treat. This is my kids’ favorite way to enjoy garlic rice.
Vegetable Boost
Add ½ cup diced carrots and ½ cup peas when stir-frying the rice. Cook until the vegetables are tender, about 3-4 minutes. This makes the dish more colorful and nutritious while keeping that signature garlic flavor.
Meat Lover’s Version
Incorporate ½ cup diced ham or crumbled longganisa (Filipino sausage) when adding the rice to the pan. Cook until the meat is heated through, about 2-3 minutes. This protein-packed variation turns the side into a complete meal. 💪
Egg-Cellent Addition
Push the rice to one side of the pan and scramble 2 eggs in the empty space. Once cooked, mix the eggs into the rice. This adds protein and makes the dish more filling. I often do this for a quick breakfast.
Extra Crispy Style
For restaurant-style crispiness, spread the cooked rice on a baking sheet and broil for 2-3 minutes under high heat. Watch closely to prevent burning. This gives you that coveted crispy top layer that everyone loves.
Nutrition Facts
Frequently Asked Questions
Can I use fresh rice instead of day-old?
Fresh rice has more moisture, which can make your dish mushy. Spread it on a tray and let it dry uncovered for 30 minutes to remove excess moisture before frying.
Why strain the garlic from the oil?
Straining prevents the garlic from overcooking and turning bitter. The oil keeps the flavor while the crispy garlic is added back at the end for texture.
Can I make this in advance?
For best results, serve immediately while crispy. Leftover rice keeps for 3-4 days in the fridge but loses its signature texture when reheated.
What’s the best oil to use?
Neutral oils like vegetable or canola work best. Avoid olive oil, as its strong flavor can overpower the garlic. Use ½ cup for proper coating.

- Mujadara Rice and Lentils Recipe: Earthy Spiced Lentils With Caramelized Onions - November 1, 2026
- Naija Fried Rice Recipe: Street-Style Spice With Veggie Crunch - November 1, 2026
- Mushy Rice Recipe: Fluffy Grains Transformed in Minutes - November 1, 2026