
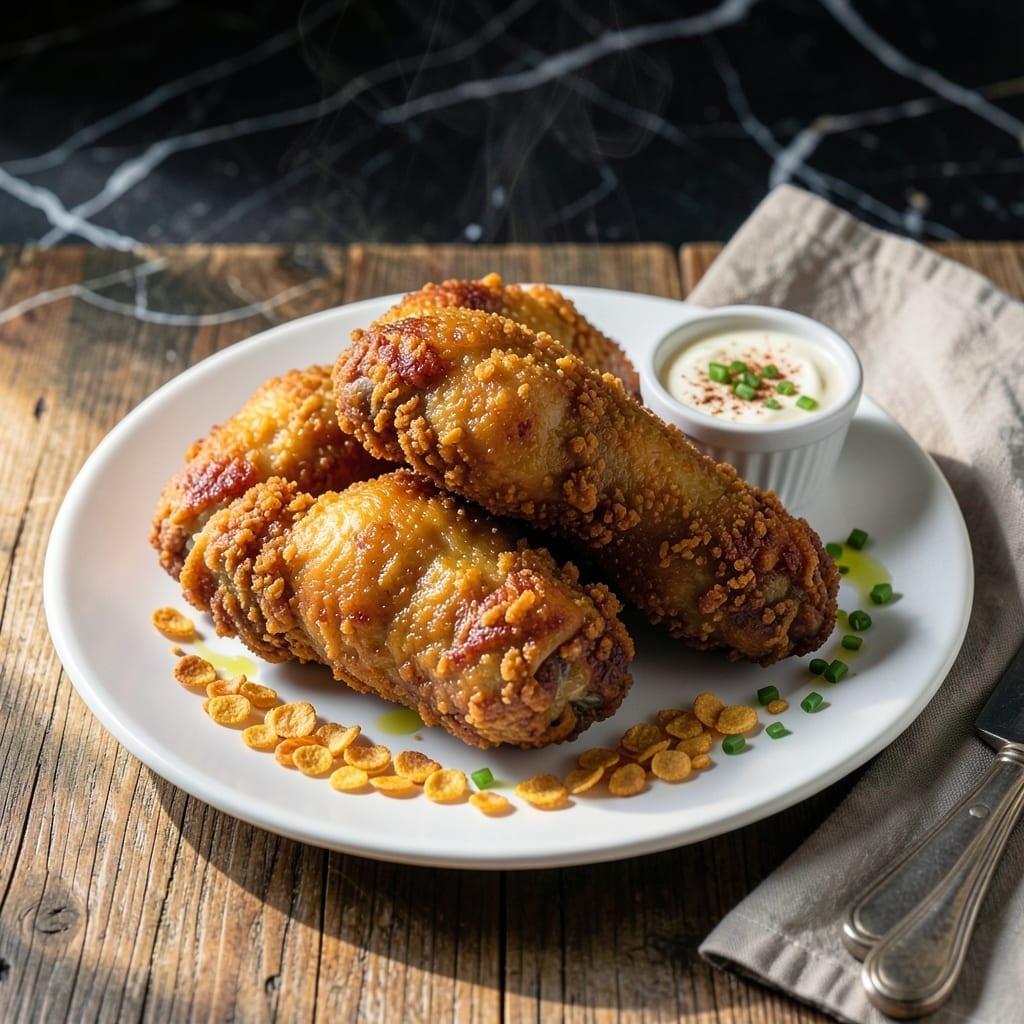
This recipe transforms classic fried chicken with a secret ingredient that delivers an unforgettable crunch. The crushed cereal coating creates a golden, crispy exterior that stays perfectly textured long after frying.
I developed this method to bring restaurant-quality results to home kitchens. The cereal adds a subtle sweetness and extra crunch that sets it apart from traditional breading, while maintaining that familiar homestyle flavor.
Each bite offers tender, juicy chicken encased in a shatteringly crisp coating. The technique is simple but precise, ensuring consistent results every time you make it.
The final product combines nostalgic comfort with an elevated texture that will impress at any dinner table. This approach proves that small changes can create extraordinary dishes.
Ingredients for Kellogg’s Fried Chicken
Eleven ingredients create that golden, shatteringly crisp coating with homestyle flavor.
| Ingredient | Amount | Notes |
|---|---|---|
| Chicken Thighs 🍗 | 2 ½ lb | Boneless, skinless, cut into strips |
| Kellogg's Corn Flakes Cereal 🥣 | 4 cups | Crushed to fine crumbs |
| All-Purpose Flour 🌾 | 1 cup | For initial dredging |
| Large Eggs 🥚 | 2 whole | Beaten for binding |
| Buttermilk 🥛 | 1 cup | Full-fat for best texture |
| Vegetable Oil 🫒 | 2 cups | For deep frying |
| Salt 🧂 | 1 ½ tsp | Diamond Crystal kosher preferred |
| Black Pepper 🌶️ | 1 tsp | Freshly ground |
| Garlic Powder 🧄 | 1 tsp | For seasoning flour |
| Onion Powder 🧅 | 1 tsp | For seasoning flour |
| Paprika 🌶️ | 1 tsp | Sweet or smoked variety |
| Cayenne Pepper 🔥 | ¼ tsp | Adjust for heat preference |
The cereal is the hero here. Kellogg’s Corn Flakes crush to perfect crumbs with just the right sweetness and crunch. Most grocery stores carry them—Target or Walmart have the best prices. For the chicken, thighs stay juicier than breasts during frying. Look for boneless, skinless to save prep time. Buttermilk matters too—full-fat gives the crispest coating, though low-fat works in a pinch.
No buttermilk? Whole milk plus 1 tbsp vinegar gets you close. Fresh out of corn flakes? Rice Krispies work but lack the buttery flavor. For gluten-free, swap the flour for cornstarch and use gluten-free cereal. The spices can flex—skip the cayenne for kid-friendly, or add smoked paprika for depth. Vegetable oil is ideal for frying, but peanut oil works too if you’ve got it.
The crushed cereal keeps in an airtight container for 1 week. Chicken must be fried fresh—no pre-breading. Leftovers? They reheat best in a 375°F oven for 15 minutes to restore crispness. Store cooked chicken in the fridge for up to 4 days.
Why You’ll Love This Recipe
- One Bowl Wonder: I love that I just crush the Corn Flakes, mix with flour, and dip—no complicated steps or piles of dishes.
- Crispy Perfection: The buttermilk and Corn Flakes combo gives that golden, crunchy coating that stays crispy way longer than regular fried chicken.
- Feeds the Crew: Honestly, it’s my go-to for Sunday dinner, potlucks, or even a quick weeknight win when everyone’s starving.
- Budget Stretcher: Chicken thighs are cheap, and a box of Corn Flakes goes a long way—leftovers taste just as good the next day.
Step-by-Step Instructions for Kellogg’s Fried Chicken
Here’s the method. Straightforward, tested, works every time.
Step 1: Season and Dredge the Chicken
First, pat the 2.5 lb Chicken Thighs completely dry with paper towels to ensure maximum crunch. In a shallow dish, combine the 1 cup All-Purpose Flour, 1.5 tsp Salt, 1 tsp Black Pepper, 1 tsp Garlic Powder, 1 tsp Onion Powder, 1 tsp Paprika, and 0.25 tsp Cayenne Pepper.
Dredge each chicken strip in the seasoned flour, pressing firmly to create an even, thorough coating. Shake off any excess—this initial layer acts as the perfect adhesive for the next step. You’ll notice the flour starts to cling immediately, creating that essential base for crispiness.
Step 2: Prepare the Corn Flake Crust
Crush the 4 cups Kellogg’s Corn Flakes Cereal into fine crumbs using a food processor or rolling pin. Transfer them to a separate shallow dish. In another bowl, whisk together the 2 whole Large Eggs and 1 cup Buttermilk until smooth and well combined.
Dip each floured chicken strip into the egg mixture, allowing any excess to drip off for 5 seconds. Then coat it thoroughly in the crushed corn flakes, pressing gently to ensure full coverage. The corn flakes should adhere evenly, giving you that signature crunch. Place the coated strips on a wire rack to rest for 10 minutes—this helps the coating set.
Step 3: Fry to Golden Perfection
Heat the 2 cups Vegetable Oil in a deep, heavy-bottomed pot to 350°F. Use a thermometer for precision—the temperature must stay consistent. Carefully lower the chicken strips into the hot oil, working in batches to avoid crowding the pot.
Fry for 6-8 minutes, turning occasionally, until the coating is deep golden brown and the internal temperature reaches 165°F. The oil should bubble steadily but not violently—this indicates proper frying temperature. Drain the fried chicken on a wire rack or paper towels to maintain crispiness.
Step 4: Rest and Serve
Let the chicken rest for 5 minutes before serving. This brief pause allows the juices to redistribute, ensuring tender meat inside that crispy, golden exterior. The corn flake crust will stay crunchy if you avoid stacking the pieces—keep them in a single layer.
Serve immediately while hot. Each piece should have an audibly crisp coating that gives way to juicy, flavorful chicken within. The combination of seasoned flour and corn flakes delivers that perfect balance of texture and taste.
Pro Tips For Making Kellogg’S Fried Chicken
- Crush the Cereal: Pulse the Corn Flakes in a food processor until they’re coarse crumbs—I learned this the hard way after picking crunchy bits out of my teeth. Fine crumbs coat the chicken better and fry up crispier.
- Soak Overnight: Let the chicken thighs bathe in the buttermilk for at least 12 hours. Sounds like a hassle, but it tenderizes the meat and guarantees the crust sticks.
- Double Dredge: After the buttermilk, dip in flour, then back in buttermilk, then into the Corn Flake mix. My grandmother swore by this, and she was right: it builds a thicker, crunchier crust.
- Fry at 350°F: Keep your oil at a steady 350°F—any hotter and the Corn Flakes burn before the chicken cooks through. After burning three batches, I finally figured out a thermometer is non-negotiable.
Storing and Reheating This Dish
Refrigerator Storage
Let the chicken cool completely before storing—this prevents condensation from making the coating soggy. I use glass containers with tight lids to keep it fresh. It’ll stay good in the fridge at 40°F or below for up to 4 days. 💡
Freezer Storage
For longer storage, freeze in a single layer on a baking sheet first, then transfer to heavy-duty freezer bags. Squeeze out all air to prevent freezer burn. It’ll keep for 2-3 months without losing much texture.
Oven Reheating
Preheat your oven to 375°F and spread pieces on a wire rack over a baking sheet. Heat for 15-20 minutes, flipping halfway. This method restores crispness better than any other.
Air Fryer Method
For quick reheating, use your air fryer at 375°F for 6-8 minutes. Shake the basket halfway through. I use my Ninja Foodi for this—it revives the crunch perfectly.
Avoid Microwaving
The microwave will make the coating soft and rubbery. If you must, use 50% power in 30-second bursts, but even then, the texture won’t be the same.
Pro Tip
Reheat directly from frozen by adding 5-10 minutes to the oven time. No need to thaw first—this actually helps maintain crispness. ❄️
Nutrition Facts
Frequently Asked Questions
Can I use chicken breasts instead of thighs?
Yes, but thighs stay juicier. If using breasts, reduce frying time to 5-6 minutes to prevent dryness. Pound them to even thickness for consistent cooking.
How do I crush the corn flakes evenly?
Use a food processor for fine, consistent crumbs. No processor? Seal flakes in a bag and crush with a rolling pin. Avoid large chunks for even coating.
Why rest the chicken before frying?
Resting for 10 minutes helps the coating adhere better. This prevents breading from falling off during frying and ensures maximum crunch.
Can I bake this instead of frying?
Bake at 400°F for 20-25 minutes on a wire rack. Spray with oil for crispiness, but frying gives the best texture. Turn halfway through.

- Jollof Rice Sauce Recipe: West African Tomato and Spice Infusion - September 25, 2026
- Japanese Rice Soup Recipe: Umami-Rich Comfort in a Bowl - September 25, 2026
- Homemade Cream Of Rice Recipe: Silk-Smooth Breakfast in Minutes - September 25, 2026