
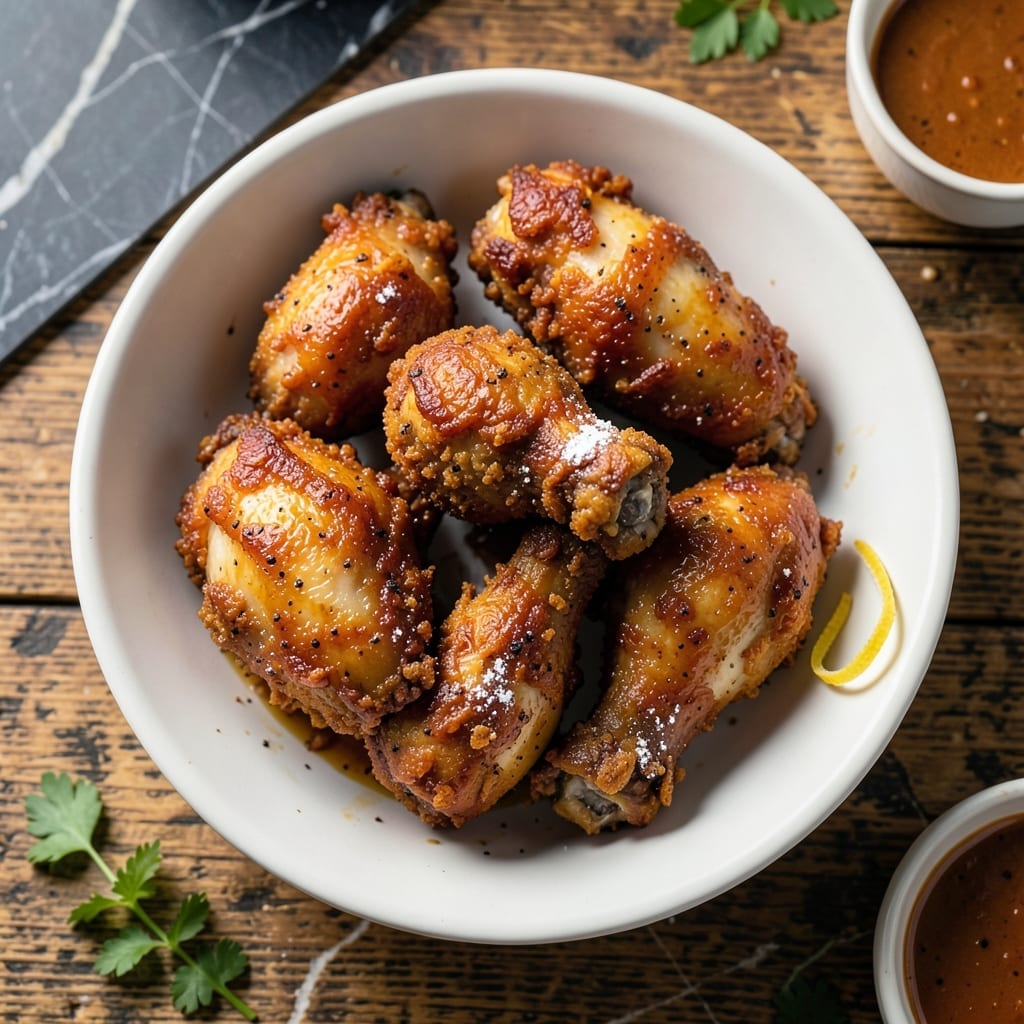
This homemade fried chicken delivers the crispy, flavor-packed experience you expect from the classic restaurant version. After years of testing, I’ve perfected a method that brings that signature herb-infused crust to your kitchen.
The secret lies in the 11-herb and spice blend, which creates a perfectly seasoned coating that stays crispy long after frying. The double-dipping technique ensures every bite is packed with flavor and texture.
With a few simple ingredients and careful frying, you’ll achieve golden, crunchy chicken that rivals the original. The aroma alone will transport you to your favorite KFC memory, but the taste proves homemade can be just as good.
Serve hot for the best experience, with all the satisfaction of takeout but made in your own kitchen.
Ingredients for Kfc Homemade Fried Chicken
Pantry raid plus a quick butcher stop. Nothing exotic, just flavor-packed essentials for that signature crust.
| Ingredient | Amount | Notes |
|---|---|---|
| Chicken Thighs 🍗 | 2 ½ lb | Boneless, skin-on preferred |
| Chicken Drumsticks 🍗 | 1 ½ lb | Skin-on for extra crispiness |
| All-Purpose Flour 🌾 | 2 cups | For initial dredging |
| Large Eggs 🥚 | 2 whole | For egg wash binder |
| Buttermilk 🥛 | 1 cup | For marinating chicken |
| Salt 🧂 | 1 tbsp | Diamond Crystal kosher preferred |
| Black Pepper 🌶️ | 1 tbsp | Freshly ground for best flavor |
| Garlic Powder 🧄 | 1 tbsp | Fine grind for even distribution |
| Onion Powder 🧅 | 1 tbsp | Freshly ground if possible |
| Paprika 🌶️ | 1 tbsp | Sweet or smoked variety |
| Dried Thyme 🌿 | 1 tsp | Crushed between fingers |
| Dried Basil 🍃 | 1 tsp | Rubbed to release oils |
| Dried Oregano 🌿 | 1 tsp | Mediterranean variety preferred |
| Celery Salt 🧂 | 1 tsp | Essential for KFC flavor |
| Ground Ginger 🌿 | ½ tsp | Freshly ground if possible |
| White Pepper 🌶️ | ½ tsp | For authentic KFC taste |
| MSG 🧂 | ½ tsp | Optional but traditional |
| Peanut Oil 🫒 | 4 cups | For deep frying |
The chicken is everything here. Thighs and drumsticks give you the juiciest, most flavorful results—avoid breasts, they dry out. I grab mine from Costco when they’ve got the skin-on, bone-in packs (cheaper and tastier). The buttermilk marinade is non-negotiable—full-fat for maximum tenderness. If your grocery store doesn’t carry it, whole milk plus a splash of vinegar works in a pinch.
No buttermilk? Plain yogurt thinned with milk gets you close. Missing celery salt? Mix salt plus a pinch of celery seed—not quite the same, but it’ll do. The MSG is traditional (that’s the umami secret), but skip it if you’re avoiding additives. For the oil, peanut oil’s high smoke point is ideal, but canola or vegetable oil works too. Don’t use olive oil—it’ll burn.
Marinate the chicken overnight for maximum flavor. The coating keeps in a sealed container at room temp for up to 2 weeks. Leftovers? They reheat surprisingly well in a 350°F oven for 10-12 minutes—almost as crispy as fresh.
Why You’ll Love This Recipe
- No-Fuss Coating: I just dip the chicken in buttermilk, roll it in flour, and fry—no complicated steps or rare ingredients.
- That KFC Crunch: The buttermilk soak makes the meat tender while the flour gives it that crispy, golden crust I crave.
- Feeds the Crowd: One batch makes enough for a family dinner, and honestly, it disappears faster than I can fry it.
- Budget Winner: Chicken thighs and drumsticks are cheap, and this recipe turns them into something restaurant-worthy.
Step-by-Step Instructions for KFC-Style Fried Chicken
Here’s the method I use to achieve that signature crispy coating with juicy, flavorful meat every time.
Step 1: Marinate the Chicken in Buttermilk
Place the 2.5 lb Chicken Thighs and 1.5 lb Chicken Drumsticks in a large bowl. Pour the 1 cup Buttermilk over the chicken, ensuring all pieces are fully submerged. Cover and refrigerate for at least 4 hours, or overnight for maximum tenderness.
The buttermilk tenderizes the meat while adding a subtle tang that balances the richness of the coating. Don’t skip this step—it’s the secret to juicy chicken that stays moist even after frying.
Step 2: Prepare the Signature 11-Herb Seasoning Blend
In a large shallow dish, whisk together the 2 cups All-Purpose Flour, 1 tbsp Salt, 1 tbsp Black Pepper, 1 tbsp Garlic Powder, 1 tbsp Onion Powder, 1 tbsp Paprika, 1 tsp Dried Thyme, 1 tsp Dried Basil, 1 tsp Dried Oregano, 1 tsp Celery Salt, 0.5 tsp Ground Ginger, 0.5 tsp White Pepper, and 0.5 tsp MSG.
This blend is the heart of the flavor. I crush the dried herbs between my fingers as I add them to release their oils and ensure even distribution throughout the flour.
Step 3: Create the Egg Wash and Dredge the Chicken
In a separate bowl, beat the 2 whole Large Eggs until well combined. Remove the chicken from the buttermilk, letting any excess drip off, and dip each piece first into the egg wash, then into the seasoned flour mixture.
Press the flour firmly onto the chicken to ensure an even, thick coating. For extra crispiness, I like to double-dip each piece—back into the egg wash and then the flour mixture again. Place the coated chicken on a wire rack and let it rest for 10-15 minutes to help the coating adhere.
Step 4: Fry to Golden Perfection
Heat the 4 cups Peanut Oil in a deep, heavy-bottomed pot or Dutch oven to 350°F. Use a deep-fry thermometer to monitor the temperature—it should stay steady between 340-350°F for even cooking.
Fry the chicken in batches to avoid overcrowding the pot, which can lower the oil temperature and lead to greasy results. Cook the chicken for 12-15 minutes, turning occasionally, until the coating is deep golden brown and the internal temperature reaches 165°F.
Step 5: Drain and Rest Before Serving
Transfer the fried chicken to a wire rack set over a baking sheet to drain excess oil. This allows air to circulate around the chicken, keeping it crispy instead of soggy. Let the chicken rest for 5-10 minutes before serving.
This resting period allows the juices to redistribute throughout the meat, ensuring every bite is flavorful and tender. Serve hot for the ultimate crispy experience.
Pro Tips For Making Kfc Homemade Fried Chicken
- Double-Dip the Chicken: After the first pass through flour, let the pieces rest 5 minutes before dipping in buttermilk and flour again—this builds the shatteringly crisp crust KFC is known for.
- Use Cold Chicken: Pat the thighs and drumsticks dry, then chill them 30 minutes before coating so the buttermilk clings better and the breading stays put during frying.
- Skip the Overcrowding: Fry in batches with at least an inch between pieces, or the oil temp drops and you’ll end up with greasy, soggy chicken instead of that golden crunch.
- Rest Before Serving: Give the fried chicken 5 minutes on a rack after frying—this keeps the crust crisp while the juices settle, so every bite is moist inside and crunchy outside.
Troubleshooting This Dish
Oil Temperature Issues
If your chicken absorbs too much oil, your oil likely wasn’t hot enough. Heat the peanut oil to exactly 350°F before adding chicken, and maintain between 340-350°F. I use a candy thermometer clipped to the pot for accuracy. 🌡️
Coating Falls Off
This usually happens if the chicken is too wet when dredging. Pat pieces dry with paper towels after the buttermilk soak. Also, let the coated chicken rest for 10-15 minutes before frying to help the flour adhere properly.
Uneven Cooking
Overcrowding the pot lowers the oil temperature. Fry in batches with space between pieces. Dark meat like thighs and drumsticks needs 12-15 minutes—don’t rush it. Use a meat thermometer to check for 165°F internal temperature.
Soggy Crust
Drain fried chicken on a wire rack, not paper towels, to allow air circulation. If storing, keep pieces in a single layer on the rack. Reheat in a 350°F oven for 10-12 minutes to revive crispiness. Never cover while warm—trapped steam = soggy coating.
Bland Flavor
Double-check your seasoning blend measurements. The 11-herb mix needs exact ratios—don’t skimp on celery salt or MSG. Crush dried herbs between your fingers to release their full flavor. Taste your flour mix before dredging—it should be bold and aromatic.
Greasy Texture
This often means the oil was too cool or the chicken wasn’t drained properly. After frying, let pieces sit on the rack for 5-10 minutes. If the oil was too cool, increase heat slightly and test with a small piece of bread—it should sizzle immediately and brown in 30-40 seconds.
Nutrition Facts
Frequently Asked Questions
Can I use chicken breasts instead of thighs and drumsticks?
It’s best to stick with thighs and drumsticks for juicier results. Chicken breasts tend to dry out when fried. If you must use them, reduce frying time to 10-12 minutes and brine them first.
Why is buttermilk important in the marinade?
Buttermilk tenderizes the meat and adds a subtle tang. Its acidity breaks down proteins, keeping the chicken moist during frying. Don’t skip this step—it’s key to the texture!
Can I bake this instead of frying?
For a lighter version, bake at 400°F for 25-30 minutes. However, the crust won’t be as crispy. For best results, finish under the broiler for 2-3 minutes.
How do I keep the coating from falling off?
Pat the chicken dry after marinating, then let the coated pieces rest for 10-15 minutes before frying. This helps the flour adhere properly.

- Jollof Rice Sauce Recipe: West African Tomato and Spice Infusion - September 25, 2026
- Japanese Rice Soup Recipe: Umami-Rich Comfort in a Bowl - September 25, 2026
- Homemade Cream Of Rice Recipe: Silk-Smooth Breakfast in Minutes - September 25, 2026