
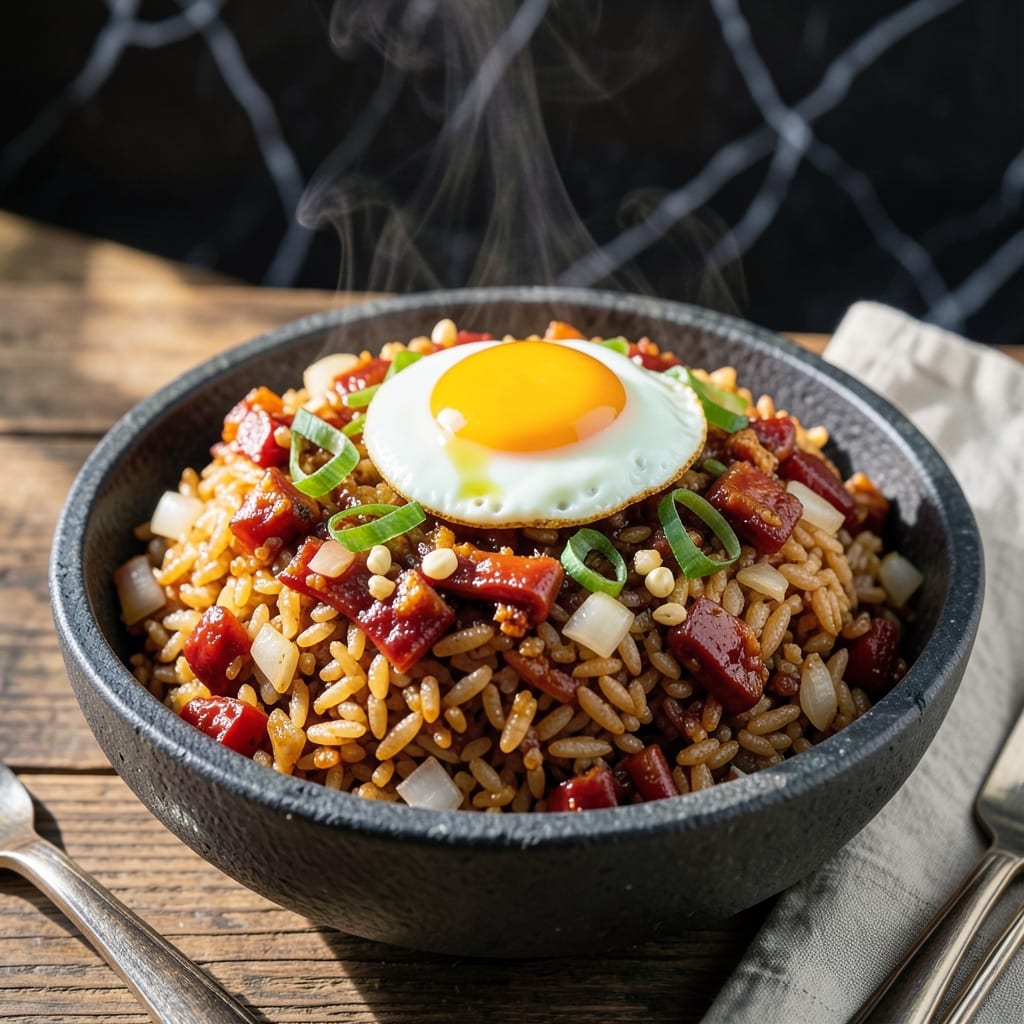
There’s a reason kimchi fried rice remains a Korean staple—it transforms simple ingredients into a dish with bold, complex flavors. This version delivers the perfect balance of fermented spice and texture.
The key is using well-aged kimchi for maximum tang and depth. Cooking it at high heat ensures the rice gets those crispy edges while the kimchi caramelizes into sweet, spicy perfection.
What you get is a dish where every bite offers contrast: the crunch of golden rice, the chew of fermented kimchi, and the richness of egg binding it all together.
Ready in 20 minutes, this is comfort food that doesn’t compromise on authentic taste.
Ingredients for Kimchi Fried Rice Recipe Maangchi
Bold fermented flavors start with well-aged kimchi and pantry staples for authentic Korean taste.
| Ingredient | Amount | Notes |
|---|---|---|
| Well-Aged Kimchi 🥬 | 2 cups | Chopped, with liquid reserved |
| Cooked Short-Grain Rice 🍚 | 4 cups | Day-old preferred for texture |
| Vegetable Oil 🫒 | 2 tbsp | High smoke point required |
| Garlic Cloves 🧄 | 4 cloves | Minced for aromatic base |
| Small Onion 🧅 | 1 whole | Diced, white or yellow |
| Gochujang 🌶️ | 1 tbsp | Korean red pepper paste |
| Soy Sauce 💧 | 2 tbsp | Low-sodium preferred |
| Granulated Sugar 🍚 | 1 tsp | Balances kimchi acidity |
| Large Eggs 🥚 | 4 whole | For topping individual servings |
| Green Onions 🌱 | 4 whole | Thinly sliced for garnish |
| Sesame Oil 🫒 | 1 tsp | For finishing aroma |
| Toasted Sesame Seeds 🌰 | 1 tsp | Garnish for texture |
| Kosher Salt 🧂 | ½ tsp | Adjust to taste |
The kimchi is non-negotiable—Mother-in-Law’s or Sinto brands (found at H Mart or Korean markets) offer the right balance of sour and spicy. Use the chop with plenty of liquid; that’s where the umami lives. For rice, short-grain like Calrose gives you the sticky texture that crisps up beautifully. Don’t use freshly cooked rice—it’ll turn to mush under high heat (day-old is ideal).
No gochujang? Sriracha plus miso paste gets you close but lacks depth. Out of kimchi liquid? Replace with 1 tsp rice vinegar mixed with 1 tsp water. For extra protein, add diced Spam or tofu (a Korean staple in this dish). The sugar can be omitted if your kimchi is already sweet, but it helps caramelization. Eggs can be fried sunny-side up or scrambled right into the rice.
Leftovers keep 3-4 days refrigerated, but the rice loses crispness. Reheat in a skillet with a drizzle of oil to revive the texture. Freezing isn’t recommended—the kimchi softens too much. Always cook this high and fast to get those crispy edges Maangchi is known for.
Why You’ll Love This Recipe
- One Pan Wonder: I just dump everything in my skillet—kimchi, rice, garlic—and dinner appears like magic. No fancy tools, no fuss.
- Umami Bomb: The aged kimchi and garlic hit that sweet-spicy-savory spot that makes my taste buds do a happy dance.
- Weeknight Rescue: Between us, this is my 9 p.m. “forgot to plan dinner” lifesaver. (Yes, even on a Tuesday night)
- Leftovers Love: I make extra on purpose. That crispy kimchi edge the next day? Even better than fresh.
Step-by-Step Instructions for Kimchi Fried Rice
Here is the proven method to achieve perfectly crispy edges and balanced fermented flavors.
Step 1: Prepare and Sauté Aromatics
Heat 2 tbsp Vegetable Oil in a large skillet or wok over medium-high heat until shimmering. Add the 1 whole Small Onion, diced, and sauté for 3-4 minutes until the pieces begin to soften and turn translucent at the edges.
Add the 4 cloves Garlic Cloves, minced, and stir constantly for 30 seconds until fragrant. Be careful not to let the garlic burn—it should turn light golden but not dark brown. This aromatic base builds the foundation of flavor for your dish.
Step 2: Incorporate Kimchi and Seasonings
Add the 2 cups Well-Aged Kimchi, chopped, with its liquid to the skillet. Cook for 4-5 minutes, stirring occasionally, until the kimchi softens and the liquid reduces slightly. The kimchi should sizzle and develop a deeper, slightly caramelized aroma.
Stir in the 1 tbsp Gochujang, 2 tbsp Soy Sauce, 1 tsp Granulated Sugar, and 0.5 tsp Kosher Salt. Mix well to coat the kimchi evenly with the seasonings. The gochujang will deepen the red color, and the sugar balances the kimchi’s tangy sharpness.
Step 3: Add Rice for Crispy Texture
Add the 4 cups Cooked Short-Grain Rice to the skillet, breaking up any clumps with your spatula. Spread the mixture evenly across the pan, pressing down lightly to ensure maximum contact with the heat. Let it cook undisturbed for 2-3 minutes to develop a crispy bottom layer.
Stir the rice, then press it down again and repeat the process. You want to see golden-brown, slightly crispy edges forming on some of the grains. Day-old rice works best here because it’s drier and fries up beautifully without turning mushy.
Step 4: Finish with Eggs and Garnishes
Create four small wells in the rice mixture. Crack the 4 whole Large Eggs directly into the wells. Cover the skillet and cook for 3-4 minutes until the egg whites are set but the yolks remain runny. The residual heat will continue cooking the eggs slightly after you remove the lid.
Drizzle the 1 tsp Sesame Oil over the fried rice and eggs. Sprinkle with the 4 whole Green Onions, thinly sliced, and 1 tsp Toasted Sesame Seeds. Serve immediately while the eggs are still warm and the rice maintains its crispy texture.
Pro Tips For Making Kimchi Fried Rice Recipe Maangchi
- Use Cold Rice: Day-old, cold rice from the fridge fries up with the perfect texture—freshly cooked rice turns mushy. I learned this the hard way after making gluey kimchi fried rice more times than I’d like to admit.
- Squeeze the Kimchi: Drain your well-aged kimchi and give it a good squeeze to remove excess liquid before cooking. Sounds weird, but it prevents a watery mess and lets the flavors concentrate.
- High Heat First: Crank the heat to medium-high when frying the kimchi and rice—it gets that slightly crispy bottom layer Maangchi’s version is known for. After burning two batches, I finally stopped being shy with the flame.
- Add Rice Last: Cook the kimchi, garlic, and onion first until fragrant, then add the rice. My grandmother swore by this, and she was right: it builds way more flavor than dumping everything in at once.
Essential Equipment for This Dish
High-Heat Skillet
A 12-inch cast iron skillet is my go-to for achieving those crispy edges that make this dish special. Cast iron retains heat beautifully and develops a natural non-stick surface over time. I use my Lodge skillet for this recipe every time.
Rice Cooker Essentials
For perfectly cooked short-grain rice, I swear by my Cuckoo rice cooker. It consistently produces fluffy, sticky rice that’s ideal for frying. Day-old rice from this cooker fries up with the perfect texture.
Wooden Spatula
Use a flat wooden spatula to press the rice into the pan and flip sections. Wood won’t scratch your skillet and gives you better control than metal. I keep a dedicated bamboo spatula just for fried rice.
Sharp Chef’s Knife
A good 8-inch chef’s knife makes quick work of chopping kimchi and dicing onions. I recommend Wüsthof or Shun brands for their durability and sharpness. Sharp knives actually make cooking safer and more precise.
Measuring Tools
For accurate seasoning, use a set of stainless steel measuring spoons. The 1 tbsp gochujang and 2 tbsp soy sauce need to be exact for balanced flavors. I keep mine in a small crock next to my stove.
Perfect measurements mean perfect flavor every time. 💡
Nutrition Facts
Frequently Asked Questions
What kind of rice works best?
Use day-old short-grain rice like Calrose for the perfect sticky texture that crisps up beautifully. Fresh rice turns mushy under high heat.
Can I use fresh kimchi?
Well-aged kimchi (at least 1-2 weeks old) delivers the best tangy, complex flavor. Fresh kimchi lacks depth and may not caramelize as well during cooking.
How do I get crispy edges?
Press the rice down in the skillet and let it cook undisturbed for 2-3 minutes. Repeat until you see golden-brown crispy bits.
What if I don’t have gochujang?
Substitute with 1 tsp Sriracha mixed with ½ tsp miso paste. It won’t be identical but adds spice and umami.

- Mujadara Rice and Lentils Recipe: Earthy Spiced Lentils With Caramelized Onions - November 1, 2026
- Naija Fried Rice Recipe: Street-Style Spice With Veggie Crunch - November 1, 2026
- Mushy Rice Recipe: Fluffy Grains Transformed in Minutes - November 1, 2026