
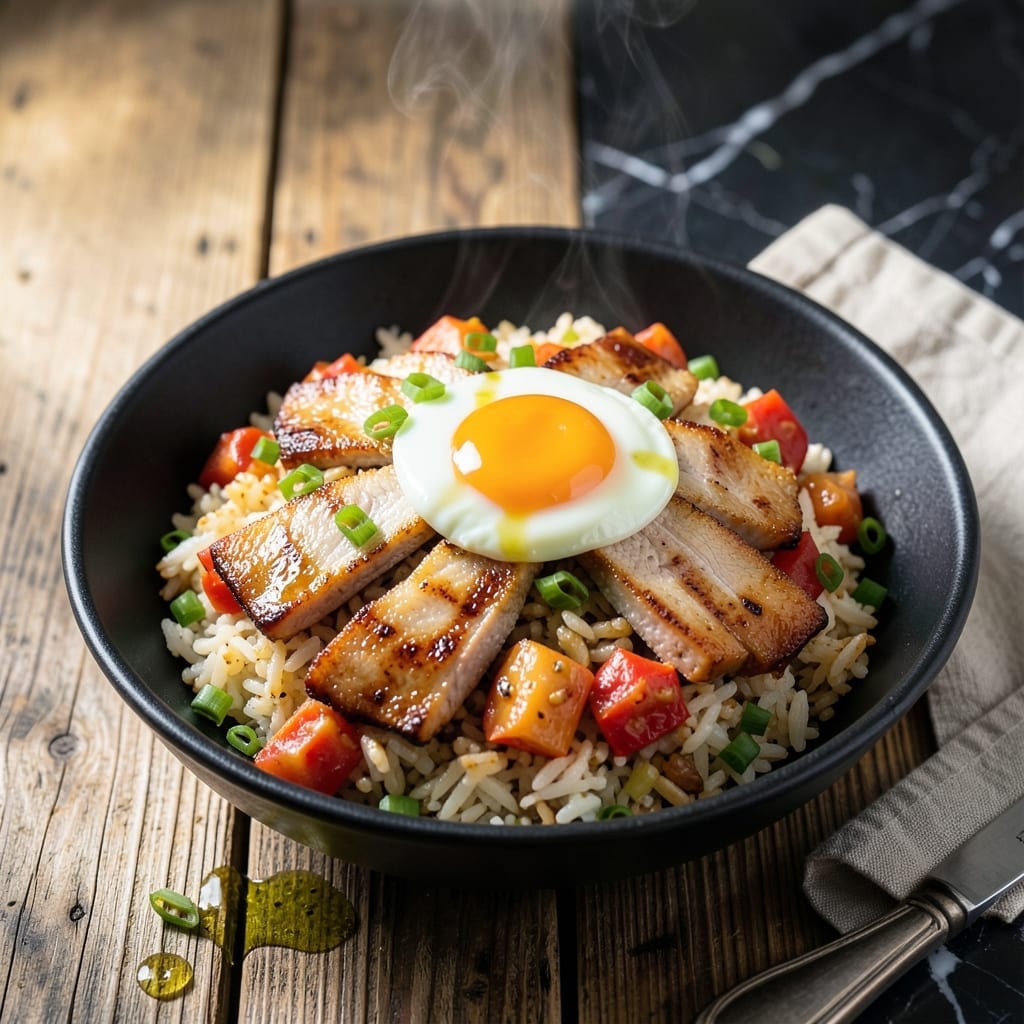
This dish brings bold Korean flavors to your kitchen with minimal effort. The combination of fermented kimchi and rich pork belly creates a perfect balance of spicy, savory, and umami notes.
I developed this method to maximize flavor while keeping prep simple. Cooking the pork belly first renders its fat, which then infuses the rice with incredible depth. The kimchi adds tang and heat without overpowering the dish.
The result is a quick 20-minute meal with restaurant-quality taste. Each bite delivers crispy pork, chewy rice, and that signature kimchi kick. It’s the ultimate comfort food with a spicy twist.
Serve with a fried egg on top for extra richness. Here’s how to make it perfectly every time.
Ingredients for Kimchi Fried Rice with Pork Belly
Bold Korean flavors start with pork belly, kimchi, and a few pantry staples. Ready in minutes.
| Ingredient | Amount | Notes |
|---|---|---|
| Pork Belly 🥓 | ¾ lb | Thinly sliced for crisping |
| Kimchi 🥬 | 2 cups | Fermented, well-aged preferred |
| Cooked White Rice 🍚 | 4 cups | Day-old, cold rice works best |
| Large Eggs 🥚 | 4 whole | For frying on top |
| Garlic Cloves 🧄 | 4 cloves | Minced for maximum flavor |
| Green Onions 🧅 | 4 whole | Thinly sliced for garnish |
| Gochujang 🌶️ | 2 tbsp | Korean red pepper paste |
| Soy Sauce 💧 | 2 tbsp | Low-sodium preferred |
| Sesame Oil 🫒 | 1 tbsp | Toasted for best aroma |
| Vegetable Oil 🫒 | 2 tbsp | For frying pork belly |
| Sugar 🍚 | 1 tsp | Balances kimchi acidity |
| Toasted Sesame Seeds 🌰 | 1 tsp | For garnish |
| Salt 🧂 | ½ tsp | Adjust to taste |
| Black Pepper 🌶️ | ¼ tsp | Freshly ground preferred |
The pork belly is non-negotiable here—look for good marbling at Korean markets or Whole Foods. Day-old rice is key (fresh gets mushy), and well-aged kimchi has that perfect sour-spicy kick. I grab my kimchi from H Mart—their in-house brands are consistently great. For the gochujang, check the Asian aisle or Amazon if your local store doesn’t carry it.
No pork belly? Thick-cut bacon works in a pinch (but loses some authenticity). Skip the gochujang? Extra sriracha plus a pinch of sugar gets you close. Fresh out of sesame oil? Perilla oil if you’ve got it. The eggs are optional but highly recommended—that runny yolk ties everything together. And if you’re feeding a crowd, double the rice but keep the pork ratio the same.
Keeps 3-4 days in the fridge, but honestly it’s best fresh. Reheat in a skillet to crisp the pork again. Gochujang and sesame oil last 6-12 months unopened, 3 months once opened (keep them in the fridge).
Why You’ll Love This Recipe
- One Pan Wonder: I toss the pork belly, kimchi, and rice together in a single skillet—minimal cleanup, maximum flavor.
- Umami Bomb: The fermented kimchi and garlic create this deep, tangy richness that hits all the right spots.
- Weeknight Hero: Honestly, it’s my go-to for busy evenings when I need something fast and satisfying.
- Stretch Your Dollar: Pork belly goes a long way, and leftover rice gets a delicious second life.
Step-by-Step Instructions for Kimchi Fried Rice With Pork Belly
This comes together fast—just follow these steps for maximum flavor in minimal time.
Step 1: Crisp the Pork Belly
Heat the 2 tbsp vegetable oil in a large skillet or wok over medium-high heat. Add the 0.75 lb pork belly slices and cook for 4-5 minutes per side until golden brown and crispy. You’ll hear that perfect sizzle when it’s ready to flip.
I like to press down gently with a spatula to ensure even contact with the pan. Once crispy, remove the pork belly and set it aside on a paper towel-lined plate to drain excess fat. This keeps it from getting soggy when mixed back into the dish.
Step 2: Sauté the Kimchi and Aromatics
In the same pan with the rendered pork fat, add the 2 cups kimchi and cook for 3-4 minutes over medium heat until it softens and starts to caramelize. The edges should turn slightly crispy—that’s when you know the flavors are deepening.
Add the minced 4 cloves garlic cloves and stir for 30 seconds until fragrant. Then, push everything to one side of the pan and add the 2 tbsp gochujang, 2 tbsp soy sauce, 1 tsp sugar, 0.5 tsp salt, and 0.25 tsp black pepper. Stir to combine and let it cook for 1 minute to meld the flavors.
Step 3: Add the Rice and Finish Cooking
Add the 4 cups cooked white rice to the pan, breaking up any clumps with your spatula. Stir-fry for 3-4 minutes until the rice is heated through and coated in the vibrant red sauce. The rice should look evenly colored with no dry spots.
Drizzle the 1 tbsp sesame oil over the rice and toss to combine. This adds a nutty depth that ties everything together. Return the crispy pork belly to the pan and stir to mix it in. Taste and adjust seasoning if needed—kimchi varies in saltiness, so this is your moment to balance it.
Step 4: Fry the Eggs and Garnish
Wipe out the pan if needed, then heat it over medium heat. Crack the 4 whole large eggs into the pan and fry for 2-3 minutes until the whites are set but the yolks are still runny. Sunrise yolk perfection is the goal here.
To serve, divide the fried rice among plates and top each with a fried egg. Garnish with the 4 whole green onions (thinly sliced) and a sprinkle of 1 tsp toasted sesame seeds. Serve immediately while the egg yolks are still luscious and ready to break into that spicy, savory rice.
Pro Tips For Making Kimchi Fried Rice With Pork Belly
- Crisp the Belly First: Cook the pork belly on medium-high until deeply browned and crispy before adding anything else—I learned this the hard way when my first few batches turned out soggy instead of caramelized.
- Drain the Kimchi: Squeeze excess liquid from the kimchi before frying, or your rice will turn mushy rather than nicely seared (yes, even if you’re impatient like me).
- Use Day-Old Rice: Fresh rice turns to paste in the pan; day-old, slightly dry grains give you that perfect chewy texture with actual bite.
- Fry Eggs Separately: Crack the eggs into the pan last, or push the rice to one side to make a well—this keeps the yolks runny instead of scrambled into the mix.
Flavor Customization for kimchi fried rice with pork belly
Spice Level Adjustments
For a milder version, use 1 cup kimchi and 1 tbsp gochujang instead of the full amount. This reduces the heat while keeping the tangy kimchi flavor. I often do this when cooking for friends who prefer less spice.
Extra Umami Boost
Add 1 tbsp fish sauce or 1 tsp anchovy paste when cooking the kimchi. This deepens the savory notes without changing the dish’s character. A little goes a long way with these potent ingredients. 💡
Vegetable Additions
Stir in 1 cup diced zucchini or shredded carrots when cooking the kimchi. These add freshness and texture. For a heartier meal, ½ cup chopped mushrooms works beautifully with the pork belly.
Protein Swaps
Replace pork belly with bulgogi beef or spicy chicken for variation. Use 0.75 lb of either protein, cooked separately before adding to the rice. The method remains the same, just the flavor profile changes.
Cheese Lovers Twist
Sprinkle ¼ cup shredded mozzarella over each serving before adding the fried egg. The melted cheese creates a delicious contrast with the spicy kimchi. This fusion style became a hit at my last dinner party.
Extra Crispy Texture
For maximum crunch, spread the cooked rice in an even layer in the pan after adding the pork belly. Let it cook undisturbed for 2 minutes to develop a crispy bottom layer. 🔥
Nutrition Facts
Frequently Asked Questions
Can I use fresh rice instead of day-old?
Day-old rice works best because it’s drier and fries up fluffier. Fresh rice tends to turn mushy. If you must use fresh, spread it on a tray for 10 minutes to dry slightly before cooking.
How do I make it less spicy?
Reduce the kimchi to 1 cup and gochujang to 1 tbsp. This keeps the flavor but cuts the heat. You can also add a drizzle of honey to balance the spice.
Can I cook the pork belly ahead of time?
Yes, crisp the pork belly up to a day ahead and store it in the fridge. Reheat in the pan for 2 minutes before adding to the rice to restore its crispiness.
What if I don’t have gochujang?
Substitute with 1 tbsp sriracha plus 1 tsp sugar. It won’t be identical but will add similar heat and sweetness to your dish.

- Jollof Rice Sauce Recipe: West African Tomato and Spice Infusion - September 25, 2026
- Japanese Rice Soup Recipe: Umami-Rich Comfort in a Bowl - September 25, 2026
- Homemade Cream Of Rice Recipe: Silk-Smooth Breakfast in Minutes - September 25, 2026