
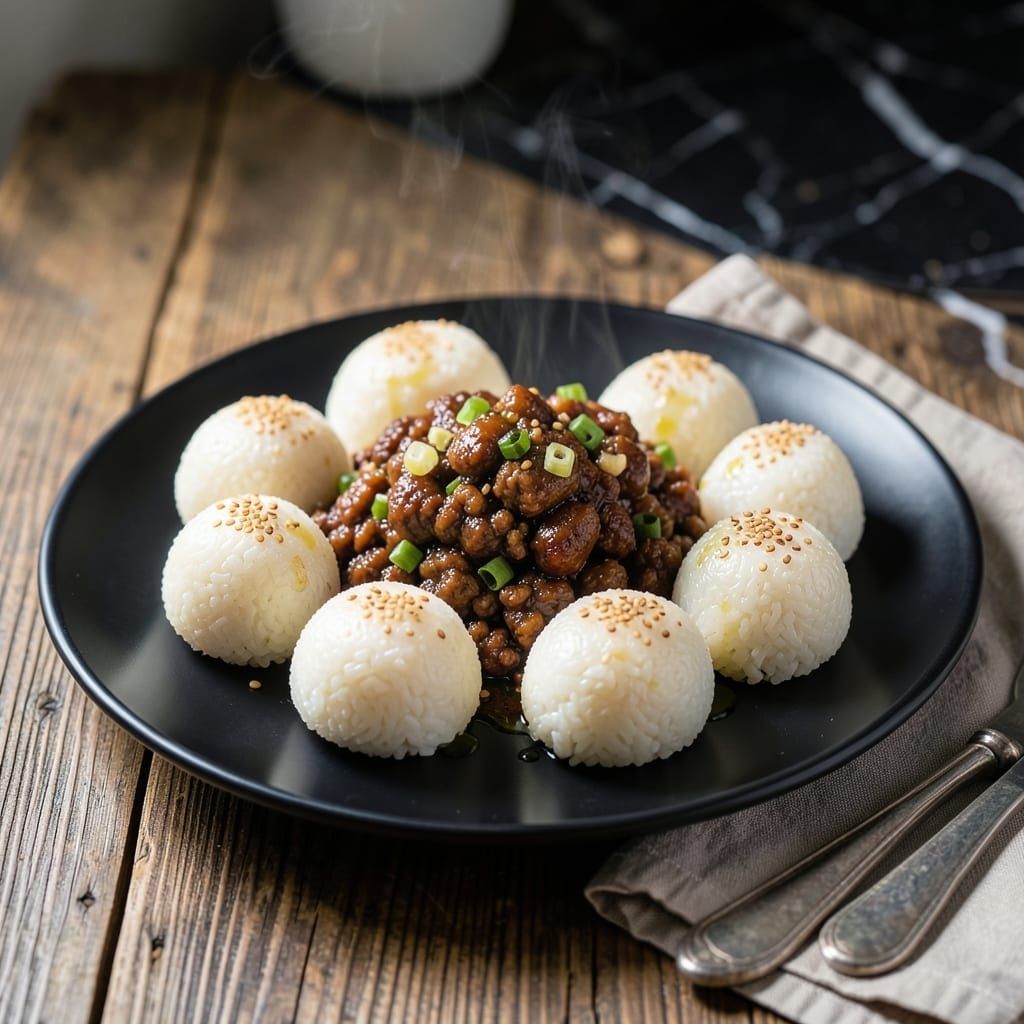
These handheld bites deliver authentic Korean flavors in every mouthful. I’ve refined this method to ensure the rice stays tender while the beef filling remains juicy and aromatic.
The secret is using short-grain rice for the right sticky texture and seasoning the beef with soy sauce, garlic, and sesame oil. This combination creates a savory, umami-rich filling that pairs perfectly with the rice.
Shaping the balls takes practice, but the effort is worth it. Each bite offers a balance of chewy rice and flavorful beef, making them ideal for parties or a satisfying snack.
Serve warm with a side of kimchi or a drizzle of spicy gochujang sauce for an extra kick.
Ingredients for Korean Beef Rice Balls
Short-grain rice, juicy beef, and bold seasonings create these authentic handheld bites with ease.
| Ingredient | Amount | Notes |
|---|---|---|
| Short-Grain Rice 🍚 | 2 cups | Uncooked, for sticky texture |
| Ground Beef 🥩 | 1 lb | 80/20 fat ratio preferred |
| Soy Sauce 🫒 | ¼ cup | Low-sodium for control |
| Garlic Cloves 🧄 | 4 cloves | Minced finely for filling |
| Sesame Oil 🫒 | 1 tbsp | Toasted for depth |
| Brown Sugar 🍯 | 2 tbsp | Light or dark works |
| Green Onions 🧅 | 4 whole | Thinly sliced for garnish |
| Gochujang Sauce 🌶️ | 2 tbsp | Optional for heat |
| Vegetable Oil 🫒 | 2 tbsp | For cooking beef filling |
| Salt 🧂 | ½ tsp | To taste for seasoning |
| Black Pepper 🌶️ | ¼ tsp | Freshly ground preferred |
| Sesame Seeds 🌰 | 1 tbsp | Toasted for garnish |
| Kimchi 🥬 | 1 cup | Optional serving side |
The rice is non-negotiable here. Short-grain white rice (like Calrose or sushi rice) delivers the sticky texture that holds everything together. Look for it in the Asian section of most supermarkets or at H Mart. The beef should be 80/20 ground chuck—leaner blends dry out. I always buy mine from Whole Foods for consistent quality and marbling.
No gochujang? Sriracha mixed with a spoon of miso gets you close. Fresh garlic is key—jarred lacks the punch. Short on green onions? Chives work in a pinch. The soy sauce can be regular if that’s what you have (just reduce added salt). Toasting the sesame seeds takes 30 seconds in a dry pan and adds serious aroma. Don’t skip it.
Assembled balls keep 3-4 days in the fridge—reheat in a skillet to crisp the exterior. Freeze uncooked portions on a tray before bagging for up to 3 months. The filling mixture holds 2 days refrigerated if you want to prep ahead.
Why You’ll Love This Recipe
- One-Bowl Magic: I mix the rice, beef, and soy sauce right in the same bowl—no extra dishes, just flavor.
- Umami Bomb: The garlic and sesame oil hit different, turning simple ground beef into something ridiculously good.
- Lunchbox Hero: These keep perfectly in the fridge, so I pack them for work or the kids’ lunches all week.
- Stretches Further: A pound of ground beef and a bag of rice feed my family for two meals, easy.
Step-by-Step Instructions for Korean Beef Rice Balls
Master the technique for these flavorful handheld bites with perfect texture every time.
Step 1: Cook the Short-Grain Rice
Rinse the 2 cups short-grain rice under cold water until the water runs clear. This removes excess starch that could make the rice gummy rather than sticky. Use a rice cooker or pot with a tight-fitting lid.
Cook the rice with a 1:1 ratio of water to rice. Bring to a boil, then reduce to a simmer, cover, and cook for 15-18 minutes until the water is absorbed and the grains are tender. Let it sit covered for 10 minutes off heat. The rice should be sticky enough to hold shape when pressed.
Step 2: Prepare the Korean Beef Filling
Heat the 2 tbsp vegetable oil in a skillet over medium-high heat. Add the 1 lb ground beef and cook for 5-6 minutes, breaking it into small pieces until browned and cooked through. Drain excess fat if needed, but leave about 1 tbsp for flavor.
Add the minced 4 cloves garlic cloves and cook for 30 seconds until fragrant. Stir in the 0.25 cup soy sauce, 2 tbsp brown sugar, 1 tbsp sesame oil, 2 tbsp gochujang sauce, 0.5 tsp salt, and 0.25 tsp black pepper. Simmer for 2-3 minutes until the sauce thickens slightly. Remove from heat and let cool.
Step 3: Assemble the Rice Balls
Once the rice is cool enough to handle, wet your hands with water to prevent sticking. Take a handful of rice (about ¼ cup) and flatten it in your palm. Add 1 tbsp of the beef filling to the center.
Gently press the rice around the filling to enclose it completely, shaping it into a ball. Press firmly but not too hard—you want it to hold together without compacting the rice too much. Repeat with the remaining rice and filling.
Step 4: Optional Pan-Fry for Crispy Texture
For extra texture, heat a non-stick pan over medium heat with a little vegetable oil. Lightly roll each rice ball in the pan for 1-2 minutes per side until golden brown and slightly crispy. This step is optional but adds a delightful contrast.
Alternatively, serve the rice balls as-is for a softer texture. Either way, they should hold their shape well when picked up.
Step 5: Garnish and Serve
Thinly slice the 4 whole green onions and sprinkle over the rice balls along with the 1 tbsp sesame seeds. Serve warm with 1 cup kimchi on the side for a traditional pairing.
The filling should be savory and rich, while the rice provides a sticky, slightly chewy contrast. These are best enjoyed fresh but can be stored in the refrigerator for up to 2 days. Reheat in a pan to restore texture.
Pro Tips For Making Korean Beef Rice Balls
- Chill the Rice: Use day-old, refrigerated short-grain rice—it’s stickier and holds shape better when forming the balls. Freshly cooked rice is too moist and falls apart.
- Brown the Beef Fast: Cook the ground beef over medium-high heat until deeply browned, about 5-6 minutes. Skimping on time leaves it pale and watery, which weakens the filling.
- Drain the Fat: After browning the beef, pour off the excess fat before adding soy sauce and garlic. I learned this the hard way—greasy filling makes the rice balls slippery and unstable.
- Toast the Sesame Oil: Heat the sesame oil in the pan for 10 seconds before adding the beef—it releases a nutty aroma that really changes the flavor. Sounds small, but it’s noticeable.
Wine and Beer Pairings for This Recipe
Korean Beer Pairings
I love serving these with Hite or OB Lager—Korean beers with clean, crisp profiles that cut through the richness. Their mild bitterness balances the savory beef beautifully. The carbonation refreshes your palate between bites. 🍺
Light Japanese Lagers
Asahi Super Dry or Sapporo work well with their slightly sweeter finish. These beers complement the brown sugar in the filling and won’t overpower the dish. Serve ice-cold for the best contrast against the warm rice balls.
White Wine Options
A chilled Riesling from Germany or Washington state offers fruity notes that pair surprisingly well. The slight sweetness matches the dish’s savory-sweet balance. I prefer Dr. Loosen Blue Slate for its crisp acidity. 🍷
Red Wine Choices
For red lovers, a light Pinot Noir like Meiomi works with its bright acidity and red fruit notes. Avoid heavy tannic wines like Cabernet Sauvignon—they’ll clash with the Korean flavors.
Non-Alcoholic Pairings
Korean barley tea (boricha) is my go-to non-alcoholic option—its nutty, toasty flavor complements the sesame and soy. Sparkling water with a squeeze of lime also refreshes the palate between bites.
Nutrition Facts
Frequently Asked Questions
What type of rice works best?
Use short-grain white rice like Calrose or sushi rice. Its stickiness holds the balls together perfectly. Avoid long-grain varieties as they won’t bind well.
Can I make these ahead of time?
Assembled balls keep for 3-4 days refrigerated or can be frozen for up to 3 months. Reheat in a skillet to restore texture before serving.
What if I don’t have gochujang?
Substitute with a mix of 1 tbsp sriracha and 1 tsp miso paste for similar heat and depth. The flavor won’t be identical but will still be delicious.
How do I prevent the rice from sticking to my hands?
Keep a bowl of water nearby and wet your hands frequently while shaping. This creates a barrier that prevents sticking without making the rice soggy.

- Mujadara Rice and Lentils Recipe: Earthy Spiced Lentils With Caramelized Onions - November 1, 2026
- Naija Fried Rice Recipe: Street-Style Spice With Veggie Crunch - November 1, 2026
- Mushy Rice Recipe: Fluffy Grains Transformed in Minutes - November 1, 2026