
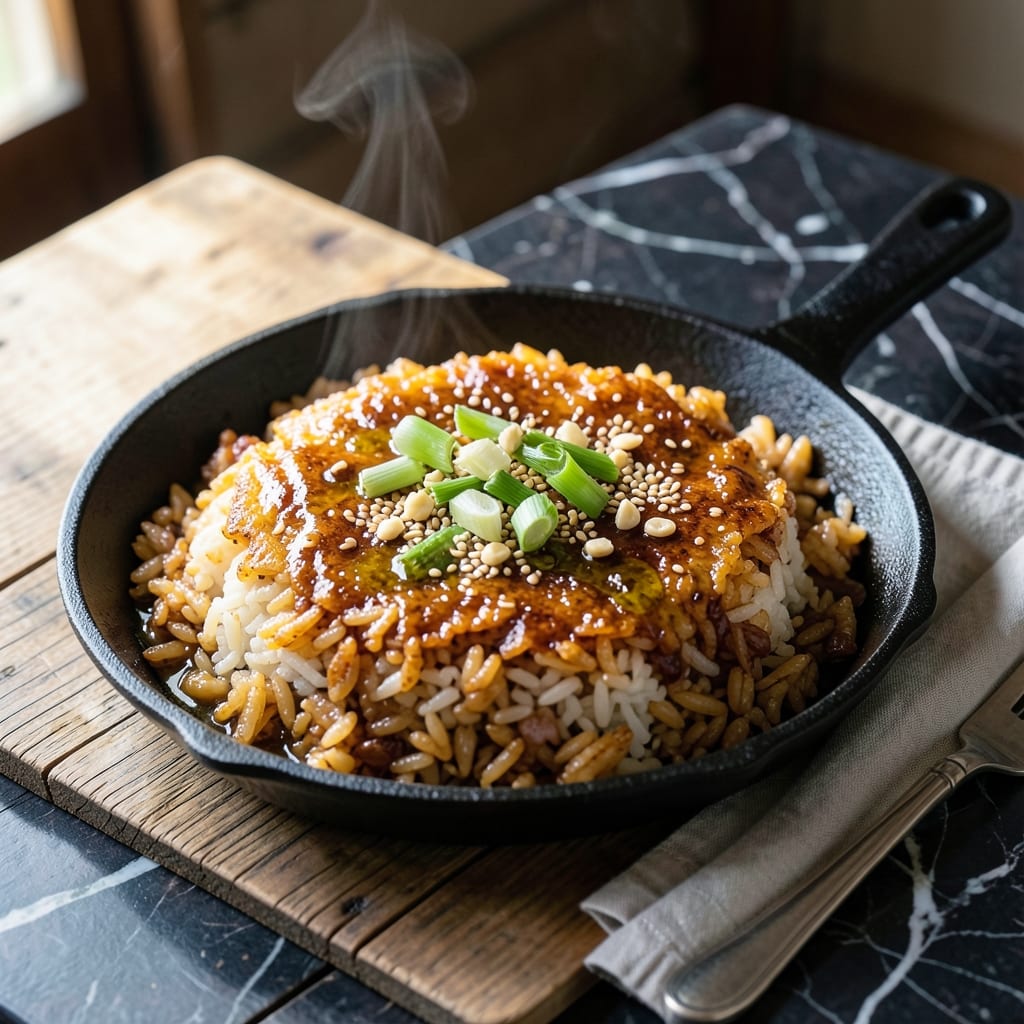
There’s something deeply satisfying about achieving the perfect crispy texture that defines this traditional Korean dish. I’ve tested multiple methods to capture that signature golden, nutty crunch.
The key lies in using day-old rice and cooking it slowly at medium heat until it transforms. This technique ensures every grain develops a crispy, caramelized exterior while staying tender inside.
What emerges is a dish with layers of flavor—slightly sweet, deeply savory, and irresistibly textured. The contrast between the crunchy bottom and soft top makes it impossible to resist.
Serve it as a snack, side dish, or even as a base for other ingredients. This method delivers consistent results every time.
Ingredients for Korean Crispy Rice
Day-old rice, a handful of pantry staples, and patience. That is all you need.
| Ingredient | Amount | Notes |
|---|---|---|
| Day-Old Cooked White Rice 🍚 | 4 cups | Short-grain preferred, fully cooled |
| Sesame Oil 🫒 | 2 tbsp | Toasted for depth of flavor |
| Soy Sauce 💧 | 2 tbsp | Low-sodium or regular |
| Brown Sugar 🍚 | 1 ½ tbsp | Light or dark variety |
| Toasted Sesame Seeds 🌾 | 2 tbsp | For garnish and texture |
| Vegetable Oil 🫒 | 1 tbsp | Neutral flavor, for crisping |
| Green Onions 🧅 | 3 whole | Thinly sliced for garnish |
| Garlic Cloves 🧄 | 2 cloves | Minced for aromatic base |
| Ground Black Pepper 🌶️ | ½ tsp | Freshly ground preferred |
| Salt 🧂 | ½ tsp | Kosher or sea salt |
| Red Pepper Flakes 🌶️ | ¼ tsp | Optional for subtle heat |
| Nori Seaweed Sheets 🌿 | 2 sheets | Cut into strips for garnish |
The rice is non-negotiable—short-grain white rice left overnight in the fridge develops the right starch structure. Korean brands like Ssanggyetap or Nishiki deliver authentic texture, but any short-grain works. Sesame oil must be toasted (check labels); untoasted lacks the nutty depth. For soy sauce, Kikkoman or San-J tamari ensures consistent salt levels. The browning reaction depends on even heat distribution, so use a heavy-bottomed pan.
No short-grain rice? Jasmine or sushi rice are acceptable substitutes, though texture may vary slightly. Brown sugar can be replaced with honey or maple syrup at equal volume. Missing sesame seeds? Crushed peanuts add a similar crunch. For a gluten-free version, swap soy sauce for coconut aminos. The green onions are flexible—chives or scallions work in a pinch.
Leftover crispy rice keeps in an airtight container for 2-3 days, but it’s best served immediately. Reheat in a dry pan to revive crispiness. Store sesame oil in a cool, dark place for 6-12 months. Nori sheets last 1 year unopened in the pantry.
Why You’ll Love This Recipe
- One Pan Magic: I just press day-old rice into a pan with sesame oil, no fancy prep—crispy edges in minutes.
- Sweet-Savory Crunch: That brown sugar caramelizes with soy sauce while the sesame seeds add this nutty pop I can’t get enough of.
- Meals for Days: Honestly, I double the batch and we snack on it cold, toss it in soups, or top with fried eggs all week.
- Budget Hero: Between us, it’s the best way to use up leftover rice—costs pennies but tastes like a restaurant side dish.
Step-by-Step Instructions for Korean Crispy Rice
Here’s the method. Straightforward, tested, works every time.
Step 1: Crisp the Day-Old Cooked White Rice
Heat 1 tablespoon vegetable oil in a large non-stick skillet over medium heat. Add the 4 cups day-old cooked white rice, breaking up any clumps with your hands or a spatula. Press the rice down firmly with a spatula to create an even layer across the pan.
Cook undisturbed for 8-10 minutes until the bottom develops a deep golden brown crust. I resist the urge to stir—this contact time is crucial for developing maximum crispness. You’ll hear it sizzle and smell the nutty aroma when it’s ready.
Flip sections of the rice carefully to crisp the other side, cooking another 5-7 minutes until most of the rice has a crunchy, toasted exterior. The texture should be similar to rice crackers with some softer bits mixed in.
Step 2: Prepare the Sweet-Savory Glaze
While the rice crisps, mince the 2 cloves garlic cloves finely. In a small bowl, whisk together 2 tablespoons soy sauce, 2 tablespoons sesame oil, and 1.5 tablespoons brown sugar until the sugar dissolves completely.
Add the minced garlic, 0.5 teaspoon salt, 0.5 teaspoon ground black pepper, and 0.25 teaspoon red pepper flakes to the sauce. The mixture should be glossy with visible garlic flecks. This balance of sweet, salty, and umami will coat every crispy bite perfectly.
Step 3: Combine Rice and Sauce
Once the rice is crispy to your liking, reduce heat to low. Pour the sauce mixture evenly over the hot rice. Toss gently but thoroughly with a spatula, ensuring every grain gets coated. The sauce will sizzle and caramelize slightly on contact with the hot rice.
Cook for an additional 2-3 minutes, stirring occasionally, until the rice absorbs most of the liquid and develops a glossy sheen. The crispy texture should remain intact while taking on the rich, savory-sweet flavor of the glaze.
Step 4: Garnish and Serve Immediately
Transfer the crispy rice to a serving platter. Thinly slice the 3 whole green onions and sprinkle them evenly over the top. Follow with the 2 tablespoons toasted sesame seeds, distributing them so each serving gets some crunch.
Cut the 2 sheets nori seaweed sheets into thin strips using kitchen shears. Scatter these over the dish just before serving—they’ll soften slightly from the heat but retain a pleasant chew. Serve immediately while the rice is still hot and at its crispiest.
Pro Tips For Making Korean Crispy Rice
- Use Day-Old Rice: Fresh rice is too moist—day-old, refrigerated white rice is drier and crisps up better in the pan.
- Heat the Pan First: Get your pan screaming hot before adding the oil and rice; I learned this the hard way after ending up with sad, soggy grains instead of crispy ones.
- Press It Down: Once the rice is in the pan, press it firmly with a spatula and resist the urge to stir for at least 3-4 minutes to form that golden crust.
- Toast the Sesame Seeds: Sounds weird, but it works: toasting the sesame seeds separately for 1-2 minutes in a dry pan brings out their nutty flavor before mixing them in.
Flavor Customization for This korean crispy rice
Sweet Heat Boost
Add ½ tsp gochujang to the sauce for a spicy-sweet kick. I mix it with the soy sauce before adding to the rice. The fermented chili paste adds depth without overpowering the dish’s balance. 🌶️
Umami Bomb
Stir in 1 tsp fish sauce or 1 tbsp oyster sauce to the glaze. This amplifies the savory notes beautifully. I tested both in my Boston kitchen—the oyster sauce gives a thicker, glossier finish.
Citrus Zing
Finish with 1 tsp rice vinegar or zest of 1 lime for brightness. The acidity cuts through the richness. I add it right before serving to preserve the fresh, vibrant flavor.
Extra Crunch
Toss in ¼ cup crushed roasted peanuts or 2 tbsp furikake seasoning after crisping. These add texture and visual appeal. My Nonna would approve of the peanut version—it reminds her of her favorite Asian-inspired recipes.
Herb Freshness
Garnish with 2 tbsp chopped cilantro alongside the green onions. The herb’s freshness contrasts the nutty, crispy base. I prefer cilantro, but Thai basil works too for a different aromatic profile.
Cheesy Twist
Sprinkle ¼ cup shredded mozzarella over the rice just before adding the sauce. The cheese melts into gooey pockets. This fusion approach bridges my Irish-Italian roots with Korean flavors. ✨
Nutrition Facts
Frequently Asked Questions
Can I use fresh rice instead of day-old?
No, fresh rice won’t crisp properly. Day-old has less moisture, which is essential for that signature crunch. If in a hurry, spread freshly cooked rice on a tray and refrigerate for 1-2 hours to dry it out.
Why press the rice down in the pan?
Pressing creates maximum contact with the pan, ensuring even browning. This step is key for developing that deep golden crust. Without it, you’ll get spotty crispiness instead of a uniform texture.
How do I prevent the rice from burning?
Use medium heat and avoid walking away. Stir occasionally after the first 5 minutes to check progress. If it browns too quickly, lower the heat slightly.
Can I make this ahead of time?
It’s best served immediately while crispy. If storing, keep in an airtight container for up to 2 days, but reheat in a dry pan to revive the texture.

- Jollof Rice Sauce Recipe: West African Tomato and Spice Infusion - September 25, 2026
- Japanese Rice Soup Recipe: Umami-Rich Comfort in a Bowl - September 25, 2026
- Homemade Cream Of Rice Recipe: Silk-Smooth Breakfast in Minutes - September 25, 2026