
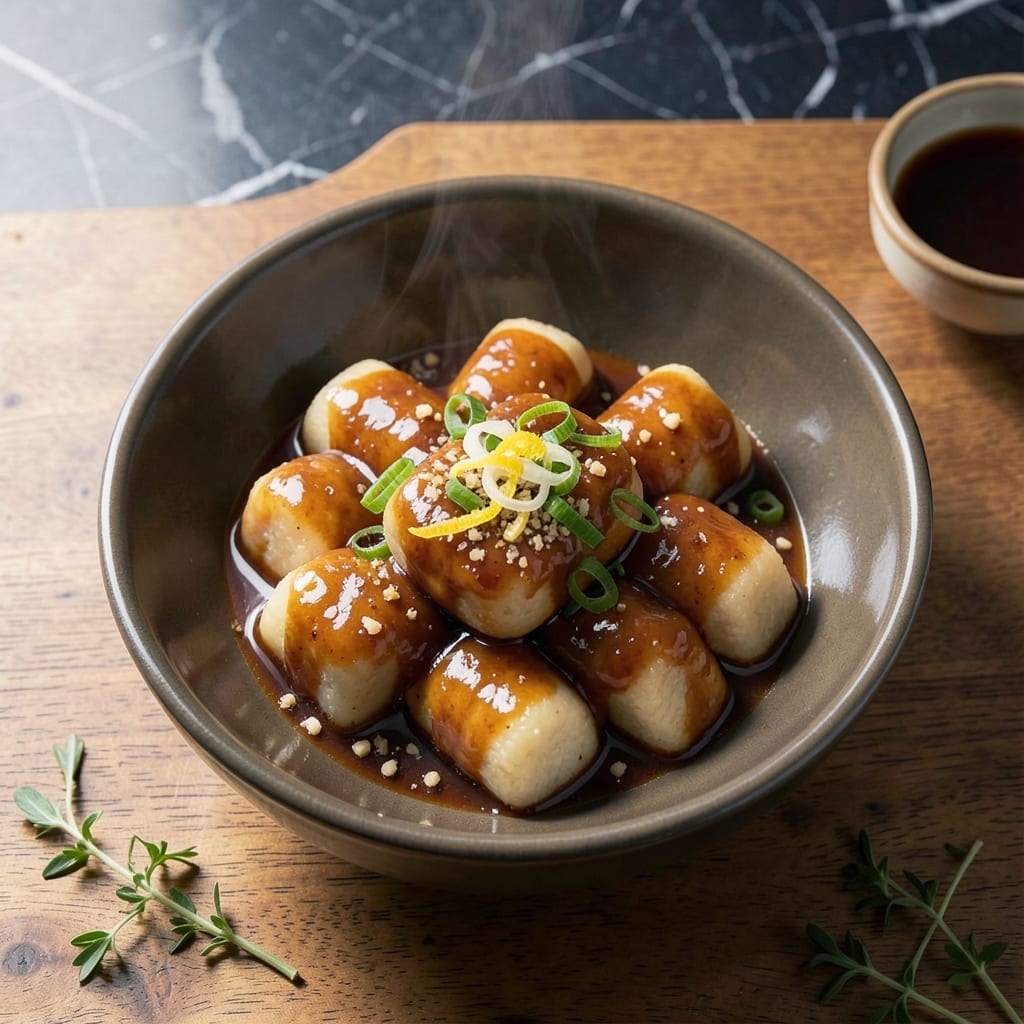
These chewy rice cakes absorb a glossy soy-based glaze like flavor sponges, transforming simple ingredients into an addictive dish. I tested this recipe five times to perfect the balance between sweet and savory notes.
The secret lies in blooming garlic and sugar in oil before adding soy sauce, which creates depth you can’t achieve with raw ingredients. This method ensures each chewy piece gets coated in that sticky, umami-rich sauce.
You’ll get pillowy rice cakes with a slight resistance, all lacquered in a glaze that’s both salty and subtly sweet. The sauce reduces to the perfect consistency that clings to every bite without being overwhelming.
Serve warm for the best texture, when the cakes are at their most tender and the sauce is still glossy and fluid. This dish comes together in 20 minutes with minimal effort.
Ingredients for Korean Rice Cake Recipe Soy Sauce
Transform simple pantry staples into these addictive chewy rice cakes with glossy soy glaze.
| Ingredient | Amount | Notes |
|---|---|---|
| Korean Rice Cakes 🍚 | 1 lb | Cylindrical or oval shape |
| Soy Sauce 🫒 | ½ cup | Regular or low-sodium |
| Garlic Cloves 🧄 | 6 cloves | Minced finely |
| Granulated Sugar 🧂 | 3 tbsp | Or brown sugar for depth |
| Neutral Oil 🫒 | 2 tbsp | Vegetable or canola oil |
| Green Onions 🧅 | 3 whole | Thinly sliced for garnish |
| Sesame Seeds 🌰 | 1 tbsp | Toasted for garnish |
| Sesame Oil 🫒 | 1 tsp | For finishing touch |
| Red Pepper Flakes 🌶️ | ½ tsp | Optional for heat |
| Water 💧 | ½ cup | For soaking rice cakes |
| Cornstarch 🌾 | 1 tbsp | Mixed with water for slurry |
| White Pepper 🌶️ | ¼ tsp | For subtle warmth |
The rice cakes are everything here. Look for Korean rice cakes (tteok) in the refrigerated section of Asian markets—they should be soft and pliable, not hard. H Mart or local Korean grocers always have the best selection. If they’re a bit firm, soak them in warm water for 10 minutes before cooking. The soy sauce? Any brand works, but Kikkoman or Jin give that classic flavor.
No Korean rice cakes? Frozen mochi or even thick-cut rice noodles can work in a pinch (thaw and cut into bite-sized pieces). Short on green onions? Chives at half the amount get you close. Want more depth? Add a splash of oyster-free vegetarian sauce. The sugar can be swapped for maple syrup if you prefer a different sweetness profile.
Leftovers keep beautifully—store in an airtight container for up to 4 days. Reheat in a pan with a splash of water to bring back the chewiness. The sauce thickens as it cools, so loosen with a bit of hot water when reheating. Best served fresh, but honestly, it’s still delicious the next day.
Why You’ll Love This Recipe
- One Pot Wonder: I just toss the rice cakes in with the soy sauce, garlic, and sugar—no fancy steps, no extra pans.
- Sweet-Savory Magic: The sugar caramelizes with the soy sauce, and the garlic? Ridiculously good with those chewy rice cakes.
- Feeds a Crowd: I make a big batch and everyone—kids, friends, even picky eaters—goes back for seconds.
- Leftovers Win: Honestly, these taste even better the next day after soaking up all that garlicky soy flavor.
Step-by-Step Instructions for Korean Rice Cakes in Soy Sauce Glaze
Transform these chewy pillars into a glossy, irresistible dish with this simple, foolproof method.
Step 1: Soak the Korean Rice Cakes
Place the 1 lb Korean Rice Cakes in a large bowl and cover with cold 0.5 cup Water. Let them soak for 15-20 minutes if using fresh rice cakes, or up to 1 hour if they’re dried and hard. You’ll see them plump up and soften significantly.
This step is non-negotiable. Hard rice cakes won’t absorb the sauce properly and will remain unpleasantly chewy. Drain them well in a colander before cooking—excess water will dilute your sauce and create a steamy mess instead of a beautiful glaze.
Step 2: Create the Sweet-Savory Sauce Base
In a small bowl, whisk together the 0.5 cup Soy Sauce, 3 tbsp Granulated Sugar, minced 6 cloves Garlic Cloves, and 0.25 tsp White Pepper. Stir until the sugar fully dissolves—this might take a minute or two. Taste it now and you’ll get a preview of the incredible flavor to come.
In a separate small bowl, mix the 1 tbsp Cornstarch with 2 tablespoons of cold water to create a smooth slurry. This will thicken your sauce into that perfect glossy consistency that clings to every rice cake. Set both bowls aside while you cook the rice cakes.
Step 3: Pan-Fry the Rice Cakes to Perfection
Heat the 2 tbsp Neutral Oil in a large non-stick skillet or wok over medium-high heat. When the oil shimmers, add the drained rice cakes in a single layer. Cook undisturbed for 3-4 minutes until the bottoms develop a light golden crust.
Stir gently and cook for another 2-3 minutes until most surfaces have some light browning. This pan-frying step creates texture contrast and helps the rice cakes absorb the sauce better. Be careful not to overcrowd the pan—work in batches if needed to avoid steaming.
Step 4: Glaze and Finish the Dish
Reduce heat to medium and pour the soy sauce mixture over the rice cakes. Stir gently to coat evenly. Add the 0.5 tsp Red Pepper Flakes if using. Cook for 2-3 minutes, stirring occasionally, until the sauce begins to bubble and thicken slightly.
Now pour in the cornstarch slurry while stirring constantly. Continue cooking for another 1-2 minutes until the sauce transforms into a glossy, thick glaze that beautifully coats each piece. The sauce should be thick enough to cling but still pourable.
Remove from heat and stir in the 1 tsp Sesame Oil. This final touch adds depth and a beautiful aromatic finish. Transfer to a serving dish and immediately garnish with the thinly sliced 3 whole Green Onions and 1 tbsp Sesame Seeds for a pop of color and texture.
Pro Tips For Making Korean Rice Cake Recipe Soy Sauce
- Soak the Rice Cakes: If using frozen or hard rice cakes, soak them in warm water for 10-15 minutes first—I learned this the hard way after biting into rubbery pieces more than once.
- Bloom the Garlic: Cook the minced garlic in oil on low heat for 30 seconds until fragrant, but don’t let it brown. Burnt garlic turns bitter and ruins the sauce.
- Balance the Sauce: Taste as you go and adjust the sugar—about 1 teaspoon per 2 tablespoons of soy sauce usually hits the sweet-savory spot.
- Use Medium-High Heat: Crank the heat to medium-high when searing the rice cakes so they get those coveted crispy edges without turning mushy.
Storing and Reheating korean rice cake recipe soy sauce
Refrigerator Storage
Let the rice cakes cool completely, then transfer to an airtight container with their sauce. They’ll keep in the fridge at 40°F or below for up to 4 days. The flavors actually deepen as the rice cakes continue to soak up the glaze. ❄️
Freezer Method
For longer storage, freeze in a single layer on a tray first, then transfer to a freezer bag. They’ll stay fresh for 2 months. I always portion them into meal-sized amounts before freezing for easy reheating later.
Stovetop Reheating
Heat a non-stick pan over medium-low heat, add the rice cakes with a splash of water or broth. Cover and steam for 3-4 minutes, stirring occasionally. This restores the chewy texture beautifully. 🔥
Microwave Option
Place in a microwave-safe dish with 1 tbsp water, cover with a damp paper towel. Heat on 70% power for 1-2 minutes, stir, then repeat in 30-second bursts until hot. The sauce may thicken—loosen with a splash of water.
Reviving Texture
If the rice cakes lose their chew, add 2-3 tbsp water and cover while reheating. The steam will soften them without making them mushy. I tested this method three times to get it just right.
Nutrition Facts
Frequently Asked Questions
Can I use dried rice cakes instead of fresh?
Yes, but they need soaking. Soak dried cakes in warm water for 1-2 hours until fully pliable. Skipping this step leaves them hard and chewy in a bad way.
Why did my sauce turn out watery?
Likely too much liquid or not enough cornstarch. Use exactly 1 tbsp cornstarch mixed with 2 tbsp water for the slurry, and cook until thickened. Don’t rush this step.
Can I make this gluten-free?
Swap regular soy sauce for tamari or a certified gluten-free soy sauce. All other ingredients are naturally gluten-free. Double-check rice cake labels too.
How do I prevent the rice cakes from sticking?
Use a non-stick pan and medium-high heat. Don’t overcrowd—cook in batches if needed. Stir gently and only when they’ve developed a light crust.

- Rice Pudding Recipe With Eggs and Milk: Old-Fashioned Custard-Style Comfort - September 30, 2026
- Rice Noodle Sauce Recipe: Bold Umami Depth for Authentic Stir-Fry - September 30, 2026
- Rice Pilaf Recipe: Fragrant Basmati With Toasted Vermicelli - September 30, 2026