
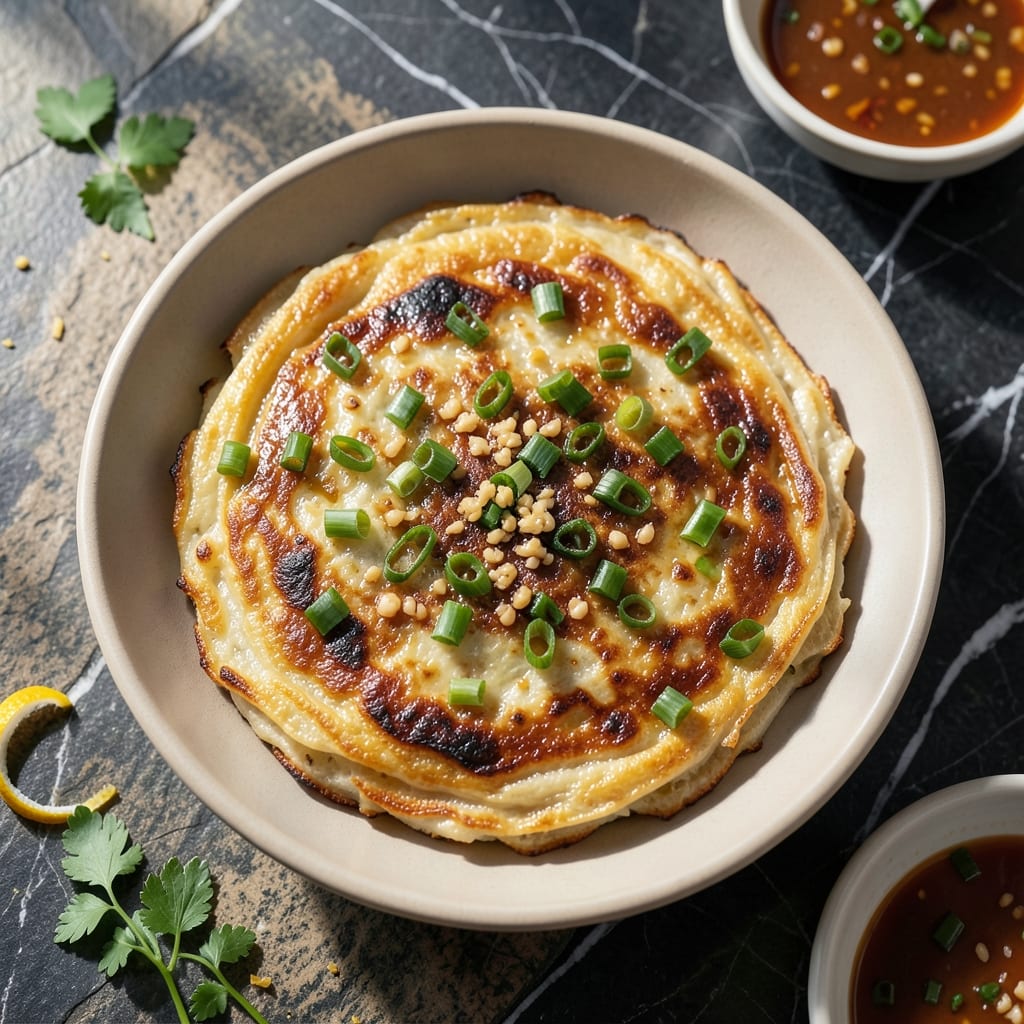
This Korean rice pancake delivers a crispy exterior with a tender interior, bursting with fresh scallion flavor in every bite. I’ve refined this method to achieve the perfect texture without complicated techniques.
The batter comes together quickly with simple ingredients, and the key is cooking it over medium heat until golden. Scallions add a bright, fresh contrast to the savory pancake base.
What results is a dish that’s satisfyingly crispy on the edges while staying soft and flavorful inside. It’s a versatile recipe that works as a snack, appetizer, or light meal.
Serve hot with a dipping sauce for the full experience. Here’s how to make it perfectly every time.
Ingredients for Korean Rice Pancake
Simple ingredients deliver crispy, scallion-packed pancakes with perfect texture every time.
| Ingredient | Amount | Notes |
|---|---|---|
| Rice Flour 🌾 | 1 ½ cups | Fine grind preferred |
| All-Purpose Flour 🌾 | ½ cup | For structure and binding |
| Scallions 🧅 | 8 whole | Thinly sliced, green parts included |
| Water 💧 | 1 ¼ cups | Room temperature for smooth batter |
| Salt 🧂 | 1 tsp | Adjust to taste |
| Ground Black Pepper 🌶️ | ½ tsp | Freshly ground preferred |
| Vegetable Oil 🫒 | 3 tbsp | For frying, neutral flavor |
| Large Egg 🥚 | 1 whole | Optional for binding |
| Garlic Cloves 🧄 | 2 cloves | Minced for flavor depth |
| Soy Sauce 🥢 | 1 tbsp | Low-sodium for seasoning control |
| Sugar 🍬 | 1 tsp | Balances savory flavors |
| Sesame Oil 🫒 | 1 tsp | For finishing aroma |
| Sesame Seeds 🌰 | 1 tbsp | Toasted, for garnish |
The rice flour is key for that authentic texture—look for fine grind in Asian markets or the international aisle. Scallions should be fresh with crisp green tops (avoid wilted bunches). For the best results, use a mix of rice and all-purpose flour; Bob’s Red Mill makes a great rice flour that’s widely available. The egg is optional but helps with binding if your batter feels too loose.
No rice flour? Substitute with cornstarch at half the amount, though the texture will differ slightly. Out of scallions? Green onions work the same. For a gluten-free version, replace all-purpose flour with extra rice flour. The soy sauce can be swapped for tamari if you need gluten-free. If you’re skipping the egg, add an extra tablespoon of water to adjust the batter consistency.
Batter keeps in the fridge for 1 day (stir before using). Cooked pancakes stay crispy for 2-3 days if reheated in a toaster oven or air fryer. Freeze uncooked batter in portions for up to 1 month—thaw before cooking (worth the extra minute).
Why You’ll Love This Recipe
- Mix and Go: So easy. Just rice flour, all-purpose flour, water, and scallions—no fancy prep, no fuss.
- Crispy Green Bites: The scallions caramelize at the edges, giving that perfect savory crunch with every bite.
- Breakfast or Snack: Honestly, I make these for lazy Sunday brunches or a quick afternoon pick-me-up.
- Budget Stretcher: Rice flour and scallions are cheap, and this feeds four without breaking the bank.
Step-by-Step Instructions for Korean Rice Pancakes
Master the technique for achieving golden, lacy edges and perfectly tender centers.
Step 1: Prepare the Scallions and Aromatics
Thinly slice all 8 whole Scallions, including the green parts, into 2-inch pieces. I find using kitchen shears makes quick work of this. Mince the 2 cloves Garlic Cloves finely—you want it to melt into the batter.
This prep work ensures even distribution of flavor and texture throughout the pancake. The scallions should be cut thin enough to cook through quickly but thick enough to maintain some bite.
Step 2: Create the Smooth Batter
In a large bowl, whisk together the 1.5 cups Rice Flour, 0.5 cup All-Purpose Flour, 1 tsp Salt, 0.5 tsp Ground Black Pepper, and 1 tsp Sugar. Slowly pour in the 1.25 cups Water while whisking to prevent lumps.
Add the 1 whole Large Egg and whisk until the batter is completely smooth. It should have the consistency of heavy cream. Let it rest for 5 minutes—this allows the flours to fully hydrate.
Now stir in the sliced scallions and minced garlic. The batter will thicken slightly as the vegetables release moisture. This is normal and desired for the final texture.
Step 3: Cook the Pancakes to Golden Perfection
Heat 2 tbsp of the 3 tbsp Vegetable Oil in a nonstick skillet over medium-high heat until shimmering. Pour in about ½ cup of batter, spreading it into a 6-inch circle with the back of a spoon.
Cook undisturbed for 3-4 minutes until the edges become golden and crispy and the center looks set. You’ll see the edges start to pull away from the pan when it’s ready to flip.
Carefully flip the pancake and cook for another 2-3 minutes until the second side is golden brown and crisp. Transfer to a paper towel-lined plate to drain excess oil.
Step 4: Finish and Serve Immediately
Repeat with the remaining batter, adding more vegetable oil as needed between batches. Once all pancakes are cooked, drizzle each with 1 tbsp Soy Sauce and 1 tsp Sesame Oil.
Sprinkle evenly with the 1 tbsp Sesame Seeds for added crunch and visual appeal. Serve immediately while hot—the contrast between the crispy edges and tender center is best experienced fresh from the pan.
The pancakes should have a lacy, golden-brown exterior with a moist, scallion-studded interior. Each bite delivers the perfect balance of savory, slightly sweet, and umami flavors.
Pro Tips For Making Korean Rice Pancake
- Pre-soak the rice flour: Mix the rice flour with cold water and let it sit for 10-15 minutes before combining with other ingredients—this prevents lumps and gives the pancakes a smoother texture.
- Chop scallions thinly: Slice the scallions as thin as you can (about 1/8-inch) so they cook through without burning, and distribute evenly in the batter.
- Keep heat medium-high: I learned this the hard way—too low and the pancakes turn gummy, too high and they burn before cooking through. Medium-high heat gives that perfect crisp edge.
- Salt the batter last: Add salt right before cooking, not while mixing—this keeps the scallions from releasing too much water and making the batter too thin.
Storing and Reheating This Dish
Refrigerator Storage
Let cooked pancakes cool completely before storing in an airtight container. They’ll keep in the fridge for up to 3 days. I like using glass containers to prevent sogginess. 🥬
Freezer Method
For longer storage, freeze uncooked batter in portions for up to 1 month. Thaw overnight in the fridge before using. Cooked pancakes can also be frozen—layer them with parchment paper to prevent sticking.
Oven Reheating
Preheat your oven to 375°F and place pancakes on a wire rack over a baking sheet. Heat for 5-7 minutes until crispy. This method works best for reviving texture.
Air Fryer Refresh
Arrange pancakes in a single layer in your air fryer basket. Reheat at 350°F for 3-4 minutes, checking halfway. They’ll come out almost as crispy as fresh.
Microwave Option
For a quick fix, microwave between damp paper towels for 20-30 seconds. Note that this softens the texture, so I recommend toaster oven or air fryer for best results. ⚡
Pro Tip
Always reheat from room temperature for even warming. If your pancakes lost some crispiness, a quick pan-fry in 1 tsp vegetable oil for 1-2 minutes per side restores it perfectly.
Nutrition Facts
Frequently Asked Questions
Can I make these without rice flour?
Yes, substitute with cornstarch at half the amount, though the texture will be slightly different. For best results, use a mix of all-purpose flour and cornstarch.
Why does my batter turn out too thick?
Add 1-2 tablespoons of water and stir well. The batter should resemble heavy cream. Let it rest for 5 minutes before adjusting.
How do I get extra crispy edges?
Use medium-high heat and avoid flipping too early. Cook until edges are golden brown and pull away from the pan.
What’s the best dipping sauce?
Mix 2 tbsp soy sauce, 1 tbsp vinegar, 1 tsp sesame oil, and 1 tsp sugar. Adjust to taste.

- Gambia Jollof Rice Recipe: West African One-Pot Spice Fusion - October 5, 2026
- Cream of Wild Rice Soup Recipe Minnesota: Northwoods Creaminess With Foraged Grains - October 5, 2026
- Frozen Cauliflower Fried Rice Recipe: Quick Low-Carb Wok Magic - October 5, 2026