
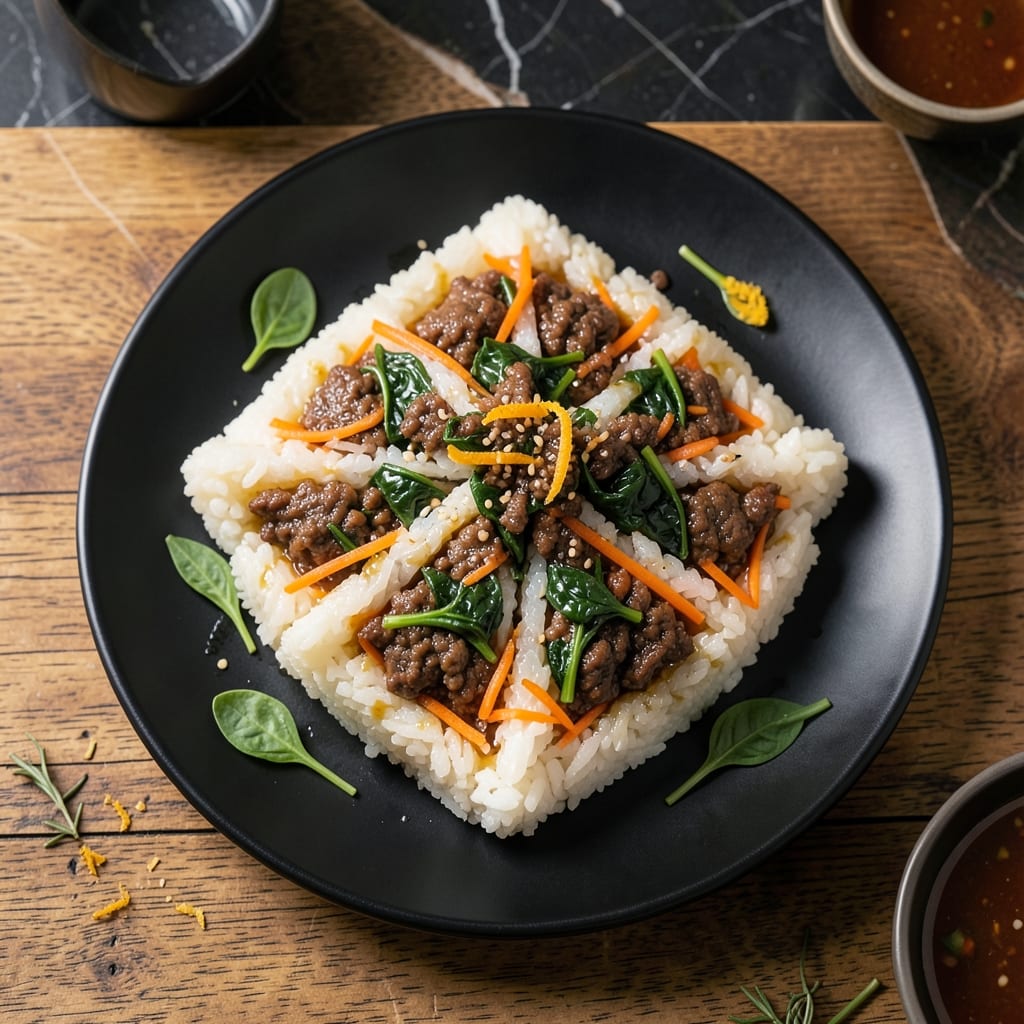
Achieving crispy edges with soft centers in Korean rice triangles requires precise technique and timing. This traditional dish transforms simple ingredients into a portable, flavorful meal that’s as satisfying as it is beautiful.
The secret lies in properly seasoning the rice and using the right fillings—carrots, spinach, egg, and optional meat create layers of texture and flavor. Each triangle offers a perfect balance of chewy rice and vibrant, fresh fillings.
When pan-fried, the exterior develops a golden, crispy crust while the inside remains tender. The contrast between the warm, crispy outside and the soft, seasoned rice inside makes every bite memorable.
These triangles are ideal for picnics, lunchboxes, or as a creative appetizer. The method ensures consistent results with minimal effort.
Ingredients for Korean Rice Triangle
Transform everyday staples into these crispy-edged, soft-centered Korean triangles with ease.
| Ingredient | Amount | Notes |
|---|---|---|
| Short-Grain White Rice 🍚 | 2 cups | Rinsed until water runs clear |
| Carrots 🥕 | 2 whole | Julienned into thin strips |
| Fresh Spinach 🥬 | 2 cups | Blanched and finely chopped |
| Large Eggs 🥚 | 2 whole | Beaten for filling |
| Ground Beef 🥩 | ½ lb | Optional, cooked and seasoned |
| Sesame Oil 🫒 | 1 tbsp | Toasted for authentic flavor |
| Soy Sauce 💧 | 2 tbsp | Low-sodium preferred |
| Garlic Cloves 🧄 | 3 cloves | Minced finely |
| Green Onions 🧅 | 3 whole | Thinly sliced for garnish |
| Sesame Seeds 🌾 | 1 tbsp | Toasted for garnish |
| Salt 🧂 | ½ tsp | Fine sea salt preferred |
| Black Pepper 🌶️ | ¼ tsp | Freshly ground |
| Vegetable Oil 🫒 | 2 tbsp | For pan-frying triangles |
| Rice Vinegar 💧 | 1 tsp | For balancing flavors |
The rice is everything here—short-grain white rice is non-negotiable for that sticky, chewy texture that holds the triangle shape. Korean brands like CJ or Sempio are ideal if you can find them at an Asian market. Rinse until the water runs completely clear to avoid gummy rice. For the carrots, julienned strips cook evenly and add a pop of color (and crunch).
No ground beef? Swap for ground pork or turkey without changing the cooking method. Vegetarian? Mushrooms or tofu work beautifully—just pre-cook and season well. Fresh spinach not on hand? Frozen works fine (thaw and drain thoroughly). The soy sauce can be tamari for gluten-free, and if you’re out of sesame oil, a few drops of toasted peanut oil adds similar depth.
Assemble and refrigerate triangles for up to 2 hours before frying—keeps them from falling apart. Leftovers? Reheat in a dry pan to restore the crispiness. They’re best eaten the same day, but will keep in the fridge for 2-3 days in an airtight container.
Why You’ll Love This Recipe
- One Pan Wonder: I just cook the rice, mix in the beef and veggies, and fold them into triangles—no fancy tools or techniques.
- Umami Bomb: The beef and spinach combo with sticky rice hits that savory-sweet spot I crave every time.
- Lunchbox Hero: These stay fresh for days, so I pack them for work or the kids’ school lunches without worry.
- Budget Stretcher: Ground beef and rice feed my family of four for under ten bucks, and honestly, it feels like a steal.
Step-by-Step Instructions for Korean Rice Triangles
Achieve perfectly crispy edges while maintaining soft centers with this proven method.
Step 1: Prepare and Season the Rice Filling
Cook the 2 cups Short-Grain White Rice according to package instructions, then let it cool slightly. In a mixing bowl, combine the cooked rice with the 2 cups Fresh Spinach, 2 whole Carrots (julienned), and 0.5 lb Ground Beef (if using).
Drizzle in the 1 tbsp Sesame Oil, 2 tbsp Soy Sauce, minced 3 cloves Garlic Cloves, 0.5 tsp Salt, and 0.25 tsp Black Pepper. Mix thoroughly until the rice is evenly coated and the flavors meld together. The mixture should hold its shape when pressed.
Step 2: Shape and Fill the Rice Triangles
Divide the seasoned rice mixture into 8 equal portions. Using slightly damp hands, shape each portion into a triangle with a small indentation in the center. This prevents sticking and helps create clean edges.
Place ½ tsp of the 2 whole Large Eggs (beaten) into the center of each rice triangle. Fold the rice edges over the egg to enclose it completely, pressing firmly to seal. The egg should be fully surrounded to prevent leaking during cooking.
Step 3: Pan-Fry for Crispy Edges
Heat the 2 tbsp Vegetable Oil in a non-stick skillet over medium heat until shimmering. Carefully place the rice triangles in the pan, leaving space between each to allow even browning. Cook for 4-5 minutes per side until golden brown and crispy.
Resist the urge to move them too soon—you’ll know they’re ready to flip when they release easily from the pan and the edges are deeply browned. This creates the signature crispy exterior while keeping the centers soft and tender.
Step 4: Finish with Aromatic Garnishes
Transfer the cooked triangles to a plate lined with paper towels to drain excess oil. While still hot, drizzle lightly with additional 1 tsp Rice Vinegar for a subtle tang that balances the richness.
Sprinkle evenly with the 3 whole Green Onions (thinly sliced) and 1 tbsp Sesame Seeds for freshness and crunch. The green onions should retain their bright color and crisp texture, adding a pop of contrast to each bite.
Pro Tips For Making Korean Rice Triangle
- Pre-cook the rice: Use day-old or slightly cooled short-grain rice—it holds its shape better when shaping into triangles, and I learned this the hard way after too many mushy first attempts.
- Squeeze spinach dry: After blanching the spinach, squeeze out every last drop of water with your hands or a clean towel, or your filling will turn soggy and leak through the rice.
- Chill before shaping: Let the rice cool to room temp before handling, about 20 minutes, so it doesn’t stick to your fingers like glue when forming those perfect triangles.
- Salt the beef early: Toss the ground beef with a pinch of salt and a teaspoon of soy sauce while it’s still raw, then let it sit for 10 minutes—this small step actually changes the outcome of the flavor.
Storing and Reheating This Recipe
Fridge Storage
Let your triangles cool completely before storing—this prevents sogginess. Place them in a single layer on a plate lined with paper towels, then cover with plastic wrap. They’ll keep in the fridge at 40°F or below for up to 2 days with minimal texture loss. ❄️
Freezer Method
For longer storage, freeze uncooked triangles on a parchment-lined tray for 1 hour first. Then transfer to a freezer bag, squeezing out excess air. They’ll last 1 month without losing flavor. Thaw overnight in the fridge before pan-frying.
Oven Reheating
Preheat to 375°F and place triangles on a wire rack over a baking sheet. Reheat for 8-10 minutes until crispy. This method revives the texture better than microwaving, which makes them soft.
Stovetop Revival
Heat a dry non-stick pan over medium-low heat for 3-4 minutes per side. Press down lightly with a spatula to ensure even contact. This restores the crispy edges almost like fresh.
Pro Tips
Always reheat from cold—never room temperature—for even results. If storing with sauce, keep it separate to avoid soggy triangles. I like using glass containers for better temperature retention.
Serving Fresh
These are best eaten immediately after cooking when the contrast between crispy and soft is most pronounced. For meal prep, cook and store uncooked, then fry fresh when ready to serve. 💡
Nutrition Facts
Frequently Asked Questions
Can I make these triangles vegetarian?
Swap the beef for mushrooms or tofu. Sauté with soy sauce and garlic for extra flavor. The texture will be just as satisfying.
Why did my triangles fall apart while frying?
This usually happens if the rice is too wet or not pressed firmly enough. Use slightly damp hands to shape, and chill for 30 minutes before frying to help them hold.
Can I bake these instead of pan-frying?
Yes, but the texture will differ. Bake at 375°F for 15-20 minutes, flipping halfway. You’ll get crispiness but less golden browning than pan-frying.
How do I keep the edges crispy when packing for lunch?
Let them cool completely, then store in a single layer in an airtight container with a paper towel to absorb moisture. Reheat in a dry pan to revive crispiness.

- Mujadara Rice and Lentils Recipe: Earthy Spiced Lentils With Caramelized Onions - November 1, 2026
- Naija Fried Rice Recipe: Street-Style Spice With Veggie Crunch - November 1, 2026
- Mushy Rice Recipe: Fluffy Grains Transformed in Minutes - November 1, 2026