
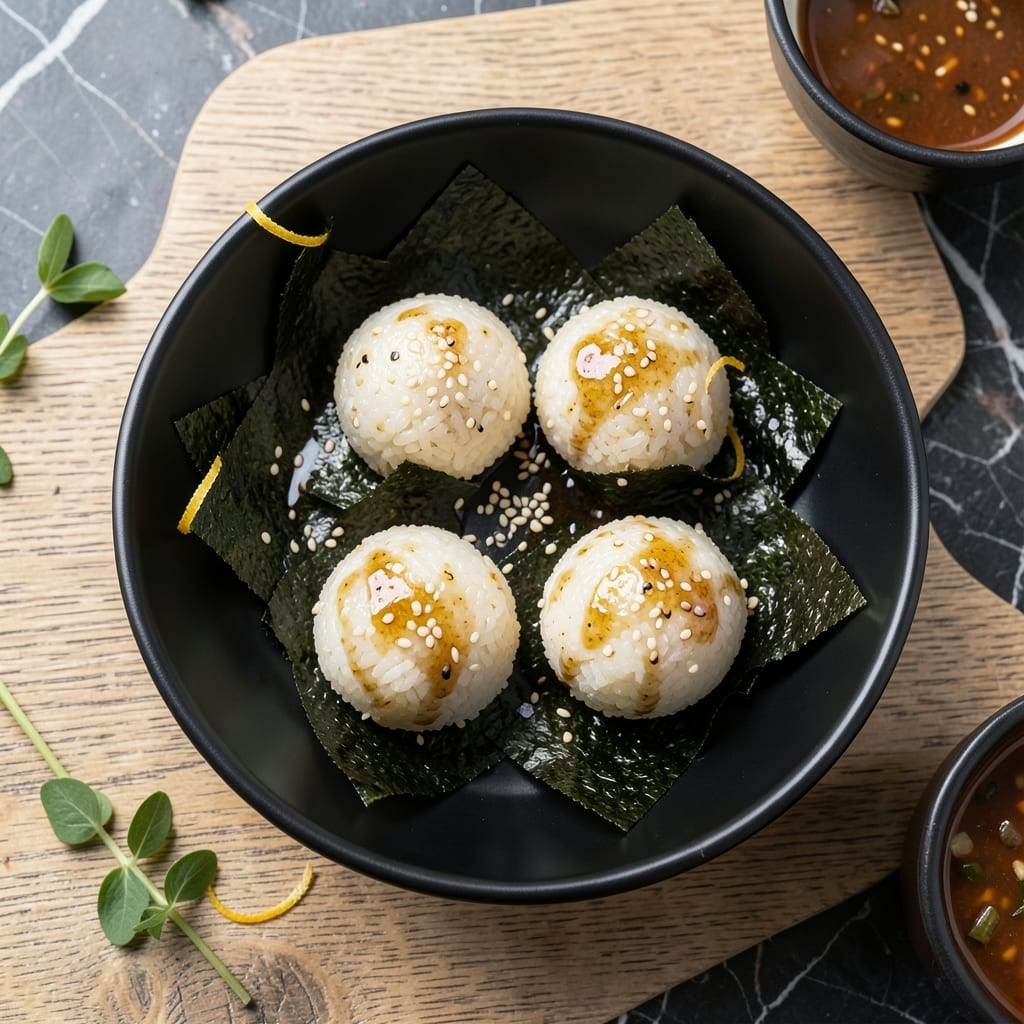
I first discovered these chewy seaweed rice balls during a trip to Busan, where street vendors sold them as a quick, portable snack. The combination of sticky rice and briny seaweed creates a uniquely satisfying texture and flavor that’s hard to forget.
This version stays true to the traditional method, using short-grain rice for the perfect chewy consistency and sheets of nori for wrapping. The key is seasoning the rice lightly with salt and sesame oil to enhance, not overpower, the natural taste of the seaweed.
Each bite delivers a balance of soft rice and crisp seaweed, with a subtle oceanic umami that lingers. They’re simple to assemble once the rice is prepared, making them ideal for lunchboxes or a light snack.
Serve warm or at room temperature, and pair with a side of spicy kimchi or soy sauce for dipping.
Ingredients for Korean Seaweed Rice Ball
Short list of traditional ingredients for authentic chewy rice balls with oceanic flavor.
| Ingredient | Amount | Notes |
|---|---|---|
| Short-Grain White Rice 🍚 | 2 cups | Rinsed until water runs clear |
| Nori Sheets 🌿 | 4 sheets | Full-size, cut into strips |
| Sesame Oil 🫒 | 1 tbsp | Toasted variety preferred |
| Sea Salt 🧂 | ½ tsp | Fine grain for even seasoning |
| White Sesame Seeds 🌰 | 1 tbsp | Toasted for extra flavor |
| Rice Vinegar 💧 | 1 tsp | For subtle tang |
| Sugar 🍚 | ½ tsp | Optional, balances flavors |
| Kimchi 🥬 | ½ cup | Chopped, for serving |
| Soy Sauce 🥄 | ¼ cup | For dipping |
| Green Onions 🧅 | 2 whole | Thinly sliced, for garnish |
| Water 💧 | 2 ½ cups | For cooking rice |
The nori and short-grain rice are non-negotiable here. Look for nori labeled as sushi-grade at Asian markets or the international aisle at Whole Foods. Short-grain rice like Koshihikari or Calrose gives that essential sticky texture—jasmine or basmati won’t work. I always rinse the rice until the water runs completely clear (usually 4-5 washes) to remove excess starch and prevent gumminess.
No rice vinegar? Apple cider vinegar at half the amount works in a pinch. For a gluten-free version, swap soy sauce for tamari. The sesame oil can be omitted if you’re allergic, but it adds that characteristic nutty aroma. If you can’t find white sesame seeds, black sesame seeds add visual contrast (and a slightly stronger flavor).
Assemble just before serving—the nori softens over time. Leftovers keep in the fridge for 1 day (best eaten fresh). The rice can be cooked a day ahead and stored separately—just rewarm slightly and moisten with a splash of water before shaping. Freezing isn’t recommended.
Why You’ll Love This Recipe
- No Cooking Required: I just mix the warm rice with sesame oil and salt, then shape and wrap—no stove time after the rice is done.
- Umami Bomb: That first bite of nori with the nutty sesame oil and sticky rice? Ridiculously good.
- Lunchbox Hero: My kids actually finish their school lunch when these are tucked inside.
- Budget Stretch: A sheet of nori makes four or five balls, and a bag of rice goes forever.
Step-by-Step Instructions for Korean Seaweed Rice Balls
Follow this method precisely to achieve perfectly seasoned rice with crisp nori wrapping.
Step 1: Prepare and Cook the Short-Grain Rice
Rinse the 2 cups Short-Grain White Rice under cold water until the water runs completely clear. This removes excess starch and prevents the rice from becoming gummy. Drain well in a fine-mesh strainer.
In a medium saucepan, combine the drained rice with the 2.5 cups Water. Bring to a boil, then reduce heat to low, cover, and simmer for 15 minutes. Remove from heat and let it steam, covered, for another 10 minutes until the grains are tender and slightly sticky.
Step 2: Season the Rice with Aromatic Flavorings
Transfer the cooked rice to a large bowl and let it cool slightly. Drizzle the 1 tbsp Sesame Oil over the warm rice and sprinkle with the 0.5 tsp Sea Salt. Using a rice paddle or silicone spatula, gently fold the seasonings into the rice to distribute evenly without mashing the grains.
Add the 1 tbsp White Sesame Seeds, 1 tsp Rice Vinegar, and 0.5 tsp Sugar. Fold again until the rice is uniformly seasoned. The rice should be sticky enough to hold its shape but not wet. Taste and adjust seasoning if needed.
Step 3: Shape the Rice Balls
Wet your hands lightly with water to prevent sticking. Scoop about ½ cup of the seasoned rice into your palm and gently press it into a triangular or round shape. The rice should hold together firmly but not be packed too tightly.
Repeat with the remaining rice to form 8 rice balls. Place them on a plate and cover with a damp towel to keep them from drying out. If the rice becomes too sticky to handle, rewet your hands as needed.
Step 4: Wrap with Nori and Garnish
Cut the 4 sheets Nori Sheets into strips approximately 1 inch wide. Wrap each strip around a rice ball, pressing gently to adhere. The nori should cover most of the rice but leave some exposed for contrast.
Thinly slice the 2 whole Green Onions and sprinkle over the finished rice balls for a fresh, colorful garnish. Serve immediately with the 0.5 cup Kimchi and 0.25 cup Soy Sauce on the side for dipping, or pack for a portable meal.
Pro Tips For Making Korean Seaweed Rice Ball
- Use Warm Rice: I learned this the hard way—cold rice makes the nori crack when you roll it. Keep your cooked short-grain rice warm, about 100°F, so it sticks better and wraps smoothly.
- Toast Sesame Seeds: Skip raw sesame seeds; toast them in a dry pan for 2-3 minutes until golden. It brings out a nutty depth that plain seeds just can’t match.
- Cut Nori Last: Nori sheets absorb moisture fast and turn soggy if cut too early. Wait until you’re ready to roll before trimming them to size—this keeps them crisp.
- Oil Your Hands: Rub about ½ teaspoon sesame oil on your palms before shaping each ball. The rice won’t cling to your skin, and you’ll get that glossy finish without extra effort.
Pro Cooking Tips for Great korean seaweed rice ball
Rice Rinsing Technique
Rinse the rice in a fine-mesh strainer under cold water, swirling with your hand. Change the water 4-5 times until it runs completely clear. This removes excess starch that would make your rice balls gummy. I use a Bamboo rice paddle for this step. 💧
Perfect Rice Texture
After cooking, let the rice steam covered for 10 minutes. The grains should be tender but still firm enough to hold shape. Test by pressing a grain between your fingers—it should stick slightly but not mush. Use Koshihikari rice for authentic chewiness.
Seasoning Distribution
Fold seasonings gently into warm rice using a cutting motion with your spatula. This prevents mashing the grains. Taste after adding 1 tsp rice vinegar—the flavor should be subtle, not overpowering. I find a wooden rice paddle works best for this.
Nori Wrapping Trick
Cut nori sheets into 1-inch strips using kitchen shears for clean edges. Wrap each rice ball just before serving to maintain crispness. Press the nori gently but firmly so it adheres without tearing. 🌿
Handling Sticky Rice
Keep a bowl of water nearby to rewet your hands as needed. The rice should be sticky enough to hold shape but not wet. If it’s too dry, sprinkle a few drops of water over the rice and fold gently.
Storage Tip
Assemble rice balls no more than 1 hour before serving. The nori will soften if left wrapped too long. Store unassembled components separately in the fridge for up to 1 day. ❄️
Nutrition Facts
Frequently Asked Questions
What rice works best for this?
Use short-grain white rice like Koshihikari or Calrose for the authentic chewy texture. Avoid jasmine or basmati as they won’t stick together properly.
Can I make these ahead of time?
Assemble no more than 1 hour before serving to keep the nori crisp. Store unassembled components separately in the fridge for up to 1 day.
What if my rice is too sticky?
Keep a bowl of water nearby to rewet your hands while shaping. If the rice is too wet, sprinkle a few drops of water and fold gently to adjust consistency.
Can I add fillings inside?
Try small pieces of tuna-mayo or pickled radish in the center before wrapping with nori. Just ensure fillings are dry to prevent sogginess.

- Mujadara Rice and Lentils Recipe: Earthy Spiced Lentils With Caramelized Onions - November 1, 2026
- Naija Fried Rice Recipe: Street-Style Spice With Veggie Crunch - November 1, 2026
- Mushy Rice Recipe: Fluffy Grains Transformed in Minutes - November 1, 2026