
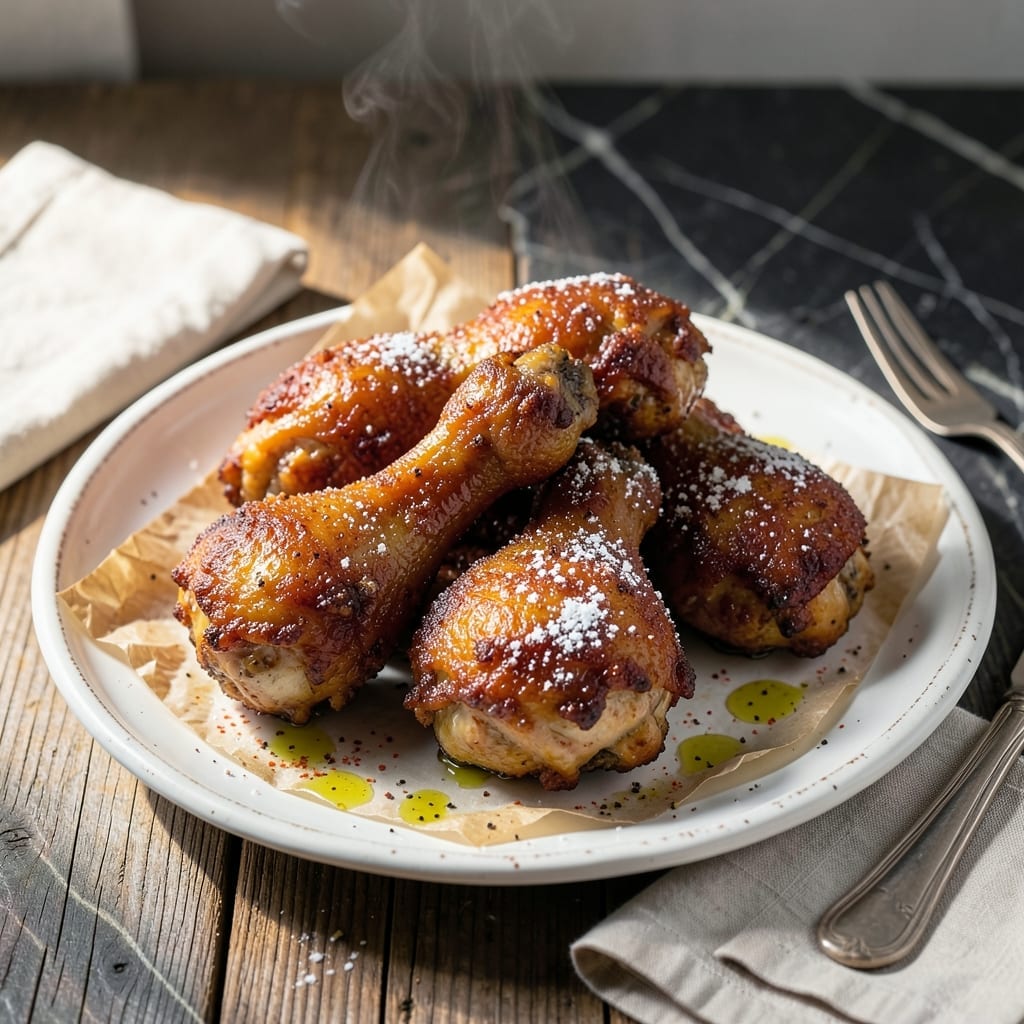
This traditional method delivers crispy, golden-brown chicken with unmatched depth of flavor.
Using lard creates a superior crust that stays shatteringly crispy while keeping the meat juicy inside. The high smoke point of lard allows for perfectly even cooking at the ideal temperature for frying.
The result is chicken with a rich, savory crust that traditional oils simply can’t match. Each bite offers the perfect balance of tender meat and that signature crispy exterior.
This method honors classic techniques while ensuring consistent, professional-quality results every time.
Ingredients for Lard Fried Chicken
Traditional ingredients for that shatteringly crisp, old-school fried chicken experience everyone remembers.
| Ingredient | Amount | Notes |
|---|---|---|
| Chicken Thighs 🍗 | 3 lb | Bone-in, skin-on for crispiness |
| Lard 🥓 | 4 cups | Rendering your own preferred |
| All-Purpose Flour 🌾 | 2 cups | For dredging chicken |
| Buttermilk 🥛 | 1 ½ cups | For soaking chicken |
| Kosher Salt 🧂 | 2 tbsp | Diamond Crystal preferred |
| Black Pepper 🌶️ | 2 tsp | Freshly ground for best flavor |
| Garlic Powder 🧄 | 1 tbsp | Adds depth to crust |
| Onion Powder 🧅 | 1 tbsp | Enhances seasoning blend |
| Smoked Paprika 🌶️ | 1 tsp | For smoky undertones |
| Cayenne Pepper 🔥 | ½ tsp | Adjust for heat preference |
| Baking Powder 🧁 | 1 tsp | Secret for extra crispiness |
| Large Eggs 🥚 | 2 whole | For binding dredge |
The lard is non-negotiable for authentic results. Leaf lard from a trusted butcher or Armour Lard at major grocers both work—avoid hydrogenated versions. For chicken, bone-in, skin-on thighs yield the juiciest meat with the crispiest skin. The buttermilk soak (use full-fat for maximum tenderness) is your insurance against dry meat. Most supermarkets carry all these items in the baking or meat sections.
No buttermilk? Whole milk plus 1 tbsp vinegar per cup works in a pinch. For a gluten-free crust, cornstarch or rice flour at a 1:1 ratio replaces the all-purpose flour. If you must use oil, peanut or vegetable oil gets closest to lard’s high smoke point, but the flavor won’t match. The spices can be adjusted—add more cayenne for heat or swap smoked paprika for sweet if preferred.
Lard keeps indefinitely in the fridge (6-12 months unopened, 3 months opened). Soak the chicken for up to 24 hours for deeper flavor. Leftover fried chicken stays crispy for 2 days at room temperature in a paper bag—never plastic, which traps steam and makes it soggy.
Why You’ll Love This Recipe
- I’ll be real: this is my go-to for Sunday suppers, birthdays, or when the neighbors drop by unannounced.
- One Pan Wonder: I toss the thighs in buttermilk, dredge in flour, and fry in lard—no extra bowls, no fuss.
- Crispy & Juicy: That lard gives it an unmatched crunch while the buttermilk keeps the meat impossibly tender.
- Feeds a Crowd: I’ll be real: this is my go-to for Sunday suppers, birthdays, or when the neighbors drop by unannounced.
Step-by-Step Instructions for Lard Fried Chicken
This method ensures a shatteringly crisp crust and juicy interior without fail.
Step 1: Brine and Season the Chicken Thighs
Begin by patting the 3 lb Chicken Thighs dry with paper towels to remove excess moisture. This step is crucial for achieving maximum crispiness. Season both sides evenly with 2 tbsp Kosher Salt, 2 tsp Black Pepper, 1 tbsp Garlic Powder, 1 tbsp Onion Powder, 1 tsp Smoked Paprika, and 0.5 tsp Cayenne Pepper.
I always use freshly ground black pepper for the best flavor. After seasoning, let the chicken rest for 10 minutes while you prepare the buttermilk and dredging mixture. This short rest allows the salt to penetrate the meat, enhancing both flavor and moisture retention.
Step 2: Prepare the Wet and Dry Dredges
In a large bowl, whisk together the 1.5 cups Buttermilk and 2 whole Large Eggs until fully combined. In a separate shallow dish, combine the 2 cups All-Purpose Flour and 1 tsp Baking Powder. The baking powder is the secret to extra crispiness—it creates tiny air pockets in the crust as it cooks.
Dip each chicken thigh into the buttermilk mixture, allowing any excess to drip off. Then dredge through the flour mixture, pressing firmly to adhere. I like to let the dredged chicken rest on a wire rack for 5 minutes before frying. This helps the coating set and prevents it from falling off during cooking.
Step 3: Heat the Lard and Fry to Golden Perfection
In a large, heavy pot or Dutch oven, heat the 4 cups Lard over medium-high heat to 350°F. Use a deep-fry or candy thermometer to monitor the temperature accurately. Maintaining the correct temperature is essential—too low and the chicken will absorb oil and become greasy; too high and the outside will burn before the inside cooks.
Carefully lower the chicken into the hot lard, being careful not to overcrowd the pot. Fry in batches if necessary. Cook for 12-15 minutes, turning occasionally, until the crust is deep golden brown and the internal temperature reaches 165°F.
Step 4: Drain and Rest Before Serving
Transfer the fried chicken to a wire rack set over a baking sheet or paper towel-lined plate. This allows excess lard to drain while keeping the crust crisp. Resist the urge to stack the pieces—the steam trapped between them will make the crust soggy.
Let the chicken rest for 5-10 minutes before serving. This brief rest allows the juices to redistribute throughout the meat, ensuring each bite is moist and flavorful. The crust should remain audibly crisp when bitten into, with a rich, savory depth from the lard.
Pro Tips For Making Lard Fried Chicken
- Render Lard Slow: Start the lard on medium-low and let it melt gradually—rushing it with high heat can burn the bits before they crisp. I learned this the hard way after my first batch tasted more bitter than savory.
- Buttermilk Soak Overnight: Give the chicken thighs at least 4 hours in buttermilk, but overnight actually changes the outcome. The acid tenderizes the meat and the flour clings better, making for a crunchier crust.
- Skip Cold Chicken: Let the thighs sit at room temperature for 20-30 minutes after the buttermilk soak. Dropping cold chicken into hot lard lowers the temperature too fast and you’ll end up with greasy, unevenly cooked pieces.
- Drain on Rack: After frying, place the chicken on a wire rack over a baking sheet, not paper towels. This keeps the crust crisp all around instead of soggy on one side—yes, even if you’re impatient like me.
Serving Suggestions for lard fried chicken
Classic Plating Style
Serve this creation on a wire rack or paper-lined tray to maintain that shatteringly crisp crust we worked so hard to achieve. I love using a vintage-style metal tray for that nostalgic diner feel. 🥗
Comfort Food Sides
Pair with classic mashed potatoes made with 1 lb Yukon Golds and ½ cup whole milk. The creamy texture contrasts perfectly with the crispy chicken. Coleslaw with a tangy vinegar dressing cuts through the richness beautifully.
Bread for Soaking
Include warm buttermilk biscuits or cornbread to soak up any leftover lard from the pan. I bake mine in a cast iron skillet for that golden crust. These are essential for the full experience.
Fresh Garnishes
Add a sprinkle of fresh parsley or chives for color and freshness. A few lemon wedges on the side let guests add a bright, citrusy note if desired. These small touches elevate the presentation.
Sauce on Side
Offer hot honey or spicy ranch for dipping—I mix ½ cup ranch with 1 tbsp hot sauce. Serve in small ramekins so the crust stays crisp. This addition satisfies those who love extra flavor.
Family-Style Service
Arrange everything on a large platter or wooden board for sharing. This encourages the communal feel that makes fried chicken meals so special. I always include extra napkins—this dish demands them. 💛
Nutrition Facts
Frequently Asked Questions
Why use lard instead of oil for frying?
Lard has a high smoke point and creates a crust with unmatched flavor and texture. It produces a crispier exterior while keeping meat juicier compared to vegetable oils.
How do I know when the lard is hot enough?
Use a thermometer to check for 350°F. Without one, test by dipping a wooden chopstick in—if bubbles form around it, the lard is ready. Maintain this temp for even cooking.
Can I use boneless thighs for this method?
Yes, but bone-in yields better flavor and stays juicier. If using boneless, reduce cooking time to 8-10 minutes to prevent drying out.
What’s the best way to store leftovers?
Keep on a wire rack at room temperature for up to 2 days. Never store in plastic—it traps steam and makes the crust soggy. Reheat in a 375°F oven for 10 minutes to restore crispiness.

- Jollof Rice Sauce Recipe: West African Tomato and Spice Infusion - September 25, 2026
- Japanese Rice Soup Recipe: Umami-Rich Comfort in a Bowl - September 25, 2026
- Homemade Cream Of Rice Recipe: Silk-Smooth Breakfast in Minutes - September 25, 2026