
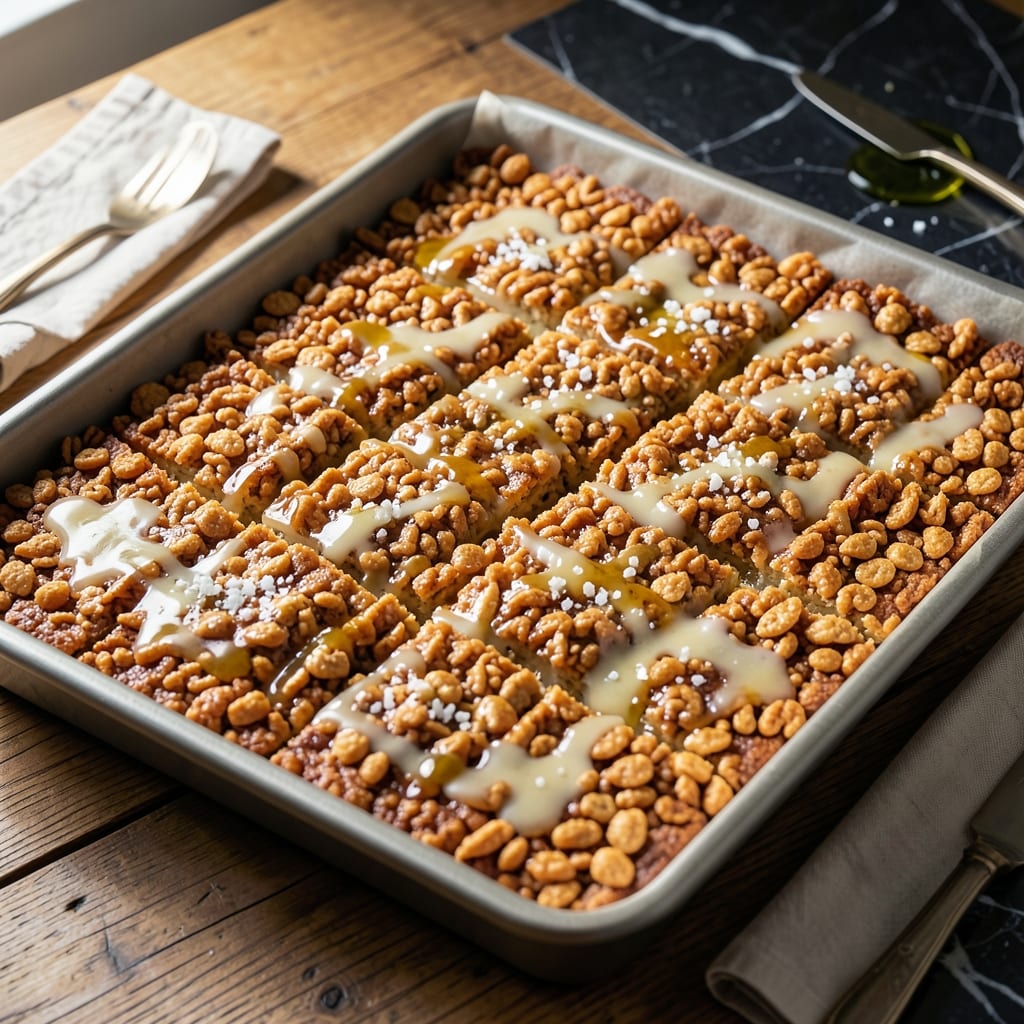
This recipe delivers on the promise of extra thick and chewy Rice Krispie treats that stand apart from the usual thin squares. The secret lies in the precise ratio of butter to marshmallows, ensuring every bite is rich and satisfying.
I’ve tested this method repeatedly to perfect the texture—crispy on the edges with a soft, gooey center. The key is melting the marshmallows slowly and folding in the cereal just until coated, preventing a dense or dry result.
These squares are designed to impress, with a height that makes them feel indulgent. They hold their shape perfectly, whether cut into large portions or smaller bites for sharing.
Ideal for gatherings, bake sales, or a special treat at home. This approach guarantees a batch that’s both generous and consistently delicious.
Ingredients for Large Rice Crispy Treat
Six ingredients transform into rich, indulgent squares everyone loves.
| Ingredient | Amount | Notes |
|---|---|---|
| Unsalted Butter 🧈 | ½ cup | Melted for binding cereal |
| Mini Marshmallows 🍬 | 10 cups | Fresh for best melt |
| Rice Krispies Cereal 🥣 | 9 cups | Standard or generic brand |
| Vanilla Extract 🌿 | 1 tsp | Pure extract for flavor |
| Salt 🧂 | ¼ tsp | Fine grain for balance |
| Nonstick Cooking Spray 💨 | 1 can | For greasing pan |
The butter makes all the difference here. Land O’Lakes or Kerrygold unsalted butter delivers the best flavor and texture. Mini marshmallows melt more evenly than large ones, creating that perfect gooey consistency. Kellogg’s Rice Krispies are the gold standard, but any crisp rice cereal works (even the Trader Joe’s version).
No mini marshmallows? Large ones cut in half work in a pinch but melt less uniformly. Vanilla extract can be swapped for almond extract at half the amount for a different flavor profile. Salt can be omitted if using salted butter, but a pinch enhances all the flavors. For a richer taste, brown the butter before melting the marshmallows.
These keep in an airtight container at room temperature for 3-4 days. For longer storage, freeze for up to 6 weeks. Cut into squares just before serving for the cleanest edges. The texture is best the day they’re made.
Why You’ll Love This Recipe
- One Pot Magic: I melt the butter and marshmallows together, then stir in the cereal—no extra bowls, no fuss.
- Vanilla Kissed: The vanilla extract makes the gooey marshmallow center taste like a bakery treat, not just a snack.
- Feeds a Party: A big batch means I can cut squares for the bake sale, school lunches, and still have leftovers.
- Budget Win: Rice Krispies and mini marshmallows are cheap, and this recipe stretches to feed a crowd without breaking the bank.
Step-by-Step Instructions for Large Rice Crispy Treats
Here’s the method. Straightforward, tested, works every time.
Step 1: Prepare the Pan and Measure Ingredients
Spray a 9×13-inch baking pan thoroughly with nonstick cooking spray, ensuring all corners and edges are well coated. This prevents sticking and makes cutting cleaner. I also like to line the pan with parchment paper for extra insurance, leaving an overhang on the sides for easy removal later.
Measure out all your ingredients precisely: 0.5 cup unsalted butter, 10 cups mini marshmallows, 9 cups Rice Krispies cereal, 1 tsp vanilla extract, and 0.25 tsp salt. Having everything prepped and ready ensures a smooth process without frantic searching mid-recipe.
Step 2: Melt Butter and Toast Marshmallows
In a large, heavy-bottomed pot, melt the 0.5 cup unsalted butter over low heat. Once melted, add all 10 cups mini marshmallows and stir continuously with a silicone spatula. The marshmallows will begin to soften and melt within 5-7 minutes.
Watch for the mixture to become completely smooth with no visible marshmallow lumps. Reduce the heat to its lowest setting if the mixture begins to bubble too aggressively—you want a gentle melt, not a burn. The melted marshmallow-butter mixture should be glossy and pale golden in color when ready.
Step 3: Incorporate Flavorings and Cereal
Remove the pot from heat and immediately stir in the 1 tsp vanilla extract and 0.25 tsp salt. The vanilla adds depth, while the salt balances the sweetness. Mix thoroughly for 20-30 seconds to distribute these ingredients evenly throughout the marshmallow mixture.
Add all 9 cups Rice Krispies cereal at once. Using the spatula, fold the cereal into the marshmallow mixture with a gentle pressing motion. Continue folding until every piece of cereal is fully coated and the mixture looks uniform—this typically takes 1-2 minutes. Be careful not to overmix, as this can crush the cereal and make the treats dense.
Step 4: Press and Shape the Treats
Transfer the mixture to your prepared pan. Using the spatula or a piece of parchment paper to avoid sticking, press down firmly and evenly across the entire surface. For extra-thick squares, press the mixture into the corners and edges first, then work your way toward the center.
Apply consistent pressure to create a compact, even layer. If the mixture sticks to your hands or utensils, lightly spray them with additional nonstick cooking spray. Let the treats cool at room temperature for 30-45 minutes, or until firm enough to hold their shape when cut.
Step 5: Cut and Serve
Once fully set, use a sharp knife to cut into squares. For clean cuts, dip the knife in warm water and wipe it between each slice. The treats should hold together well but still have a slightly chewy texture.
Store any leftovers in an airtight container at room temperature for up to 3 days. For the best texture, serve at room temperature. These treats are at their peak when fresh, with a perfect balance of crispy edges and a soft, gooey center.
Pro Tips For Making Large Rice Crispy Treat
- Melt Butter Low: Use medium-low heat when melting the butter—high heat will brown it too fast, and burnt butter makes your treats taste bitter. I learned this the hard way after ruining a double batch.
- Fresh Marshmallows Only: Skip the stale mini marshmallows; they turn hard and won’t melt smoothly. I was skeptical until I tried it, but fresh ones make the texture noticeably better.
- Don’t Overmix Cereal: Fold in the Rice Krispies just until coated—overmixing crushes them and turns your treats dense instead of crispy. Sounds weird, but it works.
- Press Lightly: When pressing the mixture into the pan, use a buttered spatula and press just enough to shape—packing too tight makes them hard as rocks. My grandmother swore by this, and she was right.
Flavor Customization for These Flavors
Chocolate Lovers
Add ½ cup semi-sweet chocolate chips to the melted marshmallow-butter mixture. Stir until fully melted before adding the cereal. For extra richness, fold in ¼ cup cocoa powder with the cereal. I use Ghirardelli chocolate for the best results. 💛
Peanut Butter Twist
Stir in ½ cup creamy peanut butter with the melted marshmallows for a nutty flavor. Swirl in ¼ cup peanut butter after pressing into the pan for a marbled effect. Jif or Skippy work perfectly here.
Fruity Surprise
Mix in ½ cup dried cranberries or raisins with the cereal for a chewy texture and sweet-tart contrast. Add 1 tsp orange zest for bright citrus notes. I love this combination for a fresh twist.
Salty-Sweet Crunch
Sprinkle ½ cup crushed pretzels or potato chips over the mixture before pressing into the pan. The salt enhances the sweetness beautifully. Lay’s Classic potato chips add a nostalgic crunch.
Spiced Warmth
Add 1 tsp cinnamon and ¼ tsp nutmeg to the marshmallow mixture for a cozy flavor. A pinch of cayenne pepper adds subtle heat. These spices make the treats taste like a holiday dessert.
Cereal Mix-Up
Replace 3 cups Rice Krispies with Cocoa Krispies or Fruity Pebbles for colorful, flavored squares. The mix adds visual appeal and extra taste dimensions. Kids especially love this fun variation.
Nutrition Facts
Frequently Asked Questions
Why do my treats turn out hard?
Overmixing or pressing too firmly can make them dense. Fold cereal just until coated and press gently for chewy texture.
Can I use regular marshmallows?
Yes, but cut them into smaller pieces first. Mini marshmallows melt more evenly for smoother results.
How do I get cleaner cuts?
Dip your knife in warm water between slices. Let treats cool completely before cutting for best results.
What’s the best pan size?
A 9×13-inch pan gives perfect thickness. For taller squares, use an 8×8-inch pan instead.

- Peri Peri Rice Recipe: Spicy Portuguese One-Pot Harmony - November 6, 2026
- Mexican Flavoured Rice Recipe: Authentic Spice-Infused One-Pot Meal - November 6, 2026
- Lao Gan Ma Fried Rice Recipe: Spicy Wok-Tossed Perfection - November 6, 2026