
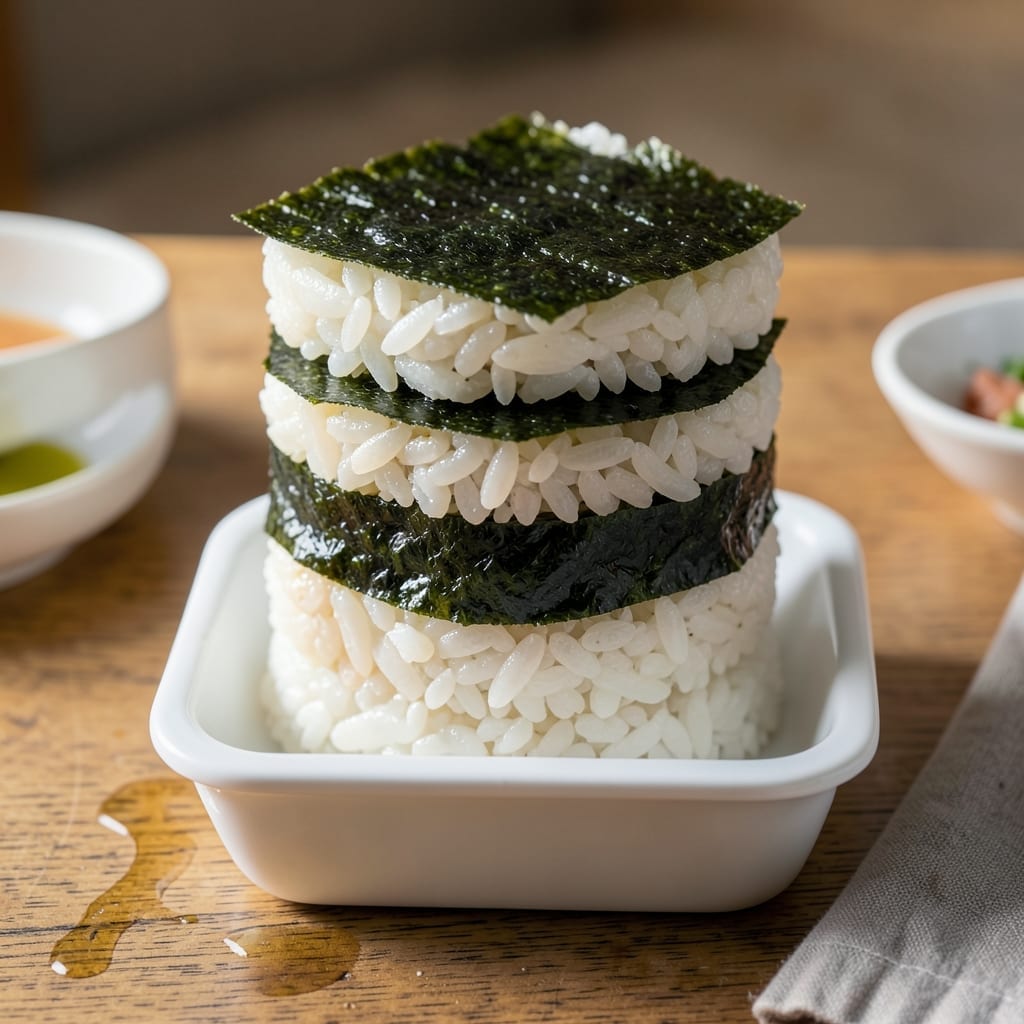
Achieving perfect sushi rice requires precision, not luck. The foundation of great sushi lies in properly seasoned, sticky rice that holds its shape without being mushy.
This method delivers vinegar-infused rice with the ideal balance of sweetness and tang. The key is using the right rice-to-water ratio and gentle folding to maintain grain integrity.
You’ll end up with glossy, slightly sticky rice that clings together beautifully. Each grain remains distinct while contributing to the overall texture that makes sushi irresistible.
The vinegar seasoning transforms plain rice into the signature flavor base for all sushi variations. Master this technique and you’ve mastered the heart of sushi making.
Ingredients for Layered Sushi Rice
Precision matters here. These carefully measured ingredients create that signature sticky, glossy foundation.
| Ingredient | Amount | Notes |
|---|---|---|
| Sushi Rice 🍚 | 2 cups | Short-grain Japanese variety |
| Water 💧 | 2 ½ cups | Filtered for best results |
| Rice Vinegar 🍶 | ½ cup | Unseasoned Japanese rice vinegar |
| Granulated Sugar 🍚 | 2 tbsp | Dissolved in vinegar mixture |
| Sea Salt 🧂 | 1 tsp | Fine grain preferred |
| Nori Sheets 🍱 | 4 sheets | Full-size for layering |
| Sesame Seeds 🌰 | 1 tbsp | Toasted for garnish |
| White Sesame Seeds 🌰 | 1 tbsp | Optional for contrast |
| Rice Wine 🍶 | 1 tbsp | Optional for depth |
| Cucumber 🥒 | ½ whole | Peeled, seeded, julienned |
| Avocado 🥑 | 1 whole | Ripe, sliced thinly |
| Imitation Crab 🦀 | 8 oz | Flaked for layering |
The rice is non-negotiable—short-grain Japanese sushi rice is the only variety that delivers the right texture. Koshihikari or Nishiki brands are widely available at Asian markets or well-stocked supermarkets. Avoid jasmine or basmati; their grains don’t cling properly. The rice vinegar should be unseasoned; seasoned versions contain added sugar and salt that throw off the balance.
No rice vinegar? Apple cider vinegar at half the amount works in a pinch, though the flavor profile differs. For the nori, full-size sheets provide the best structure for layering. The sugar and salt quantities are precise—don’t adjust until you’ve tasted the seasoned rice. Imitation crab can be swapped for cooked shrimp or smoked salmon if preferred.
The seasoned rice holds at room temperature for 4 hours—ideal for sushi parties. Store unassembled components in the fridge for up to 24 hours, but assemble just before serving. Toast sesame seeds fresh (30 seconds in a dry pan) for maximum aroma.
Why You’ll Love This Recipe
- One Pot Wonder: I dump everything in a rice cooker, walk away, and come back to perfectly sticky sushi rice—no babysitting required.
- Balanced Sweet-Salty: That tangy rice vinegar with just a touch of sugar and salt hits the spot every single time.
- Bento Box Ready: I pack these layers into lunchboxes all week—stays fresh, looks fancy, and my kids actually finish it.
- Pantry MVP: Five ingredients I always have on hand, and it stretches to feed a crowd without breaking the bank.
Step-by-Step Instructions for Layered Sushi Rice
Master the technique for perfectly seasoned rice and artful layering every time.
Step 1: Rinse and Cook the Sushi Rice
Place the 2 cups sushi rice in a fine-mesh strainer and rinse under cold water until the water runs clear. This removes excess starch that would make the cooked rice gummy rather than sticky. I rinse mine 4-5 times, swirling the rice gently with my hand each time.
Combine the rinsed rice with the 2.5 cups water in a rice cooker or heavy pot. Cook according to your rice cooker’s instructions, or bring to a boil on the stovetop, then reduce to low heat, cover, and simmer for 15 minutes. Remove from heat and let it steam, covered, for another 10 minutes.
Step 2: Prepare the Seasoning Mixture
While the rice cooks, combine the 0.5 cup rice vinegar, 2 tbsp granulated sugar, and 1 tsp sea salt in a small saucepan. Heat over low heat just until the sugar and salt dissolve completely—about 2-3 minutes. Remove from heat and stir in the 1 tbsp rice wine if using.
This seasoning mixture, called sushi-zu, is what gives sushi rice its distinctive tangy-sweet flavor. Don’t let it boil, as this can make the vinegar lose its bright flavor. The mixture should be warm but not hot when you add it to the cooked rice.
Step 3: Season and Cool the Rice
Transfer the cooked rice to a large wooden or glass bowl. Using a rice paddle or silicone spatula, gently fold in the warm vinegar mixture with a cutting motion. Be careful not to mash the rice grains—you want to maintain their individual texture while ensuring even distribution of the seasoning.
To cool the rice quickly, use a handheld fan to blow air across the surface while you continue folding. This traditional method gives the rice a glossy finish and prevents it from becoming mushy. The rice is ready when it reaches room temperature and has a slight sheen—about 10-15 minutes.
Step 4: Layer with Fillings and Roll
Lay a sheet of the nori sheets shiny-side down on a bamboo rolling mat. With wet hands, spread a thin, even layer of seasoned rice over the nori, leaving a 1-inch border at the top. Sprinkle with 1 tbsp sesame seeds and 1 tbsp white sesame seeds if using.
Arrange thin strips of the 0.5 whole cucumber, 1 whole avocado, and flaked 8 oz imitation crab horizontally across the rice. Roll tightly using the mat, pressing gently but firmly as you go to create a compact cylinder. The filling should be centered to prevent it from spilling out the ends.
Pro Tips For Making Layered Sushi Rice
- Rinse the Rice: Wash the sushi rice in 3-4 changes of cold water until it runs clear, or you’ll end up with gummy rice. I learned this the hard way—skipping this step ruins the texture.
- Warm the Vinegar: Gently heat the rice vinegar, sugar, and salt mixture just until the sugar dissolves—about 30 seconds in the microwave. Cold vinegar makes the rice seize up and taste uneven.
- Fan While Mixing: Use a hand fan or a piece of cardboard to fan the rice while folding in the vinegar mixture. Sounds old-school, but it cools the rice fast and gives it that glossy finish.
- Keep It Moist: Cover the finished rice with a damp towel if you’re not using it right away. Even 10 minutes of exposure dries it out, and dry sushi rice is a sad thing.
Essential Equipment for This Recipe
Rice Cooker Essentials
Invest in a quality rice cooker—I swear by my Zojirushi Neuro Fuzzy for perfectly cooked sushi rice every time. The fuzzy logic technology adjusts cooking temperature and time automatically. It also keeps rice warm for hours without drying out. 💪
Wooden Bowl Necessity
A traditional hangiri (wooden sushi rice tub) is ideal for seasoning and cooling rice. The wood absorbs excess moisture while the slatted bottom allows air circulation. If unavailable, a large glass or ceramic bowl works as a substitute.
Rice Paddle Importance
Use a shamoji (wooden rice paddle) for folding seasoning into rice. Its flat surface and rounded edge prevent crushing grains. I keep mine soaked in water to prevent rice from sticking. Never use metal utensils—they can react with the vinegar.
Bamboo Rolling Mat
A bamboo makisu is indispensable for rolling tight sushi cylinders. Look for one with ¼-inch slats for optimal flexibility. Soak it in water for 10 minutes before use to prevent rice from sticking. Clean by brushing with warm water and drying thoroughly.
Sharp Knife Requirement
Slice rolls with a 10-inch chef’s knife—I recommend Shun Premier. Wet the blade between cuts for clean edges. Replace your knife if it can’t slice through nori without tearing. A dull blade crushes rather than cuts, ruining your presentation.
Cooling Fan Trick
Use a handheld fan to cool seasoned rice quickly while maintaining gloss. This traditional method prevents mushy rice by evaporating excess moisture. I use a simple battery-operated fan—it’s a game-changer for texture. 💫
Nutrition Facts
Frequently Asked Questions
Why rinse sushi rice before cooking?
Rinsing removes excess starch that would make the rice gummy instead of sticky. 4-5 washes ensure the grains stay separate while clinging together perfectly.
Can I substitute the rice vinegar?
Use apple cider vinegar at half the amount in a pinch. The flavor differs slightly but works for seasoning. Avoid white vinegar—it’s too harsh.
What’s the trick to rolling tight sushi?
Use a damp bamboo mat and press firmly while rolling. Keep fillings centered to prevent spillage. Wet hands stop rice from sticking.
How long can seasoned rice sit before rolling?
Seasoned rice holds at room temp for up to 4 hours. Store components separately in the fridge for 24 hours, but assemble just before serving.

- Lump Rice Recipe Sri Lanka: Traditional Island-Style Texture - November 4, 2026
- Laos Sticky Rice Recipe: Traditional Steamed Perfection - November 4, 2026
- Magic Rice Recipe: One-Pot Aromatic Wonder - November 4, 2026