
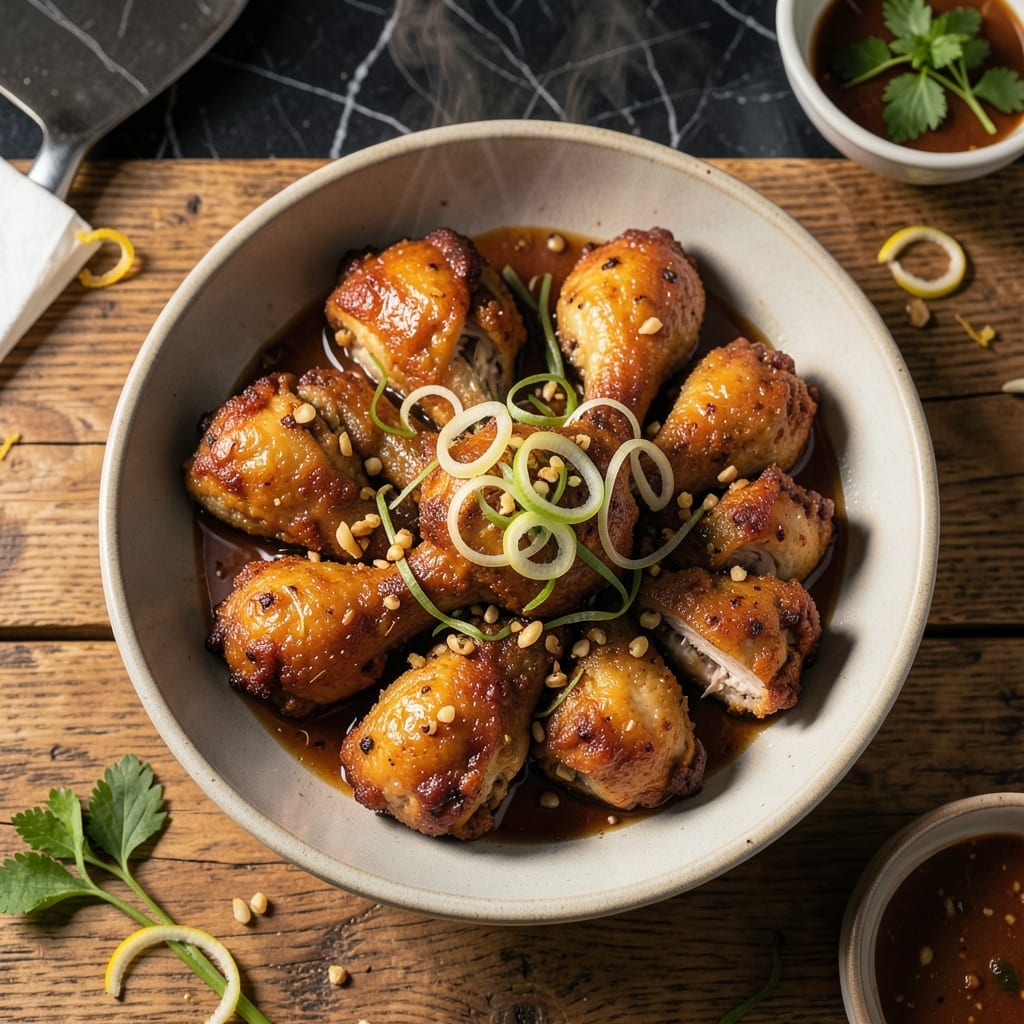
This lemongrass fried chicken delivers a perfect balance of herbaceous aroma and crispy texture that elevates any meal. The secret lies in marinating the chicken in a fragrant blend of fresh lemongrass, garlic, and fish sauce before coating it in a seasoned flour mixture.
I developed this method after testing countless variations to achieve that ideal crunch without compromising on flavor. The lemongrass infuses every bite with its signature citrusy note, while the double-frying technique ensures a golden, shatteringly crispy exterior.
What sets this dish apart is the depth of flavor in the coating. The marinade tenderizes the meat while the frying creates a crust that stays crunchy long after it comes out of the oil. Each piece emerges perfectly cooked inside with a fragrant, herb-speckled shell.
Serve it hot with your favorite dipping sauce for a meal that’s impossible to resist. This is comfort food with a sophisticated twist.
Ingredients for Lemongrass Fried Chicken
Bright herbs and crispy coating come together for this aromatic showstopper.
| Ingredient | Amount | Notes |
|---|---|---|
| Chicken Thighs 🍗 | 2 lb | Boneless, skin-on preferred |
| Fresh Lemongrass Stalks 🌿 | 4 whole | Bruised, minced white parts only |
| Garlic Cloves 🧄 | 6 cloves | Minced for marinade |
| Fish Sauce 🐟 | 3 tbsp | Vietnamese or Thai brand |
| All-Purpose Flour 🌾 | 2 cups | For dredging and coating |
| Cornstarch 🌾 | ½ cup | For extra crispiness |
| Baking Powder 🧂 | 1 tsp | Keeps coating light |
| Salt 🧂 | 1 ½ tsp | Divided for marinade and coating |
| Black Pepper 🌶️ | 1 tsp | Freshly ground preferred |
| Granulated Sugar 🧈 | 1 tbsp | Balances fish sauce saltiness |
| Peanut Oil 🫒 | 4 cups | For deep frying |
| Fresh Cilantro 🌿 | ¼ cup | Chopped, for garnish |
| Lime 🍋 | 1 whole | Cut into wedges for serving |
The lemongrass is non-negotiable here. Asian markets have the freshest stalks—look for firm, pale yellow bases and green tops. If you’re stuck with grocery store options, Gourmet Garden’s lemongrass paste (in tubes) works in a pinch, but fresh is worth the hunt. The chicken thighs? Skin-on, bone-in gives the juiciest result, though boneless works too. Just don’t skip the marinating time—overnight is ideal (worth the extra minute).
No fish sauce? Soy sauce plus a pinch of sugar gets you 80% there. Red Boat or Thai Kitchen are my go-to brands. Out of cornstarch? Swap in arrowroot powder at the same amount. The flour can be all-purpose or rice flour for a gluten-free twist. The peanut oil’s high smoke point is key—vegetable or canola oil works too, but avoid olive oil (it’ll burn).
Marinated chicken keeps 2 days in the fridge. Fried pieces? Best eaten same day, but they’ll hold 24 hours in a paper towel-lined container. Reheat in a 375°F oven for 10 minutes to crisp back up. Don’t microwave—sad, soggy chicken.
Why You’ll Love This Recipe
- One Pan Magic: I toss everything in a single bowl, fry in one pan, and cleanup’s done before the oil cools.
- Zesty Punch: The lemongrass and fish sauce hit you with that bright, tangy kick that makes every bite irresistible.
- Feeds the Crew: I make a double batch on Sunday and pack leftovers for lunches—still crispy the next day.
- Budget Hero: Chicken thighs stay cheap, and a little lemongrass goes a long way for maximum flavor.
Step-by-Step Instructions for Lemongrass Fried Chicken
Trust me, this method delivers that irresistible crispy exterior and aromatic depth you crave.
Step 1: Marinate the Chicken with Lemongrass and Aromatics
In a large bowl, combine the 2 lb Chicken Thighs with the minced white parts from all 4 whole Fresh Lemongrass Stalks, all 6 cloves Garlic Cloves, the full 3 tbsp Fish Sauce, and 1 tbsp Granulated Sugar. I use my hands to massage this marinade into the meat—it ensures every piece gets coated evenly.
The fish sauce might seem intense, but it mellows during cooking and creates that signature umami depth. Let this sit for 30 minutes at room temperature or up to 4 hours in the fridge. You’ll notice the chicken starts to absorb the flavors and the lemongrass aroma really comes alive.
Step 2: Prepare the Crispy Coating
In a separate large bowl, whisk together all 2 cups All-Purpose Flour, the full 0.5 cup Cornstarch, 1 tsp Baking Powder, 1 tsp Black Pepper, and 1 tsp of the Salt. The baking powder is my secret—it creates tiny air pockets that make the coating extra crispy.
This dry mix should look light and fluffy. The cornstarch is non-negotiable here—it’s what gives that shatteringly crisp texture that sets this apart from regular fried chicken. I like to aerate the mixture with a fork before dredging to prevent any dense spots in the coating.
Step 3: Dredge and Double-Coat for Maximum Crunch
Remove the chicken from the marinade (discard the marinade) and pat each piece dry with paper towels. This step is crucial—any excess moisture will create steam and prevent that perfect crisp. Dredge each piece thoroughly in the flour mixture, pressing firmly to adhere.
For extra crunch, I do a second dredge: dip the floured chicken back into a little water, then dredge again in the flour mixture. This double-coating technique guarantees that thick, craggy crust that stays crispy long after frying. Let the coated pieces rest on a wire rack for 10 minutes before frying.
Step 4: Deep-Fry to Golden Perfection
Heat all 4 cups Peanut Oil in a heavy pot to 350°F on a deep-fry thermometer. The oil should be deep enough to submerge the chicken pieces completely. Working in batches to avoid crowding, carefully lower the chicken into the oil.
Fry for 8-10 minutes, turning occasionally, until the coating is deep golden brown and the internal temperature reaches 165°F. You’ll know it’s ready when the crust looks shatteringly crisp and the oil stops bubbling aggressively around each piece. Drain on a wire rack set over a baking sheet to maintain crispiness.
Step 5: Garnish and Serve Immediately
While the chicken is still hot, sprinkle with the remaining 0.5 tsp Salt. This final seasoning step ensures every bite has that perfect balance of flavors. Transfer to a serving platter and garnish with all 0.25 cup Fresh Cilantro, chopped, and serve with wedges from the 1 whole Lime.
The cilantro adds freshness that cuts through the richness, while the lime wedges let everyone add that bright, citrusy zing to their taste. Serve immediately—the coating is at its crispiest right out of the fryer. Any leftovers? Reheat in a 400°F oven for 10 minutes to revive the crunch.
Pro Tips For Making Lemongrass Fried Chicken
- Bruise the Lemongrass: Smash the stalks with the side of your knife before mincing—this releases way more aromatic oils than just chopping. I learned this the hard way after making bland batches that tasted like they were missing half the flavor.
- Dry the Thighs: Pat the chicken skin bone-dry with paper towels before dredging in flour. Sounds tedious, but it’s the only way to get that shatteringly crisp crust instead of a sad, soggy coating.
- Skip Overcrowding: Fry in batches with at least an inch between pieces—any closer and the temperature drops, leaving you with greasy chicken that steams instead of crisps. After ruining two batches, I finally bought a bigger pan.
- Rest Before Serving: Let the fried chicken sit on a rack for 5 minutes after frying. This keeps the crust crisp while the juices redistribute—my grandmother swore by this, and she was right.
Serving Suggestions for This lemongrass fried chicken
Plating Presentation
I love serving this on a large wooden board lined with parchment for easy cleanup. Arrange the chicken in a single layer with lime wedges nestled between pieces. The natural wood tones complement the golden crust beautifully. 💛
Dipping Sauces
Offer sweet chili sauce and sriracha-lime mayo for dipping. I mix ½ cup mayo with 2 tbsp sriracha and 1 tbsp lime juice for the mayo. The sweet chili sauce adds a sticky, tangy contrast to the crispiness.
Fresh Garnishes
Beyond the ¼ cup cilantro, try thin-sliced Thai basil or scallions for extra color. The herbs add freshness that balances the richness. I sprinkle them generously over the top just before serving.
Side Dish Pairings
A crisp green papaya salad with its tangy dressing cuts through the fried richness. Or serve with steamed jasmine rice to soak up any extra flavors. Both options make this a complete meal.
Family-Style Service
For gatherings, pile the chicken high on a platter and let everyone grab pieces. Include small bowls of dipping sauces and lime wedges for sharing. The communal experience makes this dish even more special.
Garnish Final Touch
Right before bringing to the table, give one final sprinkle of flaky sea salt. This tiny step elevates the flavors and makes the crust sparkle. It’s my secret for restaurant-quality presentation. ✨
Nutrition Facts
Frequently Asked Questions
Can I use dried lemongrass instead of fresh?
Fresh lemongrass provides the best flavor, but if unavailable, use 1 tablespoon dried lemongrass per stalk. Soak it in warm water for 10 minutes to rehydrate before mincing. The aroma won’t be as bright, but it’ll still work.
Why does the recipe call for double-frying?
Double-frying ensures an extra crispy coating that stays crunchy longer. The first fry cooks the chicken through, while the second at a higher temp (375°F) creates that golden, shatteringly crisp shell. It’s worth the extra step!
Can I bake this instead of frying?
Yes, but the texture will differ. Bake at 400°F for 25-30 minutes on a wire rack for airflow. For crispier results, spray the chicken with oil and broil for 2-3 minutes at the end. It won’t be as crispy as deep-frying, though.
How do I prevent the coating from falling off?
Pat the chicken completely dry before dredging, and let the coated pieces rest for 10 minutes before frying. This helps the flour adhere better. Also, avoid moving the chicken too much while frying.

- Jollof Rice Sauce Recipe: West African Tomato and Spice Infusion - September 25, 2026
- Japanese Rice Soup Recipe: Umami-Rich Comfort in a Bowl - September 25, 2026
- Homemade Cream Of Rice Recipe: Silk-Smooth Breakfast in Minutes - September 25, 2026