
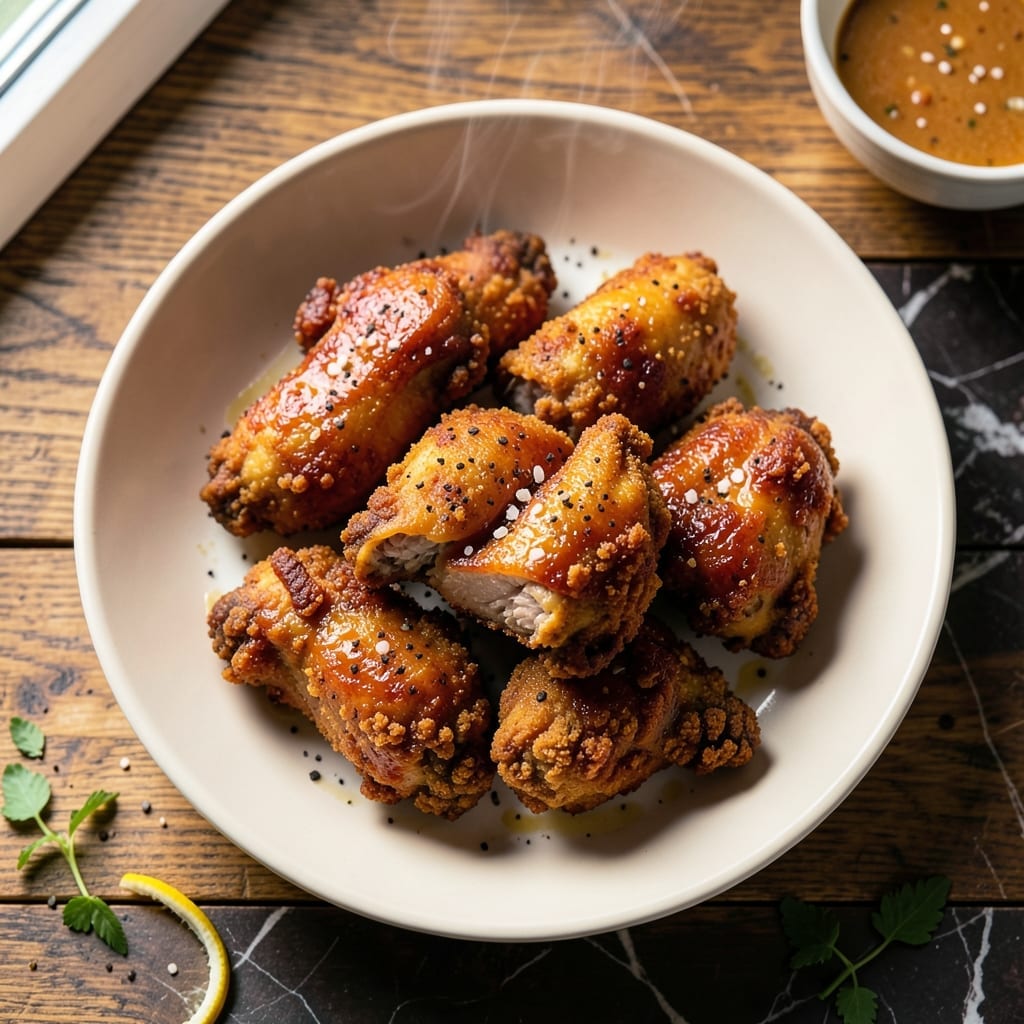
Achieving crispy fried chicken without the heavy guilt is possible with this refined technique. The buttermilk soak ensures juicy meat while a light coating delivers that signature crunch.
This method uses minimal oil compared to traditional frying, reducing calories without sacrificing texture. The secret lies in double-dredging the chicken and maintaining precise oil temperature for even cooking.
Each bite offers a satisfying contrast of tender interior and crispy golden exterior. The buttermilk marinade also adds subtle tang that complements the savory seasoning.
Whether pan-frying or using an air fryer, this approach delivers restaurant-quality results with a lighter touch. The process proves that healthier versions can still satisfy fried chicken cravings completely.
Ingredients for Light Fried Chicken
Pantry staples plus a buttermilk soak create restaurant-quality crispy chicken with less oil.
| Ingredient | Amount | Notes |
|---|---|---|
| Chicken Thighs 🍗 | 2 lb | Boneless, skinless, pounded even |
| Buttermilk 🥛 | 2 cups | Full-fat for tangy richness |
| All-Purpose Flour 🌾 | 2 cups | Divided for double-dredging |
| Cornstarch 🌽 | ½ cup | For extra crispiness |
| Kosher Salt 🧂 | 2 tsp | Diamond Crystal preferred |
| Black Pepper 🌶️ | 1 tsp | Freshly ground for best flavor |
| Paprika 🌶️ | 1 tbsp | Sweet or smoked variety |
| Garlic Powder 🧄 | 1 tsp | Not garlic salt substitute |
| Onion Powder 🧅 | 1 tsp | Fresh ground preferred |
| Cayenne Pepper 🔥 | ¼ tsp | Adjust for heat preference |
| Large Eggs 🥚 | 2 whole | For binding coating |
| Vegetable Oil 🫒 | 1 ½ cups | High smoke point for frying |
The chicken thighs are essential here—boneless, skinless ensure even cooking and maximum crispiness. Source from Whole Foods or Costco for consistent quality. The buttermilk should be full-fat for optimal tenderness and tang. For the flour, King Arthur all-purpose yields the lightest coating. Precise measurements matter for the double-dredge, so weigh if possible (1 cup ≈ 120g).
No buttermilk? Mix 2 cups whole milk with 2 tbsp lemon juice and let sit 5 minutes. Swap cornstarch for arrowroot powder at 1:1 ratio if needed. For gluten-free, use rice flour plus cornstarch (equal parts). The cayenne can be omitted for mild flavor, but the paprika is non-negotiable—it provides both color and depth. Trader Joe’s carries pre-ground spice blends if you’re short on time.
Marinate the chicken in buttermilk for up to 24 hours (minimum 4 hours). The coating keeps in the fridge for 1 week in an airtight container. Fry in batches to avoid overcrowding—this maintains oil temperature and ensures even crispiness. Leftovers reheat best in a 400°F oven for 10 minutes.
Why You’ll Love This Recipe
- One Bowl Wonder: I toss everything—flour, cornstarch, buttermilk—right in one bowl, no fancy prep work.
- Crispy Outside, Juicy Inside: That cornstarch gives it the crunch while the buttermilk keeps the thighs ridiculously tender.
- Weeknight Hero: Between us, it’s my go-to when I need dinner on the table fast but still want that fried chicken satisfaction.
- Budget-Friendly Feast: Chicken thighs are cheap, and this recipe stretches them into a meal that feels way more indulgent than it is.
Step-by-Step Instructions for Buttermilk-Soaked Crispy Chicken
Master the technique for achieving a golden, crunchy exterior with juicy, flavorful meat inside.
Step 1: Marinate Chicken in Buttermilk
Place the 2 lb Chicken Thighs in a large bowl and pour the 2 cups Buttermilk over them. I ensure each piece is fully submerged—this tenderizes the meat and infuses it with tangy richness. Cover and refrigerate for at least 4 hours, or preferably overnight.
The buttermilk not only tenderizes but also helps the coating adhere better during frying. You’ll notice the texture of the chicken changes slightly as it absorbs the liquid, becoming more supple and ready to hold onto the crispy crust you’re about to create.
Step 2: Prepare the Seasoned Dredging Mixture
In a shallow dish, whisk together 2 cups All-Purpose Flour, 0.5 cup Cornstarch, 2 tsp Kosher Salt, 1 tsp Black Pepper, 1 tbsp Paprika, 1 tsp Garlic Powder, 1 tsp Onion Powder, and 0.25 tsp Cayenne Pepper. The cornstarch is the secret to achieving that extra-crispy texture without excessive grease absorption.
This blend of spices creates a well-balanced seasoning that complements the richness of the chicken. The paprika adds a subtle depth of flavor, while the cayenne provides a gentle heat that lingers pleasantly without overpowering.
Step 3: Double-Dredge for Maximum Crispiness
Remove the chicken from the buttermilk, letting any excess drip off. Dredge each piece in the flour mixture, pressing firmly to create an even, thick coating. Shake off any loose flour, then dip the piece back into the buttermilk.
Lift it out again and dredge it a second time in the flour mixture. This double-dredging technique builds up layers that create a shatteringly crisp crust. Place the coated pieces on a wire rack set over a baking sheet to allow air circulation while you heat the oil.
Step 4: Fry to Golden Perfection
Heat the 1.5 cups Vegetable Oil in a large, deep skillet over medium-high heat until it reaches 350°F. To test the temperature, drop in a pinch of flour—if it sizzles immediately, the oil is ready. Carefully place a few pieces of chicken in the hot oil, being careful not to overcrowd the pan.
Fry for 4-5 minutes per side until the coating is deep golden brown and the internal temperature of the chicken reaches 165°F. The oil should bubble steadily around each piece as it cooks. Use a slotted spoon to transfer the fried chicken to a wire rack or paper towels to drain.
Step 5: Rest and Serve Immediately
Let the chicken rest for 5 minutes before serving. This allows the coating to set fully and the juices inside to redistribute, ensuring each bite is moist and flavorful. The exterior should remain crispy for up to 10 minutes after frying if kept warm in a 200°F oven.
Serve hot, while the crust is at its peak crispiness. The contrast between the crunchy exterior and the tender, juicy meat inside is what makes this dish truly exceptional. The spices in the coating will have mellowed slightly during cooking, creating a harmonious blend of flavors.
Pro Tips For Making Light Fried Chicken
- Dry the Thighs: Pat the chicken thighs thoroughly dry with paper towels before dredging—this prevents the coating from sliding off and guarantees a crispier crust.
- Chill the Buttermilk: Soak the chicken in cold buttermilk for at least 4 hours (overnight is even better); the acid tenderizes the meat and keeps it juicy.
- Mix in Cornstarch: Replace about 20% of the all-purpose flour with cornstarch in your dredge—it creates a lighter, crunchier coating without weighing down the chicken.
- Use a Thermometer: Fry in batches and maintain oil temp at 350°F; I learned this the hard way after burning two batches when the heat dipped too low.
Pro Cooking Tips for light fried chicken
Oil Temperature Control
Maintaining 350°F oil is crucial for even cooking and crispiness. I use a candy thermometer clipped to the pan—ThermoWorks makes reliable ones. If the oil smokes, it’s too hot; if it doesn’t sizzle when testing, it’s too cool.
Double-Dredge Secret
Press firmly when dredging to create thick layers that crisp up beautifully. Let the coated chicken rest on a rack for 10 minutes before frying—this helps the coating set and prevents it from sliding off during cooking.
Batch Frying
Fry in batches to avoid overcrowding, which lowers oil temperature. I cook 3-4 pieces at a time in my 12-inch Lodge skillet. Overcrowding leads to soggy coating and uneven cooking. 🔥
Draining Technique
Use a wire rack over a baking sheet for draining instead of paper towels. This allows air circulation on all sides, keeping the crust crispy. Paper towels can trap steam, making the coating soggy.
Oven Finishing
For extra crispiness, transfer fried chicken to a 400°F oven for 5 minutes after frying. This ensures the interior reaches 165°F without over-browning the exterior. I do this when cooking larger batches.
Air Fryer Adaptation
For a lighter option, air fry at 375°F for 12-15 minutes, flipping halfway. Spray with avocado oil before cooking for extra crispiness. The texture won’t be identical to pan-frying but still delicious. ✨
Nutrition Facts
Frequently Asked Questions
Can I use chicken breasts instead of thighs?
Yes, but adjust the cooking time. Breasts cook faster and can dry out. Reduce frying to 3-4 minutes per side and ensure internal temperature reaches 165°F. Thighs stay juicier for this method.
What oil works best for lighter frying?
Use oils with high smoke points like avocado oil or peanut oil. They handle heat better than olive oil. For air frying, just a light spray of oil is enough for crispiness.
How do I keep the coating crispy longer?
Rest on a wire rack, not paper towels, to avoid steam. Keep warm in a 200°F oven for up to 10 minutes before serving. Serving immediately gives the best texture.
Can I make this gluten-free?
Swap all-purpose flour for a 1:1 gluten-free blend or rice flour. Add 1 extra tablespoon cornstarch to maintain crispiness. The technique remains the same.

- Jollof Rice Sauce Recipe: West African Tomato and Spice Infusion - September 25, 2026
- Japanese Rice Soup Recipe: Umami-Rich Comfort in a Bowl - September 25, 2026
- Homemade Cream Of Rice Recipe: Silk-Smooth Breakfast in Minutes - September 25, 2026