
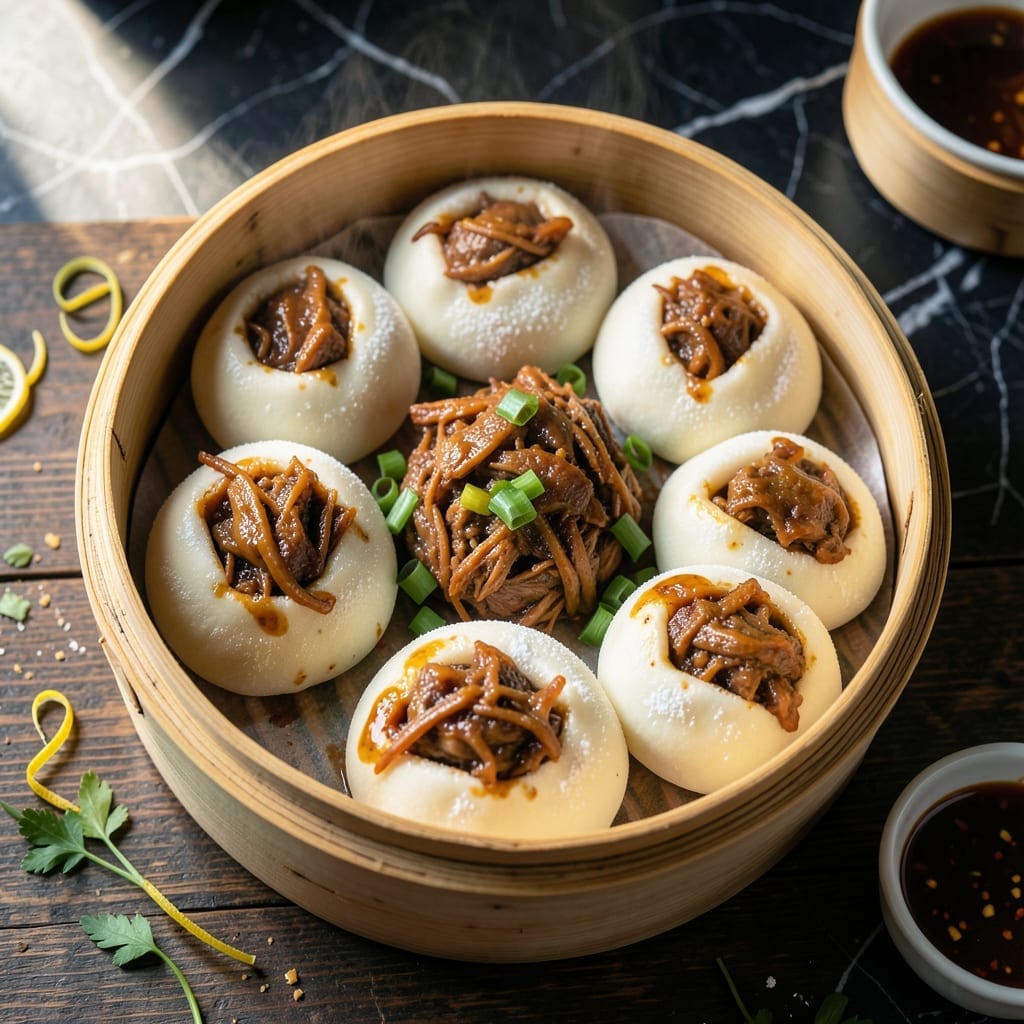
This recipe brings together the softest, most fluffy steamed buns with a rich, sweet-savory chicken filling that defines authentic Filipino siopao. The dough requires patience and precise proofing, but the results are worth every minute.
The chicken asado filling balances tender meat with a glossy, slightly sticky sauce made from soy, sugar, and garlic. I’ve refined the technique to ensure the filling stays moist and packed with flavor, even after steaming.
Steaming is the final step, transforming the dough into pillowy clouds that encase the filling perfectly. The process creates a texture that’s both light and substantial, with a subtle sweetness from the dough complementing the filling.
Serve warm for the best experience, where every bite delivers the perfect harmony of bun and filling. This dish is a labor of love that pays off in every flavorful mouthful.
Ingredients for Recipe for Siopao Chicken Asado
Soft buns and rich chicken filling come together for this authentic Filipino dish.
| Ingredient | Amount | Notes |
|---|---|---|
| All-Purpose Flour 🌾 | 4 cups | Plus extra for dusting |
| Granulated Sugar 🍚 | ¼ cup | For dough sweetness |
| Active Dry Yeast 🍞 | 1 package | 2 1/4 tsp per package |
| Warm Water 💧 | 1 ¼ cups | 110°F for yeast activation |
| Vegetable Oil 🫒 | 2 tbsp | Plus extra for greasing |
| Salt 🧂 | 1 tsp | Fine table salt |
| Boneless Chicken Thighs 🍗 | 1 ½ lb | Diced into small pieces |
| Soy Sauce 🥄 | ½ cup | Regular or light variety |
| Garlic Cloves 🧄 | 6 cloves | Minced finely |
| Brown Sugar 🍯 | ¼ cup | Packed for sauce |
| Tomato Sauce 🍅 | ¼ cup | For depth of flavor |
| Cornstarch 🌾 | 2 tbsp | For thickening sauce |
| Green Onions 🧅 | 3 whole | Thinly sliced for garnish |
| Sesame Oil 🫒 | 1 tsp | For finishing aroma |
The flour quality affects texture. King Arthur or Gold Medal all-purpose gives consistent results. Yeast must be fresh—check the expiration date or test in warm water first. For the filling, boneless thighs stay juicier than breasts after steaming. Find these at any major grocery store like Kroger or Safeway. The soy sauce should be a trusted brand like Kikkoman or Silver Swan for authentic flavor.
No thighs? Boneless chicken breasts work but require less cooking. Swap brown sugar with white in a pinch (texture differs slightly). Oyster sauce at half the amount deepens the asado flavor if available. For a shortcut, use pre-minced garlic from a jar. The tomato sauce can be replaced with ketchup for a sweeter tang. Cornstarch is key—don’t substitute with flour for thickening.
Dough rests best in a warm, draft-free spot (like an unlit oven). Filling keeps 3 days refrigerated or 1 month frozen. Assemble buns just before steaming—prevents soggy bottoms. Serve immediately for that pillowy texture (reheating dries them out).
Why You’ll Love This Recipe
- One-Bowl Wonder: I mix the dough right in my stand mixer—flour, sugar, yeast, water, oil—no extra bowls to wash.
- Sweet-Savory Magic: The sugar in the dough caramelizes slightly while steaming, balancing the rich chicken asado filling.
- Meal Prep Hero: I freeze a batch and reheat for lunches all week. Honestly, they taste just as good the third day.
- Pocket-Friendly Feast: A bag of flour and a few pantry staples make a dozen buns, and nobody guesses how cheap it was to whip up.
Step-by-Step Instructions for Siopao Chicken Asado
Master the process with these tested steps for perfect fluffy buns and rich filling every time.
Step 1: Activate the Yeast and Prepare Dough
In a large bowl, combine the 1.25 cups warm water, 0.25 cup granulated sugar, and 1 package active dry yeast. Let it sit for 5-10 minutes until the mixture becomes frothy and bubbly—this confirms the yeast is active and ready to work.
Add the 4 cups all-purpose flour, 2 tbsp vegetable oil, and 1 tsp salt to the yeast mixture. Stir until a shaggy dough forms. Turn it out onto a lightly floured surface and knead for 8-10 minutes until smooth and elastic. The dough should spring back when poked lightly with a finger.
Step 2: First Rise for Fluffy Texture
Place the dough in a lightly oiled bowl, turning to coat all sides. Cover with a clean kitchen towel or plastic wrap and let it rise in a warm, draft-free place for 1-2 hours or until doubled in size. I like to place mine near a warm oven (turned off) for consistent warmth.
You’ll know it’s ready when the dough has visibly puffed up and a finger pressed gently into the surface leaves a slight indentation. This first rise develops the gluten and ensures those soft, pillowy buns we’re after.
Step 3: Prepare the Chicken Asado Filling
While the dough rises, make the filling. In a bowl, combine the 1.5 lb boneless chicken thighs (diced into small pieces) with 0.5 cup soy sauce, 6 cloves garlic cloves (minced), 0.25 cup brown sugar, 0.25 cup tomato sauce, and 1 tsp sesame oil. Mix well.
Cook the chicken mixture in a saucepan over medium heat for 15-20 minutes, stirring occasionally, until the chicken is fully cooked and the sauce has thickened slightly. In a small bowl, mix the 2 tbsp cornstarch with 2 tbsp water to create a slurry, then stir it into the chicken mixture.
Cook for another 2-3 minutes until the sauce reaches your desired thickness. Remove from heat and let it cool completely before using as filling.
Step 4: Shape the Buns and Second Rise
Once the dough has doubled, punch it down to release the air. Divide the dough into 12 equal portions (about 80-90g each) and shape each into a smooth ball. Flatten each ball into a 4-inch circle and place 2 tbsp of the cooled chicken asado filling in the center.
Gather the edges of the dough around the filling and pinch to seal completely, creating a smooth, round bun. Place each filled bun on a square of parchment paper. Cover loosely and let rise for another 30-45 minutes until puffy.
Step 5: Steam to Perfection
Arrange the buns in a steamer basket, leaving 1 inch of space between each for expansion. Bring water to a boil in the steamer pot, then reduce to medium heat. Steam the buns for 15-20 minutes until they’ve expanded significantly and the dough looks set.
Remove from heat and let cool for 5 minutes before serving. Garnish with the 3 whole green onions (thinly sliced) if desired. The buns should be soft and fluffy with a glossy, slightly sticky exterior, and the filling should be rich and savory-sweet in every bite.
Pro Tips For Making Recipe For Siopao Chicken Asado
- Proof the Yeast: Always activate your dry yeast in warm water with a pinch of sugar first—if it doesn’t foam within 5-10 minutes, your siopao won’t rise. I learned this the hard way after a few dense, sad buns.
- Knead Long Enough: Work that dough for at least 10 minutes until smooth and elastic, or your siopao will turn out tough. Sounds tedious, but it’s the thing that matters most for that soft, fluffy texture.
- Skip Cold Ingredients: Make sure your warm water is just right—around 110°F (43°C), or it’ll kill the yeast. After burning a few batches with water that was too hot, I finally got the hang of testing it on my wrist first.
- Oil the Dough: Brush the dough with a little vegetable oil before the first rise to prevent a dry crust from forming. This isn’t the prettiest step, but it guarantees a smoother, more even expansion.
Storing and Reheating recipe for siopao chicken asado
Refrigerator Storage
Let your siopao cool completely before storing. Place them in an airtight container lined with parchment paper to prevent sticking. They’ll keep in the fridge for up to 3 days without losing texture or flavor. ❄️
Freezing for Longer Storage
For longer storage, wrap each bun individually in plastic wrap, then place in a freezer bag. Squeeze out excess air to prevent freezer burn. They’ll stay fresh for up to 1 month at 0°F or below.
Steam Reheating
Reheat directly from frozen or thawed. Steam for 8-10 minutes until the buns are soft and the filling is hot. Add 1-2 tbsp water to the steamer to ensure they don’t dry out.
Microwave Reheating
For a quick option, microwave a single bun on high for 30-45 seconds. Wrap it in a damp paper towel to retain moisture. Avoid overcooking, as this can make the dough tough.
Filling Storage
Extra chicken asado filling can be stored separately in an airtight container in the fridge for up to 4 days. Reheat it gently on the stovetop with a splash of water before filling new buns. 🔥
Serving Tip
Always serve warm for the best texture. If reheating multiple buns, steam them in batches to maintain quality. Leftovers taste best when reheated the same day they were stored.
Nutrition Facts
Frequently Asked Questions
Can I use chicken breast instead of thighs?
Yes, but thighs stay juicier after steaming. If using breasts, reduce cooking time to 12-15 minutes to prevent dryness. The flavor will be milder but still delicious.
Why did my buns turn out dense?
Dense texture usually means underproofed dough or old yeast. Ensure your yeast is fresh and give the dough 1-2 hours to double in size before shaping. Warmth speeds up the rise.
How do I prevent the filling from leaking?
Seal edges tightly when shaping and don’t overfill—use 2 tbsp maximum per bun. Chill the filling completely before adding to help it hold shape during steaming.
Can I make these ahead of time?
Prepare dough and filling separately up to 1 day ahead. Assemble and steam just before serving for the best texture. Store components separately in the fridge.

- Soupy Rice Recipe: Broth-Soaked Grains With Rustic Depth - September 25, 2026
- Rice Paper Pancakes Recipe: Crispy Vietnamese Breakfast Delight - September 25, 2026
- Rice A Roni Pork Fried Rice Recipe: Quick Wok-Style Meal with Savory Bites - September 25, 2026