
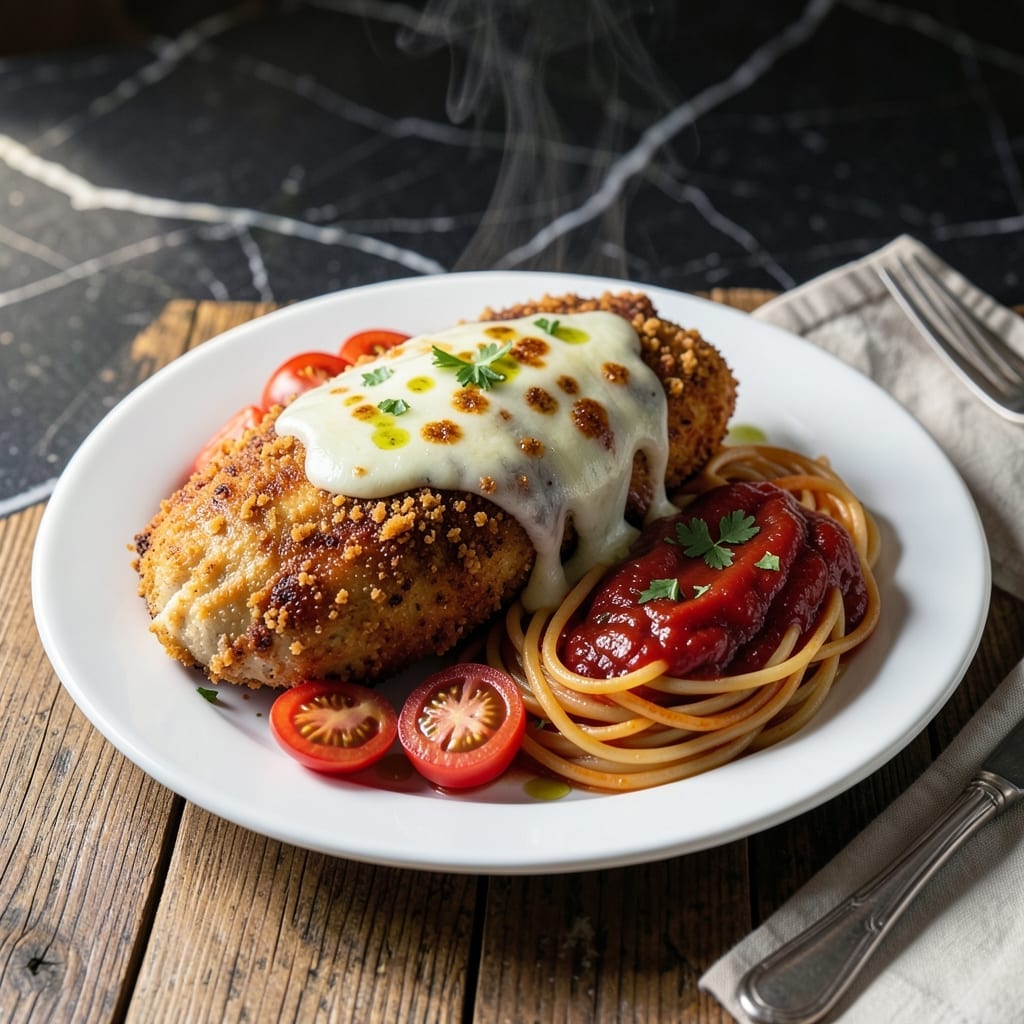
This copycat recipe recreates Longhorn Steakhouse’s signature parmesan-crusted chicken with a crispy, golden-brown exterior and tender, juicy interior. The secret lies in a double-breading technique that ensures every bite stays perfectly textured.
Simple pantry staples and a few key steps transform ordinary chicken into a restaurant-quality dish. The parmesan crust adds a rich, savory depth that pairs beautifully with the tender meat underneath.
The result is a crispy, flavorful cutlet that rivals the original. Serve it with marinara for dipping or alongside your favorite steakhouse sides for a complete meal.
Ready to bring the steakhouse experience home? This method delivers professional results with minimal effort.
Ingredients for Longhorn Parm Chicken
Pantry staples and a few fresh items recreate this restaurant favorite at home.
| Ingredient | Amount | Notes |
|---|---|---|
| Chicken Breasts 🍗 | 1 ½ lb | Boneless, skinless, pounded to 1/2-inch thickness |
| All-Purpose Flour 🌾 | 1 cup | For initial dredging |
| Large Eggs 🥚 | 2 whole | Lightly beaten for egg wash |
| Parmesan Cheese 🧀 | 1 cup | Freshly grated from block |
| Italian Breadcrumbs 🍞 | 1 ½ cups | Fine, dry variety preferred |
| Garlic Powder 🧄 | 1 tsp | For seasoning breading |
| Onion Powder 🧅 | 1 tsp | For seasoning breading |
| Paprika 🌶️ | 1 tsp | Sweet or smoked variety |
| Salt 🧂 | 1 tsp | Kosher or sea salt |
| Black Pepper 🌶️ | ½ tsp | Freshly ground preferred |
| Olive Oil 🫒 | ½ cup | For shallow frying |
| Marinara Sauce 🍅 | 1 ½ cups | For serving, warmed |
| Vegetable Oil 🫒 | ½ cup | For frying if needed |
The chicken is everything here. Boneless, skinless breasts pounded to even thickness ensure even cooking and that signature crispy coating. Costco or Sam’s Club offer great bulk options for larger batches. For the Parmesan, freshly grated from a wedge melts better than pre-shredded (which often contains anti-caking agents). The breadcrumbs should be fine and dry—Progresso or store-brand Italian work perfectly.
No Italian breadcrumbs? Panko plus a teaspoon of Italian seasoning delivers similar crunch. Short on Parmesan? Pecorino Romano offers a sharper, saltier alternative. Fresh out of marinara? Rao’s or Victoria are top-tier jarred options. The spices can be swapped for a pre-made Italian seasoning blend at one-third the amount. For extra crispiness, some cooks add a bit of cornstarch to the flour.
Leftover cooked chicken keeps 3-4 days refrigerated in an airtight container. To reheat, use the oven at 350°F to maintain crispiness—microwaving makes it soggy. The breading mixture can be prepped ahead and stored in the pantry for 1 week.
Why You’ll Love This Recipe
- One Bowl Wonder: I just mix flour, egg, and breadcrumbs in one bowl—no fancy prep, no mess.
- That Crispy Crunch: The parmesan in the breading gives it this golden, salty bite that’s impossible to resist.
- Feeds the Crew: Honestly, it’s my go-to for family dinners, and leftovers disappear by lunchtime.
- Budget Friendly: Chicken breasts and pantry staples keep costs low, but it tastes like a restaurant meal.
Step-by-Step Instructions for Longhorn Parm Chicken
Master the technique behind this restaurant favorite with a crispy, golden-brown exterior every time.
Step 1: Prep and Season the Chicken Breasts
Begin by pounding the 1.5 lb Chicken Breasts to an even ½-inch thickness using a meat mallet. This ensures even cooking and prevents dry, overdone edges. Place each breast between plastic wrap to avoid tearing.
Season both sides lightly with 1 tsp Salt and 0.5 tsp Black Pepper. I’ve found that salting before dredging enhances the flavor in every bite. Pat the seasoning gently into the meat so it adheres well during cooking.
Step 2: Create the Breading Station
Set up three shallow dishes. Place the 1 cup All-Purpose Flour in the first dish. In the second, lightly beat the 2 whole Large Eggs until uniform in color. For the third dish, combine the 1.5 cups Italian Breadcrumbs, 1 cup Parmesan Cheese, 1 tsp Garlic Powder, 1 tsp Onion Powder, and 1 tsp Paprika. Mix thoroughly until the seasonings are evenly distributed.
This three-step breading process is non-negotiable for achieving that signature crispy texture. The flour creates a base layer, the egg wash acts as glue, and the seasoned breadcrumb mixture delivers maximum crunch and flavor.
Step 3: Bread and Pan-Fry the Chicken
Dredge each chicken breast in the flour, shaking off any excess. Dip into the beaten eggs, allowing any excess to drip off. Finally, press firmly into the breadcrumb mixture, ensuring full coverage on both sides. Let the breaded chicken rest for 5 minutes to allow the coating to set.
Heat 0.5 cup Olive Oil and 0.5 cup Vegetable Oil in a large skillet over medium-high heat until shimmering. Carefully place the chicken in the hot oil and cook for 4-5 minutes per side until golden brown and crispy. Avoid overcrowding the pan—work in batches if needed.
Step 4: Finish with Marinara and Melted Cheese
Transfer the fried chicken to a paper towel-lined plate to drain excess oil. Heat the 1.5 cups Marinara Sauce in a small saucepan over medium heat until warmed through. Spread a thin layer of marinara on a baking sheet and place the chicken on top.
Top each piece with additional marinara and a sprinkle of any remaining Parmesan. Broil for 2-3 minutes until the cheese is bubbly and lightly browned. Serve immediately while the coating remains crisp.
Pro Tips For Making Longhorn Parm Chicken
- Pound the Chicken: Use a meat mallet to flatten the chicken breasts to an even 1/2-inch thickness—I learned this the hard way after too many dry, overcooked edges and underdone centers.
- Double Dredge: Dip each piece in flour, egg, then breadcrumbs, but repeat the egg and breadcrumb step for a thicker, crunchier crust that actually holds up to the sauce.
- Skip Cold Cheese: Grate the Parmesan fresh instead of using pre-shredded; the anti-caking agents in bagged cheese make it melt weird and ruin the texture.
- Rest Before Sauce: Let the fried chicken rest 3-4 minutes on a rack before adding marinara—this keeps the coating crisp instead of soggy under the sauce.
Storing and Reheating This Recipe
Refrigerator Storage
Let your crispy chicken cool completely before storing—this prevents condensation from making the coating soggy. I use glass containers with tight lids to maintain freshness. This dish keeps well for 3-4 days at 40°F or below. 💡
Freezer Storage
For longer storage, freeze cooked chicken between parchment paper layers in a gallon freezer bag. Squeeze out excess air to prevent freezer burn. It stays fresh for 2-3 months without significant texture loss when properly sealed.
Oven Reheating
Preheat to 350°F and place chicken on a wire rack over a baking sheet. Heat for 10-12 minutes until internal temperature reaches 165°F. This method preserves the crispy coating better than any other. ❄️
Air Fryer Reheating
My favorite quick method: 350°F for 4-5 minutes in the air fryer basket. Check halfway through and flip. The circulating air restores crunch almost like fresh from the pan.
Sauce Reheating
Warm marinara separately in a small pot over medium-low heat for 3-4 minutes. Stir occasionally to prevent sticking. Pour over reheated chicken just before serving.
Nutrition Facts
Frequently Asked Questions
What oil works best for frying?
A mix of olive oil and vegetable oil gives the best results. Olive oil adds flavor while vegetable oil’s higher smoke point prevents burning. Use medium-high heat for perfect browning.
Can I use chicken tenders instead?
Chicken tenders cook faster—reduce frying time to 3-4 minutes per side. They’re a great alternative for smaller portions and work well with the same breading method.
Why did my coating fall off?
This usually happens if the chicken wasn’t dry before breading or if the oil wasn’t hot enough. Pat the meat thoroughly and ensure oil reaches 350°F before adding chicken. Let breaded pieces rest 5 minutes first.
Is baking an option instead of frying?
Yes! Bake at 400°F for 20-25 minutes on a wire rack. Brush with oil first for extra crispiness. The texture will be slightly different but still delicious.

- Jollof Rice Sauce Recipe: West African Tomato and Spice Infusion - September 25, 2026
- Japanese Rice Soup Recipe: Umami-Rich Comfort in a Bowl - September 25, 2026
- Homemade Cream Of Rice Recipe: Silk-Smooth Breakfast in Minutes - September 25, 2026