
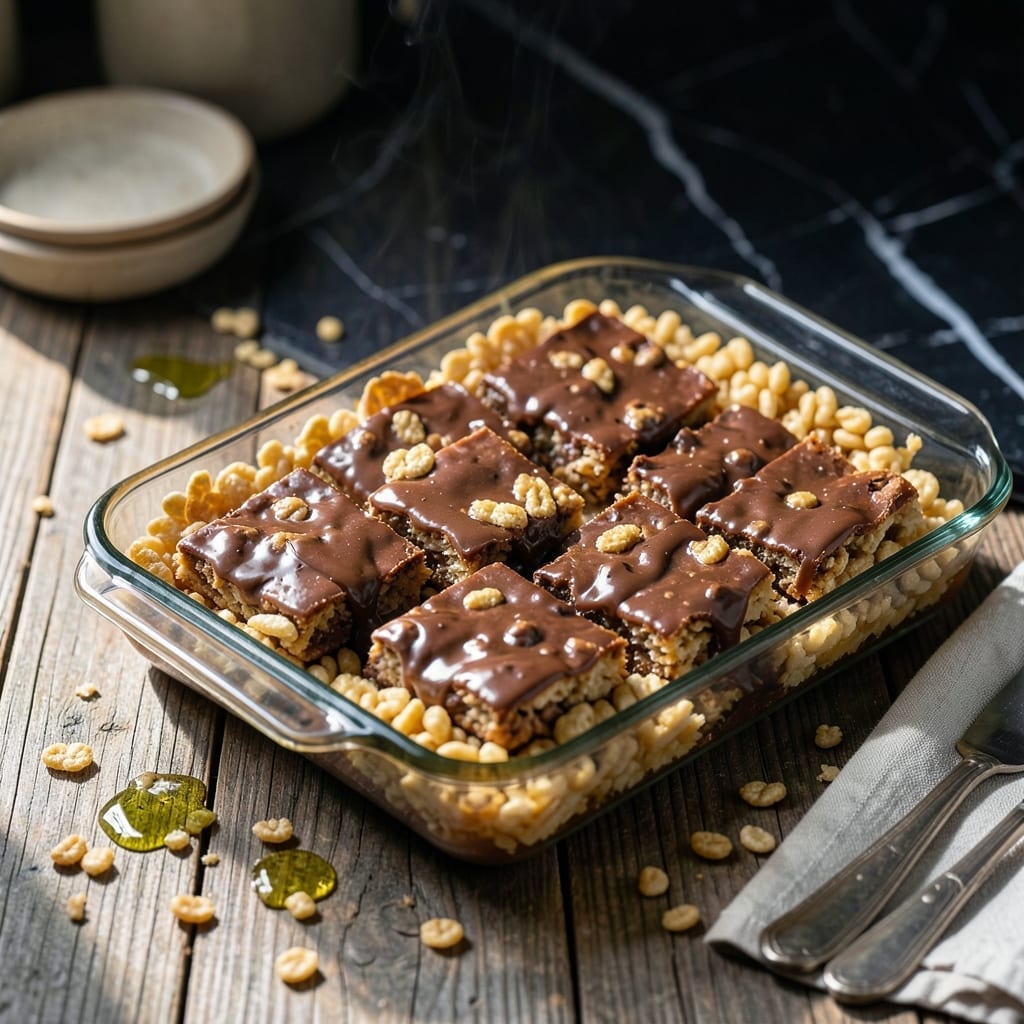
This no-bake treat combines the best of both worlds: crunchy cereal and decadent chocolate. I developed this recipe for quick desserts that feel indulgent without turning on the oven.
The beauty lies in its simplicity. Melted Mars bars create a rich, gooey base that binds the Rice Krispies together perfectly. No baking skills required—just mix, shape, and let it set.
What you get is a foolproof dessert with a satisfying snap from the cereal and creamy chocolate in every bite. The contrast of textures makes it irresistible to both kids and adults.
Ready in under 30 minutes, this is the perfect last-minute treat for parties or cravings. Here’s how to make it.
Ingredients for Mars Bar and Rice Krispies
Five simple ingredients create this no-bake chocolate crunch delight with ease.
| Ingredient | Amount | Notes |
|---|---|---|
| Mars Bars 🍫 | 8 whole | Standard 1.9 oz size each |
| Rice Krispies Cereal 🥣 | 6 cups | Plain, unflavored variety |
| Unsalted Butter 🧈 | 2 tbsp | For preventing sticking |
| Sea Salt 🧂 | ¼ tsp | Optional, enhances chocolate flavor |
| Vanilla Extract 💧 | ½ tsp | Pure extract preferred |
The Mars bars are the star—standard 1.9 oz size works best. I grab mine from Target or Walmart in bulk (they keep forever in the pantry). For the cereal, Kellogg’s Rice Krispies is the classic choice, but any crispy rice cereal works. The butter is just to grease the pan, so don’t stress about brands. If you’re feeling fancy, a pinch of flaky sea salt on top takes it over the top.
No Mars bars? Milky Way or Snickers work in a pinch (just chop them fine). Out of Rice Krispies? Any crispy cereal—Corn Flakes or Special K—gets the job done. Want extra crunch? Toss in a handful of chopped nuts or pretzels. The vanilla is optional but adds depth. Skip it if you don’t have it—no big deal.
These keep for 5 days in an airtight container at room temp. Or freeze for 1 month (if they last that long). I cut mine into squares right away—easier to grab and go. No reheating needed, just pull from the fridge and enjoy.
Why You’ll Love This Recipe
- One-Pot Magic: I melt the Mars Bars and butter in a single saucepan, stir in the Rice Krispies, and it’s done—no fancy equipment, no fuss.
- Caramel Heaven: The melted Mars Bars coat every crispy bite with that rich, gooey caramel-chocolate flavor I can’t resist.
- Party or Midnight Snack: I’ve served these at birthdays and, honestly, kept a batch all to myself for a late-night treat.
- Pantry Heroes: Between us, Rice Krispies and Mars Bars are already in my cupboard, so this costs almost nothing to throw together.
Step-by-Step Instructions for Mars Bar and Rice Krispies Treats
Here’s the method. Straightforward, tested, works every time.
Step 1: Melt Mars Bars with Butter and Flavorings
In a large saucepan, melt the 8 whole Mars Bars and 2 tbsp Unsalted Butter over low heat. I find that chopping the Mars Bars into smaller pieces first helps them melt evenly and prevents scorching.
Stir frequently with a silicone spatula until the mixture is completely smooth and glossy. Once melted, add the 0.5 tsp Vanilla Extract and 0.25 tsp Sea Salt, stirring until fully incorporated. The salt enhances the chocolate flavor beautifully, but you can omit it if preferred.
Step 2: Fold in Rice Krispies Cereal
Remove the saucepan from heat and immediately add all 6 cups Rice Krispies Cereal. Using the same spatula, fold the cereal into the chocolate mixture gently but thoroughly, ensuring every piece is evenly coated.
This step moves quickly—the cereal will start to crisp up as it meets the hot chocolate, so work efficiently. You’ll know you’re done when there are no dry cereal pieces left and the mixture takes on a uniform, glossy appearance.
Step 3: Press Mixture into Pan
Transfer the Mars Bar and Rice Krispies mixture to a parchment-lined 9×13-inch baking pan. Using the back of your spatula or a piece of parchment paper, press the mixture down firmly and evenly into the pan.
I like to press the edges first to create a clean border, then work my way inward. Pressing too hard can make the treats dense, so use firm but gentle pressure. The mixture should be about 1 inch thick when evenly spread.
Step 4: Chill Until Firm
Place the pan in the refrigerator and let it chill for at least 1 hour. This step is crucial for no-bake treats—they need time to set up so they hold their shape when cut.
You can check for doneness by gently pressing the top—if it springs back and feels firm to the touch, it’s ready. If you’re in a hurry, you can pop it in the freezer for 20-30 minutes, but the texture might be slightly different.
Step 5: Cut and Serve
Once completely chilled, remove the pan from the refrigerator and lift the treats out using the parchment paper overhang. Place on a cutting board and use a sharp knife to cut into squares.
For clean cuts, I dip the knife in hot water and wipe it between each slice. These treats are best served at room temperature, where they’ll have the perfect balance of chewy and crispy textures. Store any leftovers in an airtight container at room temperature for up to 3 days.
Pro Tips For Making Mars Bar And Rice Krispies
- Melt Low and Slow: Use low heat when melting the Mars Bars and butter together—I learned this the hard way after scorching two batches. Stir constantly and pull it off the heat just before it’s fully melted to avoid a burnt, grainy mess.
- Chop the Mars Bars: Cut the Mars Bars into small, even pieces before melting. Sounds tedious, but it ensures they melt evenly and mix smoothly with the Rice Krispies instead of clumping.
- Press While Warm: Press the mixture into the pan immediately after combining—waiting even 2 minutes makes it harder to shape. I use the back of a greased spoon to smooth it out without sticking.
- Add Extra Salt: Sprinkle a pinch of sea salt over the top after pressing into the pan. The sweetness of the Mars Bars needs that little hit of salt to balance it out—my test batches proved it.
Creative Variations of These Flavors
Peanut Butter Swirl
Mix ½ cup creamy peanut butter into the melted Mars bar mixture before adding cereal. The nutty flavor pairs surprisingly well with the chocolate. I use Jif Natural for a smoother texture. Swirl with a knife for a marbled effect. 💛
Salted Caramel Twist
Drizzle ¼ cup store-bought caramel sauce over the mixture before chilling. Sprinkle with flaky sea salt for that sweet-salty contrast. I grab Smucker’s caramel from the baking aisle. The caramel softens slightly but stays gooey.
Nutty Crunch Addition
Fold in 1 cup chopped salted peanuts or almonds with the cereal. Toast the nuts first in a dry pan for 3-4 minutes to enhance their flavor. This adds protein and a satisfying crunch to every bite.
Chocolate Drizzle Topping
After cutting into squares, melt ½ cup semi-sweet chocolate chips and drizzle over the top. Let it set for 10 minutes before serving. I use Ghirardelli chips for a richer chocolate taste. This makes them look fancy with minimal effort.
Coconut Flake Variation
Stir in 1 cup sweetened coconut flakes with the cereal for a tropical twist. Press some flakes on top before chilling for extra texture. The coconut adds a subtle chewiness that complements the crispy cereal.
Mini Bite Version
Press the mixture into mini muffin tins lined with paper cups. Chill for 30 minutes for perfect single-bite treats. These are great for parties or lunchboxes. I make these for my kids—they disappear fast! 🔥
Nutrition Facts
Frequently Asked Questions
Can I use a different chocolate bar?
Yes! Milky Way or Snickers work well as substitutes. Chop them finely for even melting. Each has a slightly different texture but still delivers that gooey chocolate base.
How long do these treats last?
Store in an airtight container at room temperature for up to 3 days. For longer storage, freeze for up to 1 month. Thaw at room temperature before serving.
Can I make these without butter?
Use coconut oil or nonstick spray to grease the pan instead. The butter is only for preventing sticking, not for flavor.
Why did my treats turn out hard?
Over-pressing the mixture or chilling too long can cause this. Use gentle pressure when shaping and chill for only 1 hour for the best texture.

- Mujadara Rice and Lentils Recipe: Earthy Spiced Lentils With Caramelized Onions - November 1, 2026
- Naija Fried Rice Recipe: Street-Style Spice With Veggie Crunch - November 1, 2026
- Mushy Rice Recipe: Fluffy Grains Transformed in Minutes - November 1, 2026