
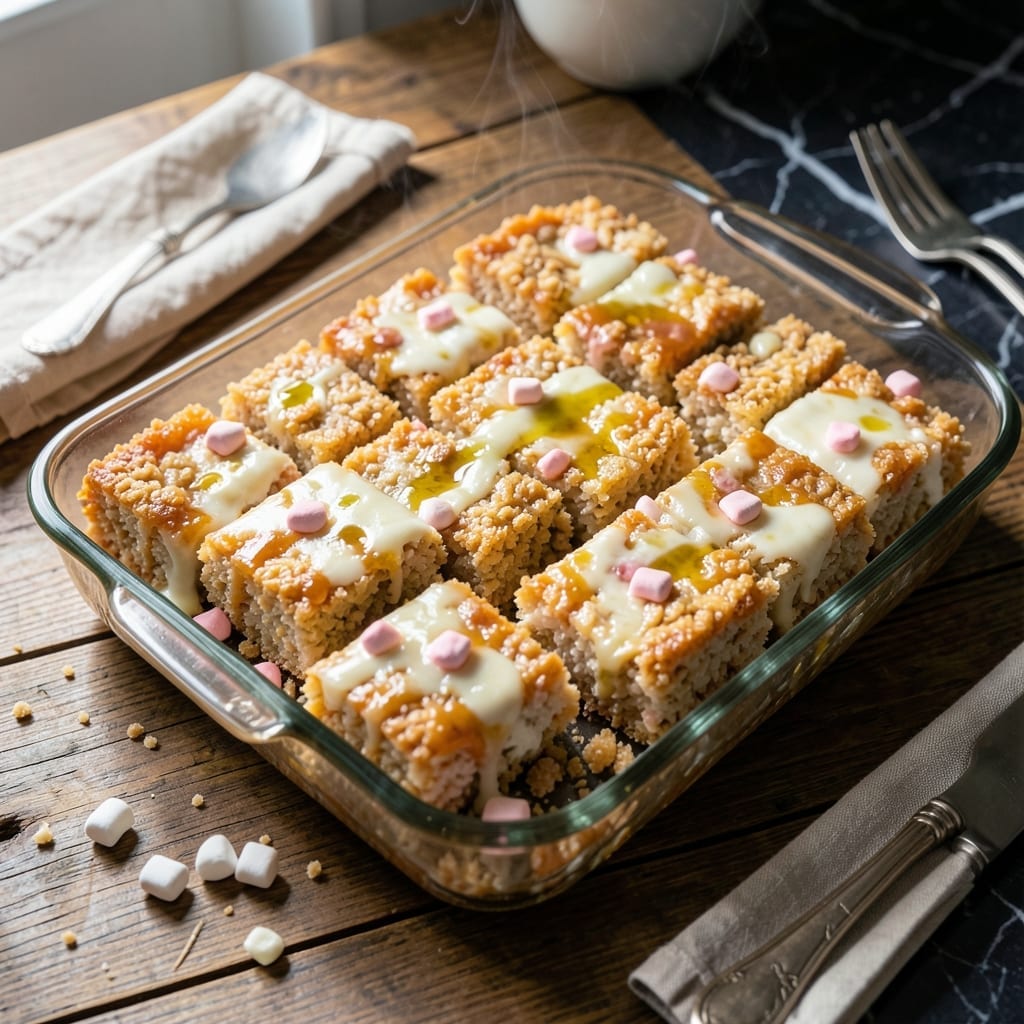
This no-bake recipe delivers perfectly chewy squares with minimal effort and maximum flavor. I’ve tested countless variations to achieve the ideal texture—soft yet holding their shape.
The secret lies in melting the marshmallows just until smooth, then folding in the cereal quickly before it sets. This ensures every bite stays crispy and coated in gooey sweetness.
With only 5 ingredients and 15 minutes of prep, this treat comes together faster than the oven can preheat. No baking required.
Cut into squares once cooled, and enjoy a nostalgic favorite that’s always a crowd-pleaser. Simple, foolproof, and irresistibly delicious.
Ingredients for Marshmallow Rice Crispy Treats
Just five ingredients for these nostalgic, gooey squares everyone will love.
| Ingredient | Amount | Notes |
|---|---|---|
| Mini Marshmallows 🍬 | 10 oz | Regular or vegan marshmallows |
| Crispy Rice Cereal 🥣 | 6 cups | Plain, unflavored variety |
| Unsalted Butter 🧈 | 3 tbsp | Or vegan butter alternative |
| Vanilla Extract 🌿 | 1 tsp | Pure for best flavor |
| Pinch of Salt 🧂 | 1 pinch | Enhances all the flavors |
The marshmallows are doing all the heavy lifting here. Jet-Puffed are my go-to for consistent melt, but store brand works too (just check for gelatin if vegan matters to you). Kellogg’s Rice Krispies crisp up perfectly—generic brands can be hit or miss, so stick with the name brand if you can. The butter? Use real unsalted so you control the salt content yourself.
Out of mini marshmallows? Regular large ones work—just measure 4 cups and cut them into smaller pieces first. Need it dairy-free? Earth Balance vegan butter swaps in perfectly. Vanilla is optional but adds depth (use pure extract, not imitation). No cereal on hand? Puffed rice or corn flakes can stand in, though the texture changes slightly.
These keep at room temp in an airtight container for 2-3 days. For longer storage, wrap individual squares in parchment, then freeze for up to 1 month. They soften a bit when thawed, but still taste amazing (worth the extra minute to wrap them right).
Why You’ll Love This Recipe
- One-Pot Magic: I melt the butter and marshmallows in one saucepan, stir in the cereal, and we’re done—no fancy equipment, no mountain of dishes.
- That Vanilla Kiss: The splash of vanilla and pinch of salt turn the sweet marshmallow into something richer, deeper, so it’s not just sugar.
- Crowd Pleaser: I’ve taken these to bake sales, birthdays, and even a last-minute potluck. They disappear every time.
- Pennies a Batch: Mini marshmallows and store-brand cereal keep the cost low, so I can make a double batch and still stay under five bucks.
Step-by-Step Instructions for Marshmallow Rice Crispy Treats
Here’s the foolproof method for perfect chewy squares every time.
Step 1: Melt the Butter and Marshmallows Together
In a large pot, melt the 3 tbsp Unsalted Butter over low heat until just melted. I prefer using a light-colored pot so I can monitor the color change as the marshmallows melt.
Add all the 10 oz Mini Marshmallows at once and stir constantly with a silicone spatula. The marshmallows will collapse and melt into a smooth, glossy mixture. Watch for the moment when the last bits dissolve—this usually takes 5-7 minutes. Don’t rush with higher heat; it’ll turn the mixture bitter.
Step 2: Season and Flavor the Marshmallow Base
Once the marshmallows are completely melted, remove the pot from heat. Stir in the 1 tsp Vanilla Extract and 1 pinch Pinch of Salt. The vanilla adds depth beyond just sweetness, while the salt balances all the flavors.
I always taste at this point—if it needs more salt, add another tiny pinch. The mixture should be sweet but not cloying, with a smooth, stretchy texture that coats the back of a spoon. This is your chance to adjust before adding the cereal.
Step 3: Fold in the Crispy Rice Cereal
Working quickly, add all 6 cups Crispy Rice Cereal to the pot. Use the spatula to fold everything together, pressing down gently to ensure every piece gets coated. You’ll hear the cereal snap, crackle, and pop—that’s the sound of success.
The mixture will seem too sticky at first, but keep folding. After about 30-45 seconds, the cereal will be evenly distributed and the texture will transform into a cohesive, slightly glossy mass. Don’t overmix or the cereal will get soggy.
Step 4: Press and Set in the Pan
Transfer the mixture to a greased 9×13-inch baking dish (or line with parchment for easy removal). Use the spatula or lightly greased hands to press it evenly into the pan. Press firmly but don’t compact it too much—you want chewy, not dense.
For perfectly even squares, use a piece of parchment to press down one final time. Let it sit at room temperature for 30 minutes until firm enough to cut. The top should look slightly shiny and the edges will pull away from the pan as it sets.
Step 5: Cut and Serve the Treats
Once set, cut into squares using a sharp knife (dip in hot water between cuts for clean edges). For classic treats, go for 2-inch squares. Each piece should hold its shape but still have that signature chewy give when you bite into it.
These are best enjoyed the same day but will keep in an airtight container for 2-3 days. The cereal stays crisp longest if you store them in a single layer rather than stacked. Serve at room temperature for the perfect texture.
Pro Tips For Making Marshmallow Rice Crispy Treats
- Melt Butter Low: Use low heat when melting the butter and marshmallows—high heat will turn the sugar in the marshmallows grainy. I learned this the hard way after ruining two batches with scorched, lumpy goo.
- Use Fresh Cereal: Stale crispy rice cereal makes for sad, soggy treats. If your box has been open for more than a week, grab a fresh one; the texture difference is noticeable.
- Press Gently: Resist the urge to pack the mixture into the pan too firmly. A light press keeps the treats tender, while compacting them turns them into dense, chewy bricks.
- Grease Everything: Butter your spatula, your hands, even the measuring cup—anything that touches the marshmallow mix. Sounds tedious, but it prevents half the batch from sticking to your tools instead of the pan.
Best Sauces and Condiments for This Recipe
Chocolate Drizzle
Melt ½ cup semi-sweet chocolate chips with 1 tsp coconut oil in the microwave in 20-second intervals, stirring between each. Drizzle over cooled treats using a fork. The coconut oil keeps the chocolate glossy and easy to drizzle. 🔥
Caramel Sauce
Warm ¼ cup store-bought caramel sauce in the microwave for 15-20 seconds to loosen. I love Smucker’s for its rich, buttery flavor. Drizzle lightly over each square just before serving for a gooey, sweet contrast.
Peanut Butter Swirl
Mix ¼ cup creamy peanut butter with 1 tbsp powdered sugar to soften, then microwave for 10-15 seconds. Use a spoon to drizzle over the treats. The slight saltiness of peanut butter cuts through the sweetness perfectly.
White Chocolate Glaze
Melt ½ cup white chocolate chips with 1 tbsp heavy cream until smooth. Stir in ½ tsp vanilla extract for extra flavor. This adds a creamy, sweet finish that kids especially love.
Fruit Compote
Simmer 1 cup frozen raspberries with 2 tbsp sugar for 5-7 minutes until thickened. Strain seeds if desired. The tartness balances the sweet treats beautifully, adding a pop of color too.
Sea Salt Sprinkle
A light sprinkle of flaky sea salt (like Maldon) on top enhances all the flavors. Just a pinch per square is all you need to add that sophisticated sweet-salty contrast. ✨
Nutrition Facts
Frequently Asked Questions
Can I use regular marshmallows instead of mini?
Yes! Use 4 cups of regular marshmallows, cut into smaller pieces first. They melt the same way but take a bit longer to break down.
Why did my treats turn out hard?
Overmixing or pressing too firmly can make them dense. Fold just until combined and press gently into the pan for the perfect chewy texture.
How do I make them gluten-free?
Swap in gluten-free crispy rice cereal—it works exactly the same. Check labels to ensure all ingredients meet your dietary needs.
Can I add mix-ins like chocolate chips?
Stir in ½ cup of chocolate chips, nuts, or sprinkles after folding in the cereal. They’ll soften slightly but add great texture.

- Lump Rice Recipe Sri Lanka: Traditional Island-Style Texture - November 4, 2026
- Laos Sticky Rice Recipe: Traditional Steamed Perfection - November 4, 2026
- Magic Rice Recipe: One-Pot Aromatic Wonder - November 4, 2026