
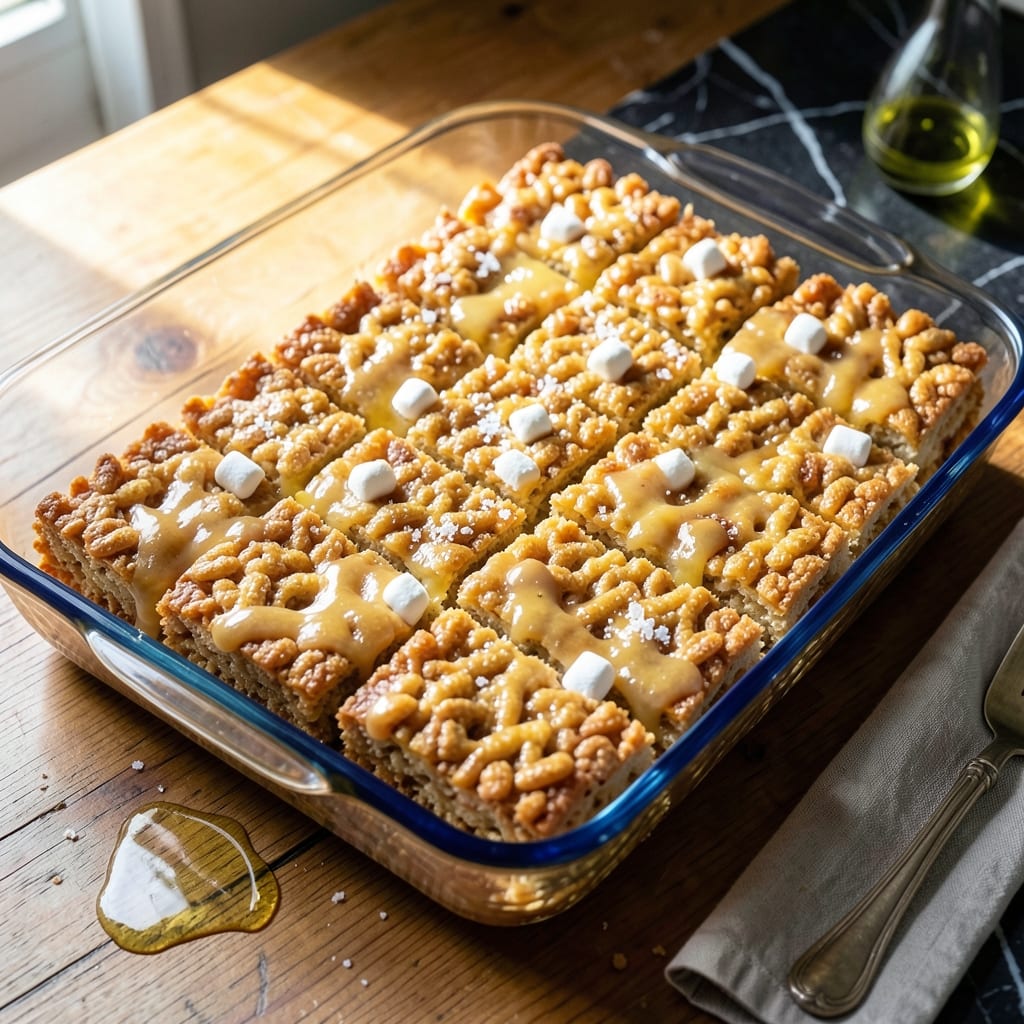
There’s a reason these classic squares remain a beloved treat after all these years. This method delivers perfectly gooey results every time with minimal effort and maximum satisfaction.
The process is straightforward: melt, mix, and press. No baking required, just a stovetop and a little patience. The marshmallows transform into a smooth, sticky base that binds the crispy cereal into irresistibly chewy bars.
What you get are golden, glossy squares with that signature crackly texture and sweet marshmallow flavor. Cut them while still warm for softer treats or let them set for firmer, easier-to-handle portions.
Ideal for bake sales, lunchboxes, or an easy dessert when time is short. Here’s how to make them just right.
Ingredients for Kellogg’s Rice Krispie Treats
Six simple ingredients transform into golden, crackly squares with minimal effort and maximum flavor.
| Ingredient | Amount | Notes |
|---|---|---|
| Kellogg's Rice Krispies Cereal 🥣 | 6 cups | Crisp rice cereal, standard variety |
| Miniature Marshmallows 🍬 | 10 oz | About 4 cups, fresh for best melt |
| Unsalted Butter 🧈 | ¼ cup | 4 tbsp, for melting |
| Vanilla Extract 🌿 | ½ tsp | Pure extract preferred |
| Kosher Salt 🧂 | ¼ tsp | Fine grain, optional for balance |
| Nonstick Cooking Spray 💨 | 1 can | For greasing pan |
The cereal is non-negotiable here—Kellogg’s Rice Krispies deliver that signature snap and crackle (the generic brands just don’t compare). Fresh marshmallows melt smoother than stale ones, so check the date on the bag. For the butter, unsalted is essential—it lets you control the salt content. If you’re using salted, skip the extra kosher salt entirely.
No miniature marshmallows? Regular marshmallows chopped into small pieces work fine (about 40 large ones equals 10 oz). The vanilla extract adds depth—skip the imitation stuff. For a richer flavor, brown the butter slightly before adding marshmallows (worth the extra minute). If you’re making these for a crowd, double the batch—13×9-inch pan handles it perfectly.
These set up fast—cut within 30 minutes for the gooiest texture. Store in an airtight container at room temperature for up to 3 days, or freeze for 6 weeks (thaw at room temp before serving). Pressing them into a parchment-lined pan makes removal effortless.
Why You’ll Love This Recipe
- One Pot Wonder: I melt the butter and marshmallows in a single saucepan, stir in the cereal, and it’s done—no mixing bowls, no fuss.
- That Crunch: The Rice Krispies stay light and crispy, while the melty marshmallow and butter bring this rich, buttery-sweet contrast.
- Crowd Pleaser: I’ve served these at birthday parties, bake sales, and lazy Sundays—kids and adults always reach for seconds.
- Budget Friendly: A box of cereal and a bag of mini marshmallows feed a whole group for under ten bucks.
Step-by-Step Instructions for Kellogg’s Rice Krispies Treats
These foolproof steps guarantee perfectly gooey, crisp-edged treats every time.
Step 1: Prepare the Pan and Melt the Butter
Lightly coat a 9×13-inch baking dish with the nonstick cooking spray, ensuring complete coverage of all surfaces. This prevents sticking and makes cleanup effortless. I prefer spraying right before adding the mixture to maintain maximum nonstick effectiveness.
In a large, heavy-bottomed pot, melt the 0.25 cup unsalted butter over low heat. Watch for the foaming to subside completely, indicating the butter is fully melted but not browned. This controlled melting prevents hot spots that could scorch the marshmallows later.
Step 2: Create the Marshmallow Base
Add all 10 oz miniature marshmallows to the melted butter. Stir constantly with a silicone spatula as they begin to soften, which takes about 3-5 minutes on low heat. The mixture is ready when no solid marshmallow pieces remain and the texture becomes smooth and glossy.
Immediately remove from heat and stir in the 0.5 tsp vanilla extract and 0.25 tsp kosher salt. The vanilla enhances the sweetness while the salt balances the overall flavor profile. Work quickly—the marshmallow mixture thickens as it cools.
Step 3: Incorporate the Cereal
Add all 6 cups Kellogg’s Rice Krispies Cereal to the marshmallow mixture at once. Using the same spatula, fold gently until every piece is evenly coated. I find that pressing down lightly as you stir helps distribute the sticky mixture without crushing the cereal.
The mixture should glisten uniformly with no dry cereal visible. If you notice any uncoated pieces, fold for another 10-15 seconds. Avoid overmixing, which can make the treats dense rather than light and crisp.
Step 4: Press and Set the Treats
Transfer the mixture to your prepared baking dish. Using the spatula or buttered hands (to prevent sticking), press evenly into the pan with gentle, consistent pressure. I aim for an even layer about 1-inch thick across the entire surface.
Press firmly enough to compact the treats but not so hard that you crush the cereal. The surface should appear smooth with the characteristic crisp rice texture still visible. Allow to cool at room temperature for 30-45 minutes until completely set.
Step 5: Cut and Serve
Once fully cooled and firm to the touch, use a sharp knife to cut into 16 equal squares. For clean cuts, I run the knife under hot water and wipe it dry between each cut. This prevents the treats from sticking to the blade and maintains perfect edges.
Serve at room temperature. The ideal treat offers a perfect balance: crisp at the edges, gooey in the center, with that signature snap, crackle, and pop of Kellogg’s Rice Krispies Cereal in every bite. Store leftovers in an airtight container at room temperature for up to 3 days.
Pro Tips For Making Kellogg’S Rice Krispie Treats
- Melt Butter Low: Keep the heat at medium-low when melting butter for the marshmallows—I learned this the hard way after scorching two batches. Too hot and the sugar in the marshmallows will burn before they even soften.
- Use Fresh Marshmallows: Skip the stale mini marshmallows; they turn rock-hard when cooled. Fresh ones melt smoothly and give that perfect gooey texture that holds the Rice Krispies together.
- Press While Warm: Don’t wait for the mixture to cool before pressing it into the pan. Work fast while it’s still warm and sticky, or you’ll end up with a crumbly mess that won’t hold its shape.
- Add Vanilla Last: Stir in the vanilla extract only after removing the marshmallow mixture from heat. Adding it too early can make the flavor bitter—sounds weird, but it works.
Storing and Reheating kelloggs rice krispie treats
Room Temperature Storage
Let your treats cool completely before storing. I use airtight containers with parchment paper between layers to prevent sticking. They’ll stay fresh at room temperature for up to 3 days. The texture softens slightly over time but remains delicious. 💡
Refrigerator Storage
For longer freshness, store in the fridge for up to 1 week. Place in a sealed container with parchment between layers. Bring to room temperature before serving to restore that signature chewiness. Cold treats can be a bit firmer than usual.
Freezing for Later
Wrap individual squares tightly in plastic wrap, then place in a freezer-safe bag for up to 6 weeks. Thaw at room temperature for 1-2 hours before serving. Honestly, they taste almost as good as fresh!
Reviving Stale Treats
If your treats lose their freshness, revive them by microwaving for 5-10 seconds on 50% power. The marshmallows will soften slightly, restoring that gooey texture. Watch closely to avoid over-softening.
Serving Warm
For that just-made warmth, microwave a single treat for 10-15 seconds before serving. The marshmallows will get delightfully sticky. This trick works best with freshly made or thawed treats. ✨
Packing for Events
Transport in a single layer in a shallow container lined with parchment. Avoid stacking to prevent crushing the cereal’s crisp texture. These travel well for bake sales or potlucks and always disappear fast!
Nutrition Facts
Frequently Asked Questions
Can I use regular marshmallows instead of mini ones?
Yes! Chop 40 large marshmallows into small pieces to equal 10 oz. They melt the same way but may take slightly longer to soften completely.
Why did my treats turn out hard?
Overmixing or pressing too firmly compacts the cereal. Use gentle pressure and fold just until coated for light, crisp results.
How do I make them less sticky when cutting?
Run your knife under hot water and wipe dry between cuts. This prevents the marshmallow from clinging to the blade.
Can I add chocolate chips or sprinkles?
Stir in 1 cup of mix-ins after combining cereal. Press lightly so they stick without sinking to the bottom.

- Mujadara Rice and Lentils Recipe: Earthy Spiced Lentils With Caramelized Onions - November 1, 2026
- Naija Fried Rice Recipe: Street-Style Spice With Veggie Crunch - November 1, 2026
- Mushy Rice Recipe: Fluffy Grains Transformed in Minutes - November 1, 2026