
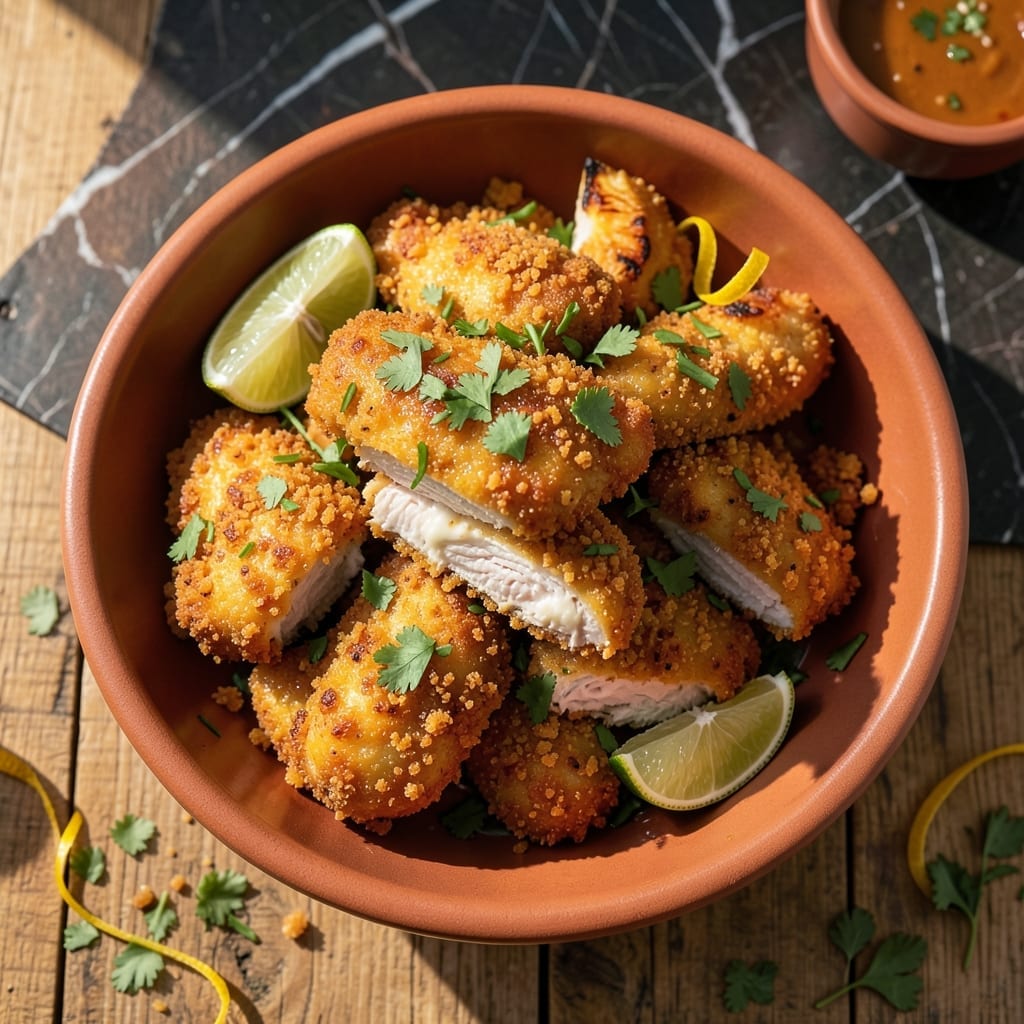
These spice-crusted tenders deliver crispy perfection without deep frying. I developed this oven-baked method to achieve golden, crunchy results with traditional Mexican flavors.
The secret lies in a double coating of seasoned panko and crushed tortilla chips, which creates an extra-thick crust that stays crispy even without oil. Paprika, cumin, and chili powder lend authentic warmth and depth to each bite.
Inside, the chicken remains tender and juicy, thanks to a quick brine in buttermilk. This balances the bold spices and ensures the meat stays moist during baking.
Ready in under 40 minutes, these tenders make a crowd-pleasing main course or appetizer. Serve with lime crema or avocado dip for a complete meal.
Ingredients for Mexican Chicken Tenders
Pantry raid time. These bold flavors come from simple, quality ingredients ready for crispy perfection.
| Ingredient | Amount | Notes |
|---|---|---|
| Chicken Breast Tenders 🍗 | 1 ½ lb | Boneless, skinless, cut into strips |
| Buttermilk 🥛 | 1 cup | For brining chicken |
| All-Purpose Flour 🌾 | ½ cup | For initial dredging |
| Large Eggs 🥚 | 2 whole | Beaten for binding coating |
| Panko Breadcrumbs 🍞 | 1 ½ cups | Japanese-style for extra crispiness |
| Tortilla Chips 🌮 | 1 cup | Crushed into fine crumbs |
| Chili Powder 🌶️ | 1 tbsp | Mild or hot variety |
| Ground Cumin 🌿 | 1 tsp | Toasted for deeper flavor |
| Paprika 🌶️ | 1 tsp | Sweet or smoked variety |
| Garlic Powder 🧄 | 1 tsp | Not garlic salt |
| Onion Powder 🧅 | 1 tsp | For aromatic depth |
| Salt 🧂 | 1 tsp | Kosher or sea salt preferred |
| Black Pepper 🌶️ | ½ tsp | Freshly ground preferred |
| Olive Oil 🫒 | 2 tbsp | For light brushing before baking |
The chicken matters here. Boneless, skinless tenders cook more evenly than whole breasts—look for uniform thickness. Buttermilk is non-negotiable for that brine; the acidity tenderizes while adding moisture. For the panko, Kikkoman brand delivers consistent crispiness. Tortilla chips should be sturdy restaurant-style (like Tostitos), not the thin, delicate kind that turn to dust when crushed.
No buttermilk? Whole milk plus 1 tbsp vinegar or lemon juice gets you close. Swap panko for regular breadcrumbs at a 1:1 ratio, though texture suffers slightly. Fresh out of chili powder? Cayenne plus cumin at half the amount adds heat and depth. The paprika can be smoked for extra complexity—just reduce the cumin by half to avoid overpowering the blend.
Chicken brines best 30 minutes at room temp or 2 hours refrigerated. Coated tenders can rest 15 minutes before baking for maximum crust adhesion. Leftovers? They reheat surprisingly well in a toaster oven for 5-7 minutes at 400°F.
Why You’ll Love This Recipe
- 20-Minute Magic: I toss the tenders in buttermilk, coat them, and bake—dinner’s on the table before the oven even preheats fully.
- Crispy Perfection: That panko crust gets golden and crunchy while the inside stays juicy, with just a hint of tang from the buttermilk.
- Crowd Pleaser: Honestly, kids and adults alike devour these—great for weeknight dinner or sliced up in tacos the next day.
- Budget Hero: Chicken tenders stretch further than whole breasts, and one batch makes enough for leftovers that reheat like a dream.
Step-by-Step Instructions for Mexican Chicken Tenders
Achieve maximum crunch and juiciness with this foolproof oven-baked method.
Step 1: Brine the Chicken in Buttermilk
Place the 1.5 lb chicken breast tenders in a large bowl and pour over the 1 cup buttermilk. Ensure every piece is fully submerged. Cover and refrigerate for at least 1 hour or up to 4 hours.
This buttermilk brine tenderizes the chicken while adding subtle tang. The lactic acid breaks down proteins, guaranteeing moist meat even after baking. Don’t skip this step—it’s the secret to preventing dry, stringy tenders.
Step 2: Prepare the Spiced Breading Station
In a shallow dish, combine the 0.5 cup all-purpose flour, 1 tbsp chili powder, 1 tsp ground cumin, 1 tsp paprika, 1 tsp garlic powder, 1 tsp onion powder, 1 tsp salt, and 0.5 tsp black pepper. Mix thoroughly to distribute spices evenly.
In a second dish, beat the 2 whole large eggs. In a third, combine the 1.5 cups panko breadcrumbs and 1 cup crushed tortilla chips. The crushed chips add extra crunch and authentic Mexican flavor to the coating.
Step 3: Dredge and Coat the Chicken
Remove the chicken from the buttermilk, letting excess drip off. Dredge each piece in the spiced flour mixture, pressing gently to adhere. Shake off any excess, then dip into the beaten eggs, allowing any excess to drip off.
Finally, press each piece into the panko-tortilla chip mixture, turning to coat completely. The three-step process ensures maximum adhesion for that ultra-crispy exterior. Place coated tenders on a wire rack set over a baking sheet.
Step 4: Bake to Golden Perfection
Preheat oven to 400°F. Lightly brush each tender with olive oil—this enhances browning and crispness. Bake on the middle rack for 15-18 minutes, flipping halfway through.
Bake until the coating is deep golden brown and the chicken reaches an internal temperature of 165°F. The tenders should feel firm to the touch and the crust should be audibly crisp when tapped. Avoid overcrowding the pan to ensure even cooking.
Step 5: Rest and Serve Immediately
Transfer the baked tenders to a wire rack and let rest for 3-5 minutes. This brief rest allows the coating to set while keeping the chicken juicy inside.
Serve immediately while hot and crispy. The contrast between the crunchy spice-crusted exterior and tender, moist interior delivers the perfect texture. For best results, avoid stacking the tenders, as this can cause the coating to steam and lose its crispness.
Pro Tips For Making Mexican Chicken Tenders
- Soak in Buttermilk Overnight: I learned this the hard way—give the chicken tenders at least 4 hours (or overnight) in buttermilk. It keeps them juicy and helps the coating stick like it should.
- Double-Dredge for Crunch: After the buttermilk, dip in flour, then egg, then panko, but repeat the egg and panko once more. Sounds tedious, but it’s the only way to get that thick, crispy crust.
- Skip Cold Oil: Make sure your oil is hot—350°F minimum—before the tenders hit the pan. After burning three batches, I finally figured out that lukewarm oil just makes them greasy.
- Rest Before Serving: Give them 5 minutes on a wire rack after frying. My grandmother swore by this, and she was right: it keeps the crust crisp instead of soggy.
Perfect Pairings for mexican chicken tenders
Dipping Sauces
I always pair these tenders with a cooling lime crema—just mix ½ cup sour cream with 1 tbsp lime juice and 1 tsp lime zest. The tangy creaminess balances the bold spices perfectly. 🍋
Fresh Sides
A crisp jicama slaw with shredded cabbage, julienned jicama, and cilantro adds a refreshing crunch. Toss with 2 tbsp lime juice and 1 tbsp olive oil for a bright contrast to the rich tenders.
Mexican Street Corn
Elote-style corn makes an ideal companion—grill or roast corn, then slather with mayo, cotija cheese, chili powder, and lime. The smoky, creamy flavors complement the tenders beautifully.
Light Salad
A simple avocado and tomato salad with red onion and cilantro keeps things fresh. Drizzle with 1 tbsp olive oil and a squeeze of lime for a light, vibrant side.
Beer Pairings
A crisp Mexican lager like Modelo Especial or Pacífico cuts through the richness with its light, clean finish. For something darker, a negra modelo adds a malty depth that stands up to the spices. 🍺
Margarita Match
Serve with a classic lime margarita on the rocks—2 oz tequila, 1 oz lime juice, and 1 oz triple sec. The citrus and salt rim enhance the tenders’ flavors without overpowering them.
Nutrition Facts
Frequently Asked Questions
Can I use chicken thighs instead of breast tenders?
Yes, boneless skinless thighs work well and often stay juicier. Reduce baking time by 2-3 minutes since they cook faster. Pat them dry first for better coating adhesion.
What if I don’t have buttermilk?
Mix 1 cup milk with 1 tbsp vinegar or lemon juice and let sit for 5 minutes. This creates a suitable substitute with the same tenderizing acidity.
How do I keep them crispy when serving a crowd?
Bake in batches and keep finished tenders warm on a wire rack in a 200°F oven. Never stack them—this traps steam and makes the coating soggy.
Can I make these ahead of time?
Coat the tenders and refrigerate uncovered for up to 4 hours before baking. This helps the coating dry slightly for extra crispiness. Avoid freezing coated tenders.

- Jollof Rice Sauce Recipe: West African Tomato and Spice Infusion - September 25, 2026
- Japanese Rice Soup Recipe: Umami-Rich Comfort in a Bowl - September 25, 2026
- Homemade Cream Of Rice Recipe: Silk-Smooth Breakfast in Minutes - September 25, 2026