
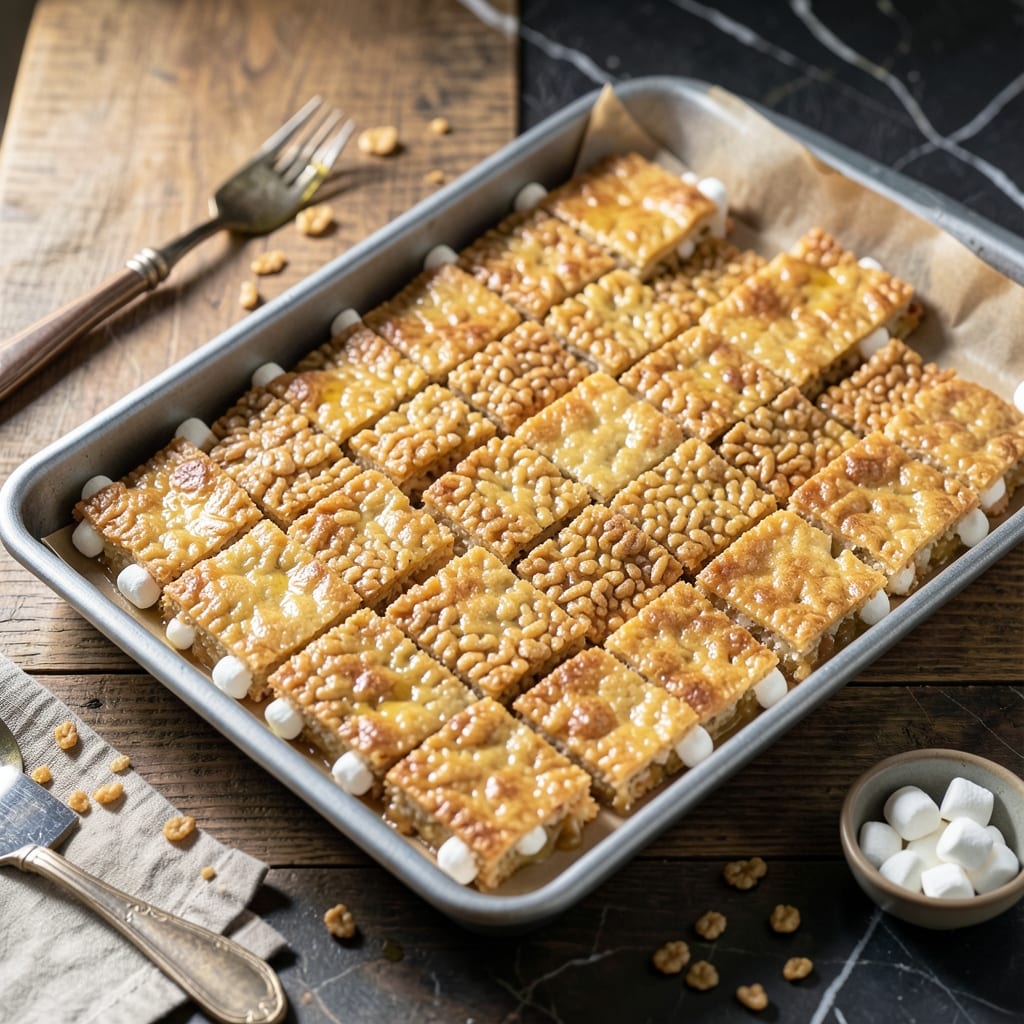
This recipe brings back childhood memories with a perfectly balanced crisp and chewy texture. The combination of mini marshmallows and Rice Krispies creates a treat that’s impossible to resist.
What makes this version special is the precise ratio of ingredients—just enough marshmallows to create that signature gooey center while maintaining the cereal’s signature crunch. The process is simple but requires attention to detail for the best results.
You’ll end up with squares that hold their shape when cut but melt in your mouth. The mini marshmallows distribute evenly, ensuring every bite has that perfect blend of sweetness and snap.
Ideal for parties, lunchboxes, or a quick sweet fix. This recipe delivers consistent, professional-quality results every time.
Ingredients for Mini Marshmallow Rice Krispie
Six simple ingredients transform into these nostalgic, crisp-chewy squares everyone loves.
| Ingredient | Amount | Notes |
|---|---|---|
| Mini Marshmallows 🍬 | 10 cups | Divided for even distribution |
| Rice Krispies Cereal 🥣 | 6 cups | Fresh for maximum crunch |
| Unsalted Butter 🧈 | ½ cup | For melting marshmallows |
| Vanilla Extract 💧 | 1 tsp | Pure for best flavor |
| Kosher Salt 🧂 | ¼ tsp | Balances sweetness |
| Light Corn Syrup 🧴 | 2 tbsp | Optional for extra chew |
| Sea Salt Flakes 🧂 | ½ tsp | For finishing |
The marshmallows are the foundation here. Jet-Puffed mini marshmallows melt perfectly and distribute evenly—regular marshmallows won’t give you the same texture. Kellogg’s Rice Krispies is the gold standard for that signature snap, crackle, pop (store brand works in a pinch). For the butter, unsalted lets you control the salt content precisely.
No mini marshmallows? Regular marshmallows chopped into small pieces work, but the texture won’t be as uniform. Want more depth? Swap the vanilla for vanilla bean paste. The corn syrup is optional but adds that classic chew—honey or agave can substitute if needed. Skip the light corn syrup? Just add an extra 2 tbsp of butter.
These keep beautifully at room temperature in an airtight container for up to 3 days. For longer storage, freeze for up to 6 weeks—just thaw at room temperature before serving. Cut into squares only after fully cooled to prevent crumbling.
Why You’ll Love This Recipe
- One-Bowl Wonder: I melt the butter, mix in the mini marshmallows, and fold in the Rice Krispies—all in the same pot. One less dish to wash.
- Vanilla-Kissed Crunch: The vanilla extract adds this warm, cozy depth that makes the gooey marshmallows and crispy cereal taste even more addictive.
- Party-Ready Bites: I press the mix into mini muffin tins for perfectly portioned treats that disappear faster than I can make them.
- Budget-Friendly Batch: A box of cereal and a bag of mini marshmallows makes dozens of squares. Honestly, it’s my cheapest crowd-pleaser.
Step-by-Step Instructions for Mini Marshmallow Rice Krispie Treats
Master the technique for perfectly gooey, crisp-edged treats with professional precision.
Step 1: Prepare the Pan and Measure Ingredients
Line a 9×13-inch baking pan with parchment paper, leaving an overhang on all sides for easy removal. This prevents sticking and ensures clean edges. I use a metal pan for even heat distribution.
Measure out all ingredients precisely: 10 cups Mini Marshmallows (divided), 6 cups Rice Krispies Cereal, 0.5 cup Unsalted Butter, 1 tsp Vanilla Extract, 0.25 tsp Kosher Salt, 2 tbsp Light Corn Syrup, and have 0.5 tsp Sea Salt Flakes ready for finishing. Mise en place is critical for the timing-sensitive steps ahead.
Step 2: Melt the Butter and Marshmallow Mixture
In a large, heavy-bottomed pot, melt the 0.5 cup Unsalted Butter over low heat. Once fully melted, add 8 cups of the Mini Marshmallows (reserving 2 cups for later) and the 2 tbsp Light Corn Syrup. Stir constantly with a heatproof spatula.
The mixture will begin to melt and bubble after 2-3 minutes. Continue stirring until completely smooth and no marshmallow lumps remain. Remove from heat immediately once melted to prevent scorching. Stir in the 1 tsp Vanilla Extract and 0.25 tsp Kosher Salt until fully incorporated.
Step 3: Incorporate the Cereal and Remaining Marshmallows
Working quickly while the mixture is still hot, add the 6 cups Rice Krispies Cereal to the pot. Fold gently with the spatula until the cereal is evenly coated. The mixture will be thick and sticky—this is normal.
Add the reserved 2 cups Mini Marshmallows and fold just until distributed. These whole marshmallows create pockets of extra gooeyness in the finished treats. Avoid overmixing, which can crush the cereal and make the final product dense rather than light and crisp.
Step 4: Press and Set in the Prepared Pan
Transfer the mixture to the prepared pan. Using a spatula or your hands (lightly greased with butter or cooking spray), press the mixture evenly into the pan. Apply firm, consistent pressure to create a uniform layer—this ensures even texture throughout.
Press the top surface smooth, then use the spatula to gently press down the edges to create clean lines. The mixture should fill the pan completely with no gaps. Let the treats set at room temperature for 30-45 minutes until firm to the touch.
Step 5: Cut and Finish with Sea Salt
Once fully set, use the parchment overhang to lift the treats from the pan. Place on a cutting board and, using a sharp knife, cut into 16 equal squares. For clean cuts, dip the knife in hot water and wipe it clean between each slice.
Sprinkle the tops of the treats with 0.5 tsp Sea Salt Flakes while they’re still slightly warm. This final touch enhances the sweetness and adds a sophisticated contrast. Serve at room temperature for the ideal balance of chewiness and crispness.
Pro Tips For Making Mini Marshmallow Rice Krispie
- Melt Butter Low: Use medium-low heat when melting the butter—mini marshmallows burn fast, and I learned this the hard way after scorching two batches.
- Use Fresh Cereal: Stale Rice Krispies won’t give you that signature snap, so check the box date and give it a quick sniff if you’re unsure.
- Skip the Overmixing: Once the marshmallow mixture meets the cereal, fold just until coated—overworking it turns the treats dense instead of light and crisp.
- Press With Wet Hands: Lightly wet your hands before pressing the mixture into the pan to prevent sticking and keep things even—sounds weird, but it works.
Troubleshooting This Recipe
Too Sticky to Handle
If the mixture sticks to your hands or spatula, lightly coat them with butter or cooking spray before pressing. This creates a barrier and prevents frustration. I keep a small bowl of melted butter nearby for quick touch-ups. 💡
Hard and Crunchy
Overcooked marshmallows can make your treats hard. Remove from heat immediately once melted and smooth. If they’re already too firm, stir in 1-2 tbsp warm water to soften the mixture before adding cereal.
Won’t Hold Shape
If your treats crumble when cutting, they may not have set long enough. Let them cool for the full 45 minutes before slicing. Pressing too lightly can also cause this—apply firm, even pressure when shaping.
Uneven Texture
For consistent texture, distribute the reserved 2 cups mini marshmallows evenly before the final press. This ensures every bite has that perfect gooey pocket. Stir gently but thoroughly when combining with cereal.
Burnt Marshmallows
Marshmallows scorch easily over direct heat. Always use low heat and stir constantly. If you notice browning, reduce heat immediately. A heavy-bottomed pot helps prevent hot spots. 🔥
Dry Treats
If your treats turn out dry, you may have overmeasured the cereal. Stick to exactly 6 cups Rice Krispies. Adding 1 tbsp corn syrup to the melted mixture can also restore moisture and chewiness.
Nutrition Facts
Frequently Asked Questions
Can I use regular marshmallows instead of mini?
Yes, but chop them into small pieces first. Mini marshmallows melt faster and distribute more evenly, giving better texture. Regular marshmallows may create larger gooey pockets.
Why do my treats turn out too hard?
Overcooking the marshmallow mixture is the most common cause. Remove from heat immediately once melted and smooth. Stir in 1-2 tbsp warm water if they’ve already firmed up too much.
How do I get clean cuts without crumbling?
Let treats set for the full 45 minutes before cutting. Use a sharp knife dipped in hot water and wiped clean between each slice for perfect edges.
Can I add chocolate or sprinkles?
Fold in 1 cup chocolate chips with the cereal, or press sprinkles into the top before setting. Both add fun variations while keeping the classic texture.

- Mujadara Rice and Lentils Recipe: Earthy Spiced Lentils With Caramelized Onions - November 1, 2026
- Naija Fried Rice Recipe: Street-Style Spice With Veggie Crunch - November 1, 2026
- Mushy Rice Recipe: Fluffy Grains Transformed in Minutes - November 1, 2026