
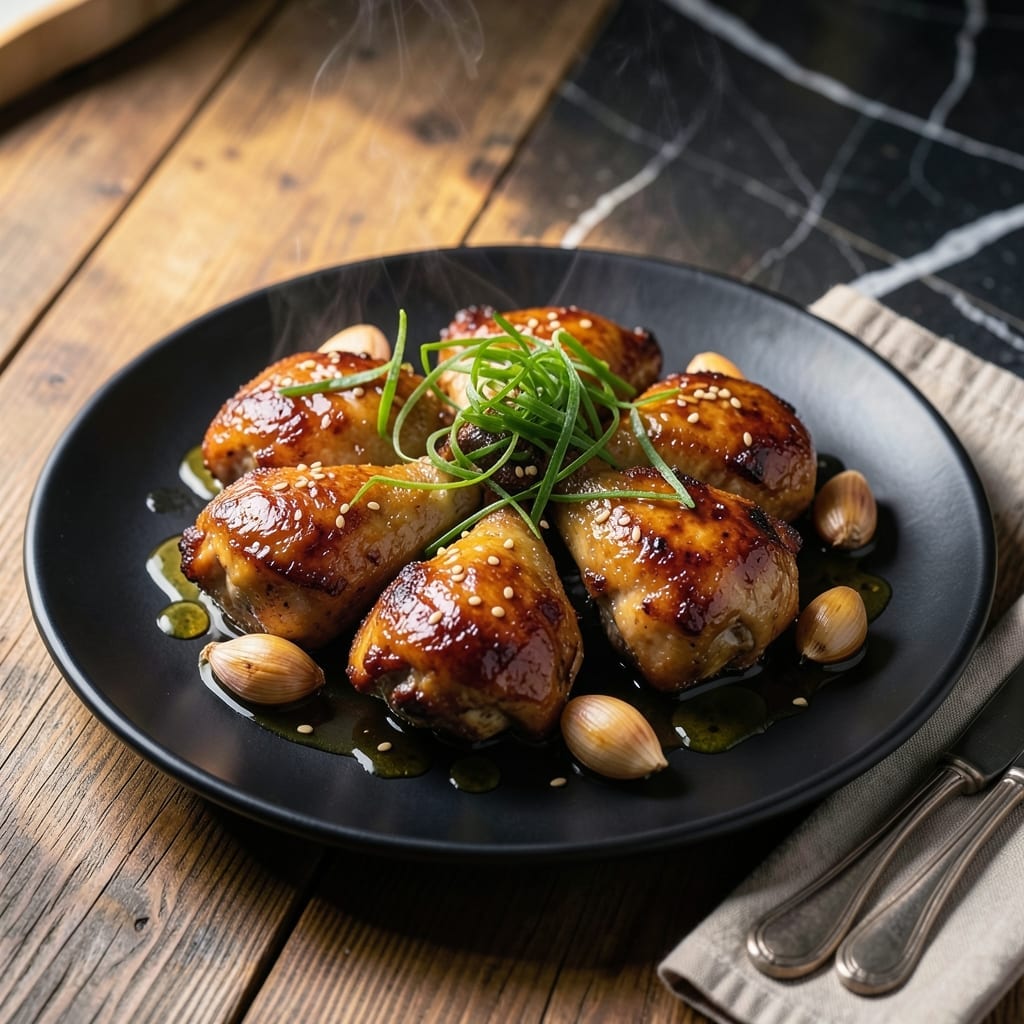
This Japanese-style dish delivers a sweet and savory balance that’s hard to resist. The garlic glaze caramelizes beautifully, creating a sticky, glossy coating that clings to every piece of chicken.
I developed this recipe after tasting a similar version in a small Tokyo izakaya—its simplicity and depth of flavor stayed with me. The key is patiently reducing the sauce to achieve that perfect consistency.
The result is tender chicken with a glossy, umami-rich glaze that’s both garlicky and subtly sweet. It pairs perfectly with steamed rice and quick-pickled vegetables.
Ready in under 30 minutes, this dish brings restaurant-quality results to your home kitchen. Here’s how to make it right.
Ingredients for Mitsuken Garlic Chicken
A handful of ingredients for that sticky, garlicky, Tokyo izakaya magic at home.
| Ingredient | Amount | Notes |
|---|---|---|
| Chicken Thighs 🍗 | 1 ½ lb | Boneless, skinless, cut into bite-sized pieces |
| Garlic Cloves 🧄 | 8 cloves | Minced finely for maximum flavor |
| Soy Sauce 🥢 | ⅓ cup | Use low-sodium for balance |
| Mirin 🍶 | ¼ cup | Sweet rice wine essential |
| Sake 🍶 | ¼ cup | Dry variety preferred |
| Granulated Sugar 🍚 | 2 tbsp | Balances savory and sweet |
| Ginger Root 🌿 | 1 tbsp | Freshly grated for zing |
| Cornstarch 🌾 | 1 tbsp | For sauce thickening |
| Vegetable Oil 🫒 | 2 tbsp | High smoke point for frying |
| Green Onions 🧅 | 3 whole | Thinly sliced for garnish |
| Sesame Seeds 🌰 | 1 tsp | Toasted for nutty aroma |
The chicken thighs are non-negotiable here. Boneless, skinless stays juicy even with the high-heat frying. I always grab mine from Whole Foods or H-Mart—better marbling than the standard grocery store stuff. For the soy sauce, Kikkoman low-sodium is my go-to (no weird aftertaste). If you can find hon-mirin instead of aji-mirin, grab it—the depth of flavor is worth the extra dollar or two.
No mirin? Dry sherry plus a pinch of sugar works in a pinch. Sake can be swapped for dry white wine, but the flavor won’t be as clean. Out of fresh ginger? Ground ginger at one-third the amount (it’s stronger, so go easy). The cornstarch is key for that glossy sauce—don’t skip it. If you’re gluten-free, arrowroot powder does the same job.
The sauce thickens as it cools, so don’t panic if it seems thin at first. Best eaten fresh, but leftovers keep 3-4 days in the fridge. Reheat gently on the stove (microwave makes the chicken rubbery). Garnish with sesame seeds right before serving—they lose their crunch if added too early.
Why You’ll Love This Recipe
- One Pan Wonder: I toss everything in a skillet and let the soy sauce, mirin, and sake do the work while I set the table.
- Garlic Lover’s Dream: Honestly, the whole head of garlic cloves melts into the sauce, coating each thigh in deep, savory goodness.
- Weeknight MVP: It’s my go-to for busy evenings—ready before the rice finishes cooking.
- Budget Stretcher: Chicken thighs stay juicy and cheap, and the sauce soaks in so nothing goes to waste.
Step-by-Step Instructions for Japanese-Style Garlic Chicken
Here’s how to create this dish with perfect balance between sweet and savory flavors.
Step 1: Sear the Chicken Thighs
Heat the 2 tablespoons vegetable oil in a large skillet over medium-high heat until it shimmers. Add the 1.5 lb chicken thighs in a single layer, being careful not to crowd the pan. You want each piece to have direct contact with the hot surface.
Sear undisturbed for 4-5 minutes until the bottoms develop a deep golden brown crust. Flip and cook for another 3-4 minutes until the chicken is just cooked through. Remove the chicken to a plate and set aside. The fond left in the pan will be the flavor base for your sauce.
Step 2: Create the Aromatic Sauce Base
In the same skillet, add the 8 cloves garlic cloves and 1 tablespoon ginger root. Sauté over medium heat for 1-2 minutes until the garlic turns lightly golden and releases its fragrance. Be careful not to let it brown too much, or it will become bitter.
Pour in the 0.33 cup soy sauce, 0.25 cup mirin, 0.25 cup sake, and 2 tablespoons granulated sugar. Stir well to combine and scrape up all the browned bits from the pan. Bring the mixture to a gentle simmer and let it cook for 3-4 minutes to meld the flavors.
Step 3: Thicken and Finish the Sauce
In a small bowl, mix the 1 tablespoon cornstarch with 2 tablespoons of cold water to create a slurry. Stir this into the simmering sauce and cook for another 1-2 minutes until the sauce thickens to a glossy consistency that coats the back of a spoon.
Return the chicken to the skillet and spoon the sauce over the pieces. Simmer for 2-3 minutes to allow the chicken to absorb the flavors and finish cooking through. The sauce should cling beautifully to each piece of chicken.
Step 4: Garnish and Serve
Thinly slice the 3 whole green onions and sprinkle them over the dish along with the 1 teaspoon sesame seeds. The green onions add a fresh contrast to the rich sauce, while the sesame seeds provide a nutty crunch.
Serve immediately while hot, with steamed rice to soak up the extra sauce. Each bite should deliver tender chicken coated in a glossy, flavorful glaze that perfectly balances sweet, savory, and umami notes.
Pro Tips For Making Mitsuken Garlic Chicken
- Sear Thighs Skin-Side Down: Start with the skin side down in a cold pan, then turn the heat to medium-high—this renders the fat slowly and guarantees crispy skin without burning the garlic later.
- Smash the Garlic: Lightly crush the garlic cloves with the side of your knife before adding them whole—this releases the aroma without the bitterness of mincing, and they’ll infuse the oil beautifully.
- Deglaze with Sake First: After searing the chicken, pour in the sake first to lift all those browned bits before adding soy sauce and mirin—this builds deeper flavor in the sauce.
- Simmer Covered: Once the liquids are in, cover the pan and let it simmer for 10-12 minutes on low—this keeps the chicken tender and lets the garlic mellow into the sauce instead of turning harsh.
Flavor Customization for This Dish
Spice It Up
For heat lovers, I add ½ tsp red pepper flakes to the sauce while it simmers. The subtle kick pairs beautifully with the sweet-savory balance. For more intensity, 1 tbsp sriracha works wonders, but add it at the end to preserve its fresh flavor.
Citrus Twist
A splash of 1 tbsp yuzu juice or lime zest brightens the dish. I learned this trick at a Tokyo izakaya—it cuts through the richness and adds a refreshing note. Add it just before serving to maintain its vibrant aroma. 🌟
Umami Boost
Stir in 1 tbsp miso paste with the sauce for deeper umami. White miso keeps it mild, while red miso adds complexity. I also love adding 1 tsp fish sauce for an extra layer of savory depth.
Herb Infusion
Fresh herbs can elevate this dish. Toss in 2 tbsp chopped cilantro or thai basil at the end. The aromatic herbs complement the garlic and ginger beautifully. Avoid dried herbs—they won’t have the same impact.
Sweet Adjustments
If you prefer a sweeter glaze, add 1 tbsp honey or maple syrup to the sauce. For a caramelized touch, sprinkle 1 tsp brown sugar on the chicken before searing. These small tweaks make the dish your own.
Creamy Variation
For a richer version, stir in 2 tbsp heavy cream or coconut milk at the end. This creates a luxurious, velvety sauce that’s still balanced by the garlic and ginger. Serve with extra sauce for dipping. 💛
Nutrition Facts
Frequently Asked Questions
Can I use chicken breast instead of thighs?
Yes, but thighs stay juicier. If using breast, reduce cooking time to 3-4 minutes per side to prevent dryness. The sauce helps compensate for the leaner meat.
How do I make the sauce less salty?
Use low-sodium soy sauce and add 1 tbsp water or 1 tsp sugar to balance. Taste before adding all the soy sauce and adjust gradually.
Can I prepare this ahead of time?
Cook the chicken and sauce separately, then combine when reheating. Store in an airtight container for up to 3 days. Reheat gently on the stove.
What if my sauce doesn’t thicken?
Mix 1 tsp cornstarch with 1 tbsp cold water and stir into simmering sauce. Cook for 1-2 minutes until glossy. Avoid high heat which can break the sauce.

- Jollof Rice Sauce Recipe: West African Tomato and Spice Infusion - September 25, 2026
- Japanese Rice Soup Recipe: Umami-Rich Comfort in a Bowl - September 25, 2026
- Homemade Cream Of Rice Recipe: Silk-Smooth Breakfast in Minutes - September 25, 2026