
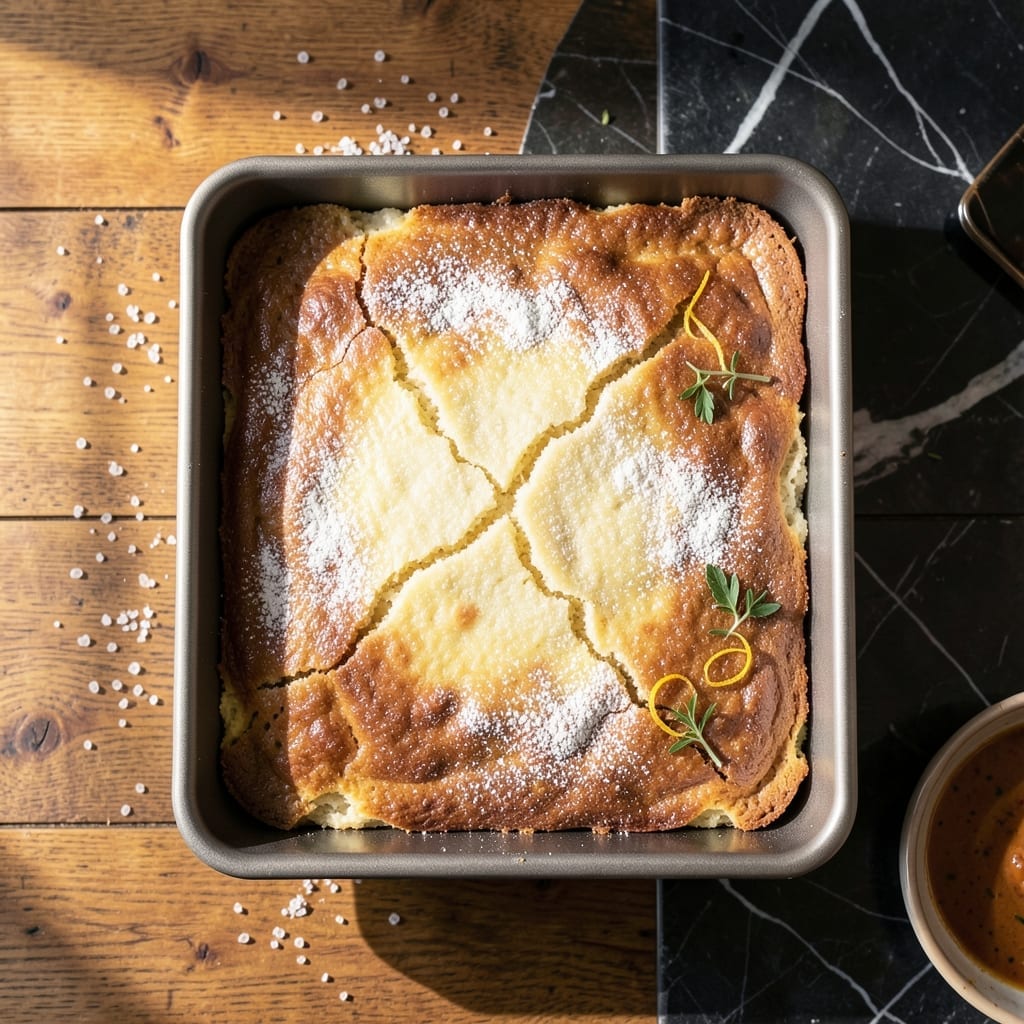
There’s a special magic in achieving that perfect balance of chewy centers and crispy edges in mochiko rice cakes. This recipe transforms simple ingredients into a treat that’s both nostalgic and irresistibly satisfying.
I’ve refined this method to ensure the cakes develop a golden, slightly caramelized crust while staying soft and springy inside. The key is in the batter consistency and precise baking time—no shortcuts here.
The result is a batch of rice cakes that are tender on the inside with just the right amount of resistance when you bite into the edges. They’re ideal for snacking, gifting, or serving at gatherings.
With a few pantry staples and a little patience, you’ll create a dessert that’s as rewarding to make as it is to eat.
Ingredients for Mochiko Rice Cake
Simple pantry staples create these nostalgic, irresistibly chewy treats with crispy edges.
| Ingredient | Amount | Notes |
|---|---|---|
| Mochiko Sweet Rice Flour 🌾 | 2 cups | Do not substitute other flours |
| Granulated Sugar 🍚 | 1 cup | Organic preferred for clean taste |
| Water 💧 | 1 ¼ cups | Room temperature for best mixing |
| Baking Powder 🧂 | 1 tsp | Ensures proper rise and texture |
| Vanilla Extract 🌿 | 1 tsp | Pure extract for best flavor |
| Salt 🧂 | ¼ tsp | Fine sea salt preferred |
| Coconut Milk 🥥 | ¼ cup | Full-fat for richness |
| Neutral Oil 🫒 | 2 tbsp | For greasing the pan |
| Cornstarch 🌾 | 1 tbsp | For dusting the pan |
The Mochiko sweet rice flour is non-negotiable here—it’s what gives these cakes their signature chewy texture. Asian markets or the international aisle at Whole Foods usually carry it. Look for the blue bag with red lettering (the most common brand). The flour should be fine and white, not coarse. If you’re making a big batch, Costco sometimes stocks it in bulk.
No coconut milk? Any plant-based milk works, but the coconut adds richness (almond milk is the neutral runner-up). For sweeter cakes, increase sugar by 2 tbsp. If you don’t have cornstarch, a light dusting of rice flour works too. The vanilla can be skipped, but it adds depth—pure extract only, no imitation. Baking powder is for lift; don’t swap in baking soda.
The batter keeps in the fridge for 24 hours if you want to prep ahead. Baked cakes stay fresh at room temperature for 2-3 days in an airtight container. For longer storage, freeze for up to 1 month—reheat briefly to restore that crispy edge magic.
Why You’ll Love This Recipe
- Five Ingredients: I love that this only needs mochiko flour, sugar, water, baking powder, and vanilla—nothing fancy.
- Chewy Sweet Bite: The vanilla-sugar combo gives that soft, slightly sticky texture I crave with my afternoon tea.
- Snack or Dessert: Honestly, it’s just as good packed in a lunchbox as it is dusted with powdered sugar for company.
- Keeps for Days: These stay fresh in an airtight container, so I can bake a batch on Sunday and still enjoy them by Wednesday.
Step-by-Step Instructions for Mochiko Rice Cake
These tested steps deliver the signature chewy center and crisp edges this dish is known for.
Step 1: Prepare the Pan for Optimal Texture
Lightly grease an 8×8-inch baking pan with the 2 tbsp Neutral Oil, making sure to coat all sides thoroughly. I use a pastry brush for even coverage. Then dust the pan with the 1 tbsp Cornstarch, tapping it around until all surfaces are lightly coated.
This double-layer treatment prevents sticking while creating that coveted crispy exterior. The cornstarch absorbs excess moisture, which helps form the delicate crust that contrasts with the chewy interior. Shake out any excess—you want just a thin, even layer.
Step 2: Mix the Wet and Dry Components
In a large bowl, whisk together the 2 cups Mochiko Sweet Rice Flour, 1 cup Granulated Sugar, 1 tsp Baking Powder, and 0.25 tsp Salt until completely combined. I sift the flour first to prevent lumps, which ensures a smooth, uniform batter.
In a separate bowl, combine the 1.25 cups Water, 0.25 cup Coconut Milk, and 1 tsp Vanilla Extract. Whisk until the mixture looks slightly creamy—the coconut milk adds richness that balances the sweetness. Gradually pour the wet mixture into the dry ingredients while stirring gently.
Step 3: Bake Until Golden with Crisp Edges
Pour the batter into your prepared pan. It will be thick, almost like a cake batter, so spread it evenly with a spatula. Tap the pan firmly on the counter 2-3 times to remove any air bubbles—this prevents uneven pockets during baking.
Bake in a preheated 350°F oven for 50-60 minutes until the top is golden brown and the edges pull away from the pan. The center should spring back lightly when touched, and a toothpick inserted should come out clean or with just a few moist crumbs.
Step 4: Cool Properly for Clean Slices
Remove the pan from the oven and let it cool on a wire rack for 10 minutes. Then, run a thin knife around the edges to loosen it before inverting onto the rack. This prevents the crisp edges from tearing as the cake contracts while cooling.
Let it cool completely for at least 1 hour before slicing. Cutting while warm can cause the pieces to crumble and lose their shape. The texture firms up as it cools, making it easier to achieve clean, even squares with that perfect contrast of chewy and crisp.
Pro Tips For Making Mochiko Rice Cake
- Mix Thoroughly: Beat the batter for at least 2 minutes until completely smooth—I learned this the hard way after ending up with grainy spots from under-mixed flour.
- Use Warm Water: Swap cold water for warm (about 110°F) to help the baking powder activate better, giving your cakes a lighter texture.
- Skip Overmixing: Once the baking powder hits the wet ingredients, resist the urge to stir longer than necessary or your cakes will turn dense.
- Rest the Batter: Let it sit for 10 minutes before baking—this lets the rice flour hydrate fully and prevents that raw flour taste.
Health Benefits of This Recipe
Gluten-Free Goodness
Mochiko sweet rice flour is naturally gluten-free, making this treat perfect for anyone with celiac disease or gluten sensitivity. Unlike wheat flour, it provides that signature chewy texture without any gluten proteins. I love sharing these with friends who typically miss out on baked goods. 💪
Easy to Digest
The sweet rice flour used here is gentler on digestion than regular wheat flour. It’s pre-gelatinized, which means it breaks down more easily in your system. Many people with sensitive stomachs find they can enjoy these cakes without discomfort.
Low Fat Content
Each serving contains minimal fat, with only the 2 tbsp neutral oil used for pan preparation. The coconut milk adds richness without excessive calories, making this a lighter option compared to traditional oil-heavy desserts.
Energy Boost
The combination of complex carbohydrates from the rice flour and natural sugars provides sustained energy. I often pack one as a mid-afternoon pick-me-up. The 1 cup sugar gives quick energy, while the rice flour provides longer-lasting fuel.
Nutrient Rich
While modest, this recipe offers some B vitamins from the rice flour and a touch of healthy fats from the coconut milk. The baking powder adds a small calcium boost. It’s a more nutritious option than many processed snacks.
Allergy-Friendly
This recipe avoids common allergens like dairy, eggs, and nuts. The plant-based coconut milk makes it suitable for vegan diets. I’ve served these at gatherings with diverse dietary needs, and everyone can enjoy them. ✨
Nutrition Facts
Frequently Asked Questions
Can I use regular rice flour instead of mochiko?
No, regular rice flour won’t give the same chewy texture. Mochiko sweet rice flour is essential for that signature bounce and elasticity. Substituting will result in a denser, less satisfying cake.
Why does my batter look too thin or too thick?
Batter consistency should resemble pancake batter. If too thin, add 1-2 tbsp more mochiko flour. If too thick, add 1-2 tbsp water. Proper thickness ensures even baking and the right texture.
How do I get crispier edges?
For extra crispiness, brush the top with a little neutral oil before baking. Also, ensure your oven is fully preheated to 350°F and bake the full 50-60 minutes.
Can I make these ahead of time?
Yes! The batter keeps in the fridge for 24 hours. Baked cakes stay fresh for 2-3 days in an airtight container or freeze for up to 1 month. Reheat briefly to restore crispiness.

- Jollof Rice Sauce Recipe: West African Tomato and Spice Infusion - September 25, 2026
- Japanese Rice Soup Recipe: Umami-Rich Comfort in a Bowl - September 25, 2026
- Homemade Cream Of Rice Recipe: Silk-Smooth Breakfast in Minutes - September 25, 2026