
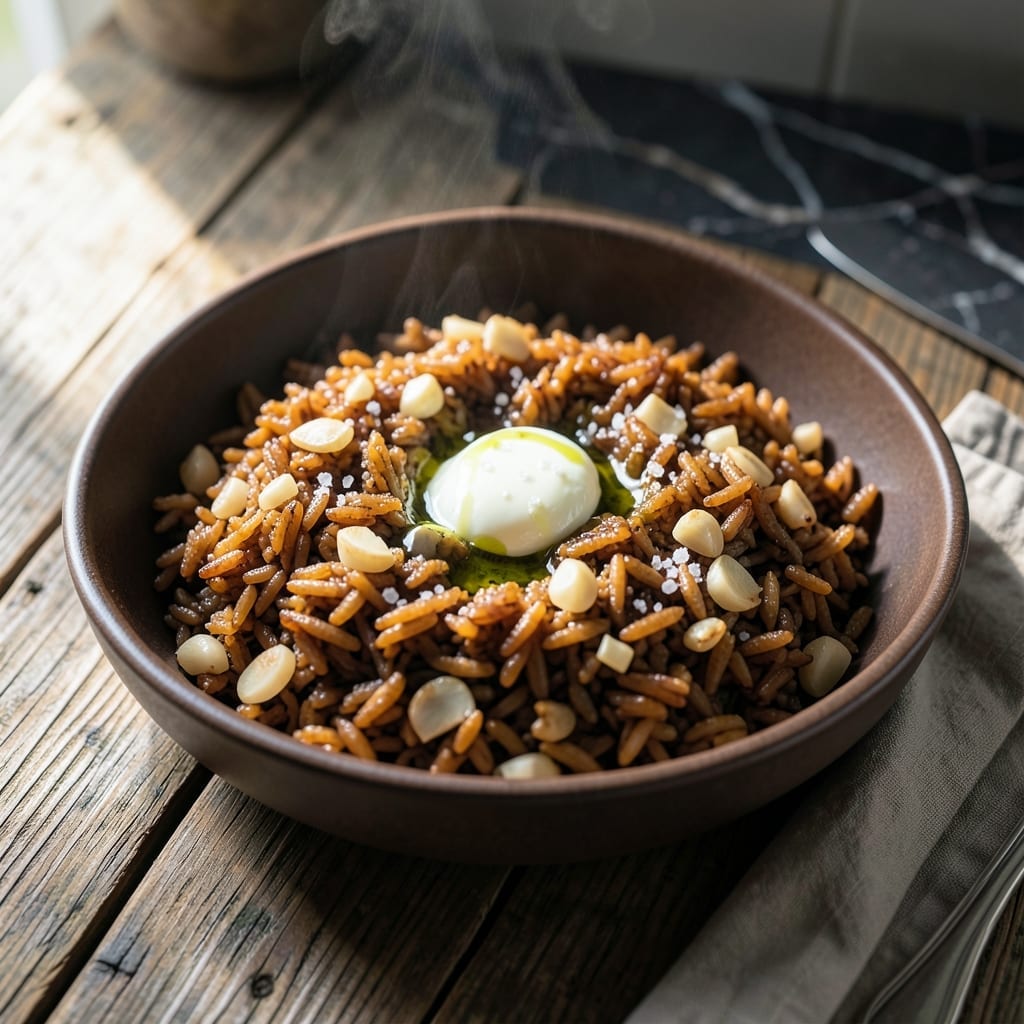
This brown rice recipe delivers the same nutty texture and rich flavor you love from restaurant-style dishes at home. I developed this method after years of experimenting to match the quality of professional kitchens.
The key is toasting the rice before cooking to enhance its natural nuttiness. Using the right ratio of water to rice and a precise cooking time ensures perfectly tender grains without mushiness.
What you get is fluffy, separate grains with a satisfying bite and deep, toasted flavor. This technique works every time, giving you consistent restaurant-quality results.
Serve it as a base for bowls, alongside proteins, or as a simple side dish. Here’s how to make it perfectly.
Ingredients for Moes Brown Rice
Eleven ingredients transform into fluffy, restaurant-quality grains with deep, nutty flavor.
| Ingredient | Amount | Notes |
|---|---|---|
| Long-Grain Brown Rice 🌾 | 2 cups | Rinsed until water runs clear |
| Water 💧 | 4 ½ cups | Filtered or spring preferred |
| Unsalted Butter 🧈 | 2 tbsp | Or substitute olive oil |
| Kosher Salt 🧂 | 1 tsp | Diamond Crystal preferred |
| Garlic Cloves 🧄 | 2 cloves | Minced for toasting |
| Shallot 🧅 | 1 whole | Finely diced for aroma |
| Fresh Thyme Sprigs 🌿 | 2 pieces | Leaves stripped from stems |
| Bay Leaf 🍃 | 1 whole | Dried or fresh |
| Black Peppercorns 🌶️ | ½ tsp | Freshly cracked preferred |
| Vegetable Stock 🥕 | ½ cup | Low-sodium for control |
| Lemon Zest 🍋 | 1 tsp | Finely grated for brightness |
The brown rice is the foundation—long-grain varieties like basmati or jasmine hold their shape best. Look for organic options at Whole Foods or bulk bins at natural food stores. The butter adds richness, but high-quality olive oil works just as well (and makes it vegan). For the stock, Better Than Bouillon is my go-to for depth without salt overload.
No shallots? Yellow onion at half the amount is a fine swap. Fresh thyme can be replaced with dried at one-third the quantity. If you’re out of vegetable stock, water with a splash of soy sauce adds umami. The lemon zest is optional but brightens everything up—skip if you don’t have it, but don’t skip the toasting step (that’s non-negotiable).
Uncooked rice keeps in a sealed container for 6-12 months. Once cooked, it’s good for 4-5 days in the fridge or 3 months frozen. The toasting step means it reheats better than plain rice—just add a splash of water and microwave.
Why You’ll Love This Recipe
- Set and Forget: I toss everything in one pot, cover it, and walk away—no stirring, no fuss.
- Buttery Garlic Magic: The butter and garlic turn plain brown rice into something rich and aromatic I could eat by the spoonful.
- Meal Prep MVP: It keeps beautifully all week, so I make a big batch for lunches and quick dinners.
- Pantry Staple: Long-grain brown rice, butter, salt, garlic—things I always have on hand.
Step-by-Step Instructions for Restaurant-Style Brown Rice
Here’s the method to achieve that signature nutty flavor and perfect texture you love from your favorite spots.
Step 1: Toast the Rice and Aromatics
In a heavy-bottomed pot, melt the 2 tbsp Unsalted Butter over medium heat. Add the 2 cups Long-Grain Brown Rice and stir for 2-3 minutes until the grains become slightly translucent and emit a nutty aroma. This toasting step is crucial—it deepens the flavor profile significantly.
I immediately add the finely diced Shallot and minced Garlic Cloves to the pot, stirring constantly for 1 minute until they become fragrant but not browned. The residual heat from the rice will soften them perfectly without burning.
Step 2: Build the Liquid Base
Pour in the 4.5 cups Water and 0.5 cup Vegetable Stock, then add the 1 tsp Kosher Salt, 1 whole Bay Leaf, 2 pieces Fresh Thyme Sprigs, and 0.5 tsp Black Peppercorns. Stir well to combine, ensuring the rice is evenly distributed in the liquid.
Here’s the thing—this liquid ratio is precisely calibrated for long-grain brown rice. The combination of water and stock creates a rich, flavorful cooking environment while the herbs and spices infuse during the cooking process. Don’t be tempted to reduce the liquid; brown rice needs more hydration than white rice.
Step 3: Simmer Until Tender
Bring the mixture to a boil over medium-high heat. Once boiling, reduce the heat to low, cover the pot with a tight-fitting lid, and let it simmer undisturbed for 40-45 minutes. You’ll know it’s working when you see steam escaping from under the lid and hear a gentle simmer.
Resist the urge to stir or peek during cooking. The steam trapped inside is what cooks the rice evenly. After 30 minutes, you can check once—if the liquid is absorbing too quickly, add a splash of hot water, but this shouldn’t be necessary with the precise measurements we’re using.
Step 4: Rest and Finish with Citrus
When the rice is tender and the liquid has been absorbed (the grains should be chewy but not crunchy), remove the pot from heat. Let it rest, covered, for 10 minutes. This allows the rice to steam in its own moisture, finishing the cooking process and ensuring even texture throughout.
Finally, fluff the rice gently with a fork and stir in the 1 tsp Lemon Zest. The zest adds a bright, fresh note that balances the rich, nutty flavors. Remove the Bay Leaf and Thyme Sprigs before serving. The result should be perfectly cooked grains with distinct flavor layers in every bite.
Pro Tips For Making Moes Brown Rice
- Toast the Rice: Heat the long-grain brown rice in the pot for 2-3 minutes before adding water—it deepens the nutty flavor and prevents a mushy texture.
- Crush the Garlic: Smash the garlic cloves with the side of your knife before adding them; it releases more aroma without the risk of burning small minced pieces.
- Use Extra Water: Brown rice needs more liquid than white, so go with a 1:2.5 rice-to-water ratio—trust me, I learned this the hard way after too many dry batches.
- Butter at the End: Stir in the unsalted butter after cooking instead of before; it keeps the grains separate and adds a rich finish rather than weighing them down.
Storing and Reheating moes brown rice
Refrigerator Storage
Let the rice cool completely before transferring to an airtight container. It’ll keep in the fridge for 4-5 days without losing texture. I use glass containers to prevent absorbing odors. ❄️
Freezer Storage
For longer storage, spread cooled rice on a tray to freeze individually, then transfer to a ziplock bag. This prevents clumping and lets you portion easily. It stays fresh for 3 months.
Stovetop Reheating
Add the rice to a skillet with 2 tbsp water or broth and heat over medium-low for 5-7 minutes, stirring occasionally. This restores moisture and revives the grains beautifully. 🔥
Microwave Reheating
Place rice in a microwave-safe dish, sprinkle with 1 tbsp water, and cover loosely. Heat on 50% power for 2-3 minutes, then fluff with a fork.
Reviving Dry Rice
If the rice seems dry after reheating, add a splash of water and let it steep for 5 minutes. The toasting step from cooking helps it absorb moisture better than plain rice.
Nutrition Facts
Frequently Asked Questions
Why toast the rice first?
Toasting enhances the natural nutty flavor and ensures the grains stay separate. It also helps the rice absorb liquid more evenly during cooking.
Can I use a rice cooker?
Yes, but toast the rice and aromatics in a pan first, then transfer to the cooker. Use the same 4.5 cups liquid and cook on the brown rice setting.
What if the rice is still crunchy?
Add 1/4 cup hot water, cover, and simmer for 5-10 minutes more. If it’s overcooked, reduce liquid slightly next time.
Can I make this without butter?
Swap in 2 tbsp olive oil for a vegan version with equally rich flavor. The toasting step remains key.

- Mujadara Rice and Lentils Recipe: Earthy Spiced Lentils With Caramelized Onions - November 1, 2026
- Naija Fried Rice Recipe: Street-Style Spice With Veggie Crunch - November 1, 2026
- Mushy Rice Recipe: Fluffy Grains Transformed in Minutes - November 1, 2026