
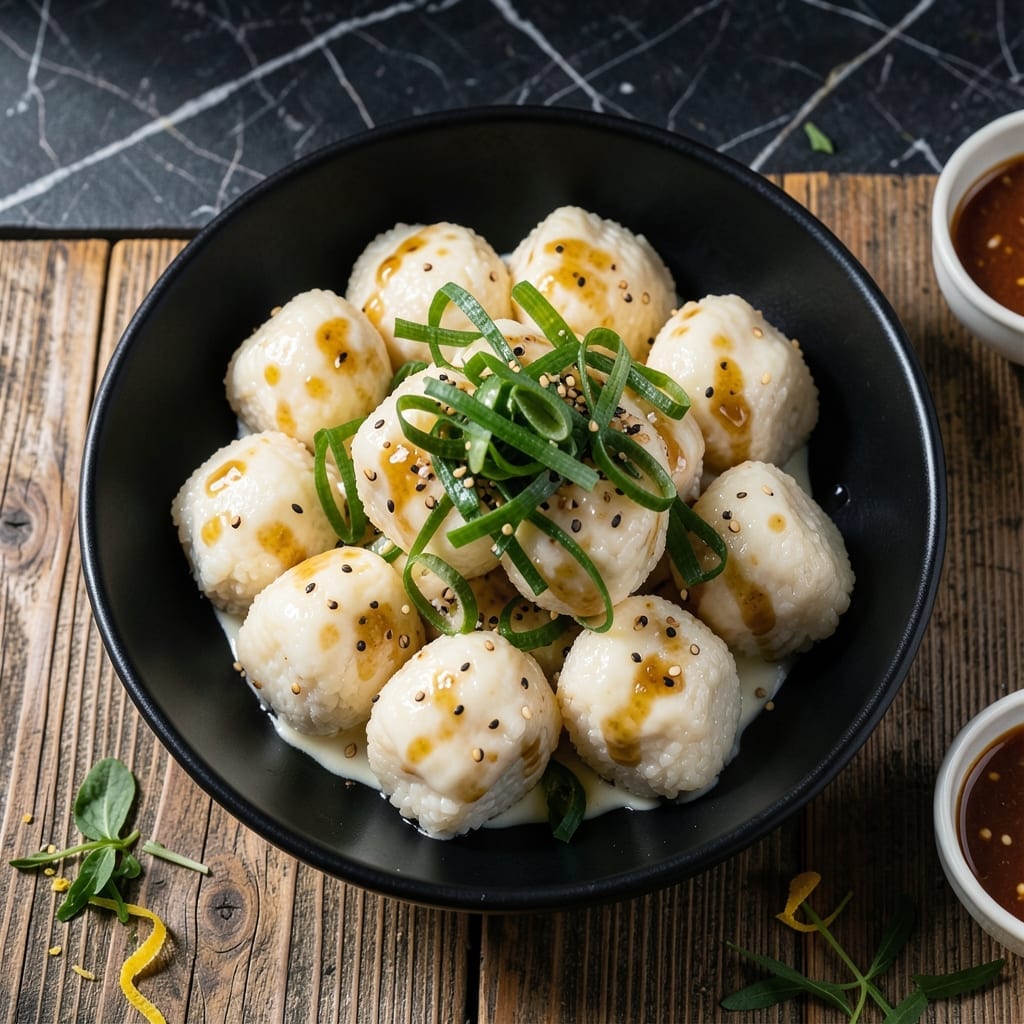
This recipe delivers the signature texture of Momofuku’s famous rice cakes at home. The key is achieving crispy edges while maintaining chewy centers through precise cooking techniques.
I developed this method after testing various approaches to replicate the restaurant’s version. The process involves steaming the rice cakes first, then pan-frying to create the perfect contrast in every bite.
The result is a dish with a satisfying golden crust and a soft, pillowy interior. Each piece holds its shape while offering that coveted combination of textures.
Serve these as a base for your favorite proteins or enjoy them plain. The technique ensures consistent results every time.
Ingredients for Momofuku Rice Cake
Simple ingredients transform into chewy, crispy rice cakes with restaurant-quality texture at home.
| Ingredient | Amount | Notes |
|---|---|---|
| Glutinous Rice Flour 🌾 | 2 cups | Also called sweet rice flour |
| Water 💧 | 1 ¾ cups | Warm, for mixing dough |
| Kosher Salt 🧂 | 1 tsp | Diamond Crystal preferred |
| Vegetable Oil 🫒 | ¼ cup | Neutral flavor, for frying |
| Sesame Oil 🫒 | 1 tbsp | Toasted, for finishing |
| Green Onions 🧅 | 3 whole | Thinly sliced for garnish |
| Garlic Cloves 🧄 | 2 cloves | Minced, for flavor infusion |
| Soy Sauce 🥢 | 2 tbsp | Low-sodium for balance |
| Rice Vinegar 🍚 | 1 tbsp | Adds subtle tang |
| Sugar 🍚 | 1 tsp | Balances savory notes |
| Cornstarch 🌽 | 2 tbsp | For dusting, prevents sticking |
| Tofu 🧈 | 1 lb | Extra-firm, pressed and cubed |
The rice flour is non-negotiable here—glutinous (sweet) rice flour is what gives these their signature chew. Don’t confuse it with regular rice flour. Asian markets or the international aisle at Whole Foods usually stock it. Bob’s Red Mill makes a solid version if you’re ordering online. The tofu? Extra-firm holds up best to the dual cooking process, but firm works in a pinch (just press it longer).
No glutinous rice flour? Mochiko is the same thing—just branded differently. Out of soy sauce? Tamari works at a 1:1 ratio. Want more depth? Swap the vegetable oil for avocado oil (higher smoke point). The sugar can be omitted if you prefer, but it balances the savory notes beautifully. Fresh tofu tastes better than pre-cubed, but pre-cubed saves time (don’t judge).
Dough can rest in the fridge for up to 1 day if you want to prep ahead. Cooked rice cakes keep in the fridge for 3-4 days—reheat in a dry pan to crisp up again. They don’t freeze well, so make only what you’ll eat fresh.
Why You’ll Love This Recipe
- Five Ingredient Wonder: I love that this only needs glutinous rice flour, water, salt, and a splash of both oils—no fancy shopping.
- Crispy Yet Chewy: The sesame oil gives it that nutty depth while the edges get this addictive crunch.
- Endless Toppings: Honestly, I’ve done everything from chili crisp to soy-glazed mushrooms on these.
- Stays Perfect: They reheat like a dream—toss them in a pan with a little oil and they’re as good as fresh.
Step-by-Step Instructions for Momofuku Rice Cakes
Here’s the method I use for achieving that signature crispy exterior with a chewy center.
Step 1: Create the Rice Cake Batter
In a large mixing bowl, whisk together the 2 cups Glutinous Rice Flour, 1 tsp Kosher Salt, and 1 tsp Sugar until fully combined. I find that breaking up any lumps in the glutinous rice flour at this stage prevents texture issues later.
Gradually pour in the 1.75 cups Water while whisking continuously. The batter should be smooth and slightly thick, like a loose pancake batter. Let it rest for 10 minutes—this allows the flour to fully hydrate and develop the proper chewy texture.
Step 2: Prepare the Tofu and Aromatics
While the batter rests, press and cube the 1 lb Tofu. I press mine between paper towels with a heavy pan on top for 15 minutes to remove excess moisture, which gives it that perfect crispy exterior when fried.
Thinly slice the 3 whole Green Onions and mince the 2 cloves Garlic Cloves. Set these aside for garnishing and infusing flavor later. The green onions will go on top right before serving, while the garlic will flavor the cooking process.
Step 3: Steam the Rice Cakes
Pour the batter into a greased 8×8-inch baking dish or steamer tray. I use a silicone baking dish for easy removal. The layer should be about ½-inch thick—this creates the perfect thickness for crispy edges with chewy centers.
Steam for 20-25 minutes until the rice cake is set and slightly springy to the touch. You’ll know it’s done when a toothpick inserted in the center comes out clean. Remove from the steamer and let cool completely before cutting into cubes.
Step 4: Pan-Fry to Crispy Perfection
Heat the 0.25 cup Vegetable Oil in a large skillet over medium-high heat. Dust the rice cake cubes lightly with the 2 tbsp Cornstarch—this creates that signature crispy exterior. The oil is ready when it shimmers and a cube of rice cake sizzles immediately upon contact.
Fry the rice cake cubes in batches, turning occasionally, for 4-5 minutes until all sides are golden brown and crispy. Don’t overcrowd the pan or the temperature will drop and the rice cakes will steam instead of fry. Transfer to a paper towel-lined plate to drain excess oil.
Step 5: Finish and Serve
In the same skillet, add the minced garlic and cook for 30 seconds until fragrant. Add the 2 tbsp Soy Sauce, 1 tbsp Rice Vinegar, and 1 tbsp Sesame Oil, then toss the crispy rice cakes in this mixture to coat evenly.
Serve immediately while hot, garnished with the sliced green onions. The combination of crispy edges, chewy centers, and savory-sweet glaze makes these irresistible. The rice cakes are best eaten fresh out of the pan when they’re at their crispiest.
Pro Tips For Making Momofuku Rice Cake
- Steam Then Pan-Fry: After steaming the rice cakes, give them a quick sear in a hot pan with a little vegetable oil—about 1-2 minutes per side—to get that signature crispy exterior.
- Use Warm Water: Mix the glutinous rice flour with warm water (around 110°F) to help the batter come together smoothly and avoid lumps that ruin the texture.
- Skip Cold Ingredients: I learned this the hard way—cold water or flour makes the dough stiff and hard to work with, so pull everything out 30 minutes before starting.
- Sesame Oil Last: Brush the finished rice cakes with sesame oil just before serving, not during cooking, so the flavor stays bright and doesn’t burn off.
Health Benefits of These Flavors
Gluten-Free Goodness
These rice cakes are naturally gluten-free, making them perfect for anyone with celiac disease or gluten sensitivity. The glutinous rice flour provides that signature chew without any wheat proteins, so you can enjoy this dish worry-free. I always double-check labels on my soy sauce to ensure it’s gluten-free too. 💪
Easy to Digest
Rice-based dishes like this are gentle on the stomach, making them a great option when you want something satisfying but easy to digest. The steaming process breaks down starches, while the tofu adds plant-based protein without heavy fats. A 1-cup serving of tofu provides about 20g of protein.
Low in Saturated Fat
With vegetable oil as the primary fat source, these rice cakes contain minimal saturated fat. The 1 lb tofu adds healthy fats and keeps the dish heart-friendly. I like using avocado oil for an even healthier fat profile when available.
Rich in Plant Compounds
The green onions and garlic in this recipe provide beneficial plant compounds like allicin and quercetin, which support immune health. These ingredients also add flavor without extra calories, making every bite both delicious and nutritious. 🌱
Balanced Energy Source
The combination of complex carbs from rice flour and protein from tofu creates a balanced energy source. This helps maintain steady blood sugar levels, keeping you full and energized. I find this dish particularly satisfying as a midday meal.
Nutrient-Dense Garnishes
The finishing touch of sesame oil adds healthy fats and antioxidants, while the soy sauce contributes essential amino acids. Together, they enhance both the flavor and the nutritional profile of this simple yet delicious creation.
Nutrition Facts
Frequently Asked Questions
Can I make these without a steamer?
Yes! Use a colander or sieve over a pot of boiling water with a tight lid. Ensure the bottom doesn’t touch the water. Steam for 20-25 minutes as directed.
Why are my rice cakes tough?
Overmixing the batter or using regular rice flour causes toughness. Use glutinous rice flour and mix just until combined. Let the batter rest for 10 minutes before steaming.
Can I bake instead of pan-fry?
For a lighter version, bake at 400°F for 15-20 minutes, flipping halfway. They won’t get as crispy, but still delicious. Toss with sauce after baking.
How do I store leftovers?
Refrigerate in an airtight container for up to 3-4 days. Reheat in a dry pan to restore crispiness. Avoid freezing, as it alters the texture.

- Jollof Rice Sauce Recipe: West African Tomato and Spice Infusion - September 25, 2026
- Japanese Rice Soup Recipe: Umami-Rich Comfort in a Bowl - September 25, 2026
- Homemade Cream Of Rice Recipe: Silk-Smooth Breakfast in Minutes - September 25, 2026