
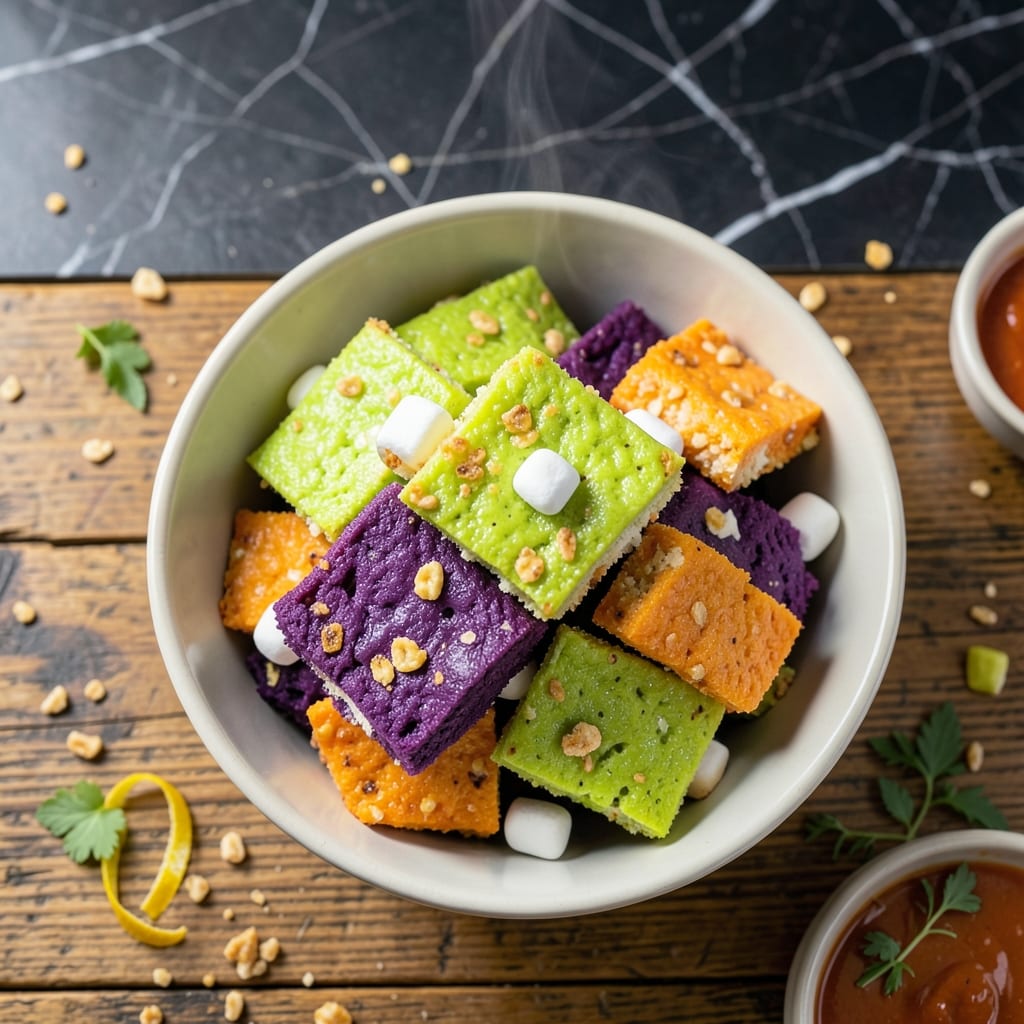
These extra gooey Rice Krispie treats take a Halloween twist with monster-themed layers that kids and adults will love. The secret is in the marshmallow-to-cereal ratio, creating a texture that’s perfectly chewy and holds its shape.
I developed this version after years of making the classic recipe, adding food coloring and decorative touches to create a spooky yet delicious treat. The layers allow for creative color combinations while maintaining that signature crispy texture.
Each bite delivers the classic snap, crackle, and pop with an added gooey richness from the extra marshmallows. The monster theme makes them ideal for Halloween parties or fun afternoon baking projects.
Simple ingredients and a 15-minute prep time make this a no-fuss recipe anyone can master. The results are always a hit at gatherings.
Ingredients for Monster Rice Krispie Treats
A few colorful additions transform classic ingredients into a Halloween masterpiece with perfect texture.
| Ingredient | Amount | Notes |
|---|---|---|
| Rice Krispies Cereal 🥣 | 6 cups | Standard variety, not puffed rice |
| Mini Marshmallows 🍬 | 10 cups | Divided for layered coloring |
| Unsalted Butter 🧈 | ½ cup | For melting with marshmallows |
| Green Food Coloring Gel 🎨 | 1 tsp | For monster green layer |
| Purple Food Coloring Gel 🎨 | 1 tsp | For monster purple layer |
| Orange Food Coloring Gel 🎨 | 1 tsp | For monster orange layer |
| Black Food Coloring Gel ⚫ | ½ tsp | For monster details |
| Vanilla Extract 🌿 | 1 tsp | Pure extract for best flavor |
| Salt 🧂 | ¼ tsp | Fine grain for balance |
| Candy Eyeballs 👁️ | 1 package | For monster decoration |
| White Chocolate Chips 🍫 | ½ cup | Melted for monster details |
The marshmallows are critical here—Jet-Puffed mini marshmallows melt the smoothest for that ultra-gooey texture. Kellogg’s Rice Krispies give the best snap, crackle, and pop (the generic brands just don’t deliver). For the food coloring, gel-based like AmeriColor won’t water down your layers. You’ll find all of this in the baking aisle at Target or Walmart. The butter should be unsalted to control the flavor balance precisely.
No food coloring gels? Liquid food coloring at double the amount works in a pinch, but your colors won’t be as vibrant. Swap white chocolate chips for melted almond bark if that’s what you have. Out of candy eyeballs? Chocolate chips or M&M’s make great substitutes. The vanilla extract can be skipped, but it adds depth to the marshmallow flavor. For a less sweet version, reduce marshmallows by 2 cups.
Store treats in an airtight container at room temperature for up to 3 days. For longer storage, wrap individually in plastic wrap and freeze for up to 1 month. The food coloring gels keep indefinitely in a cool, dark pantry. Let treats come to room temperature before serving for best texture.
Why You’ll Love This Recipe
- No-Bake Magic: I love that this comes together in one pot—just melt butter, toss in marshmallows, and stir in the cereal. No oven, no fuss.
- Sweetly Crunchy: That contrast of gooey mini marshmallows with crispy Rice Krispies? Honestly, it’s the best part.
- Halloween Ready: Between us, these green and purple swirls are my secret weapon for spooky season parties.
Step-by-Step Instructions for Monster Rice Krispie Treats
This method ensures vibrant layers and professional-quality monster designs with minimal effort.
Step 1: Prepare the Colored Marshmallow Bases
In a large microwave-safe bowl, melt 0.5 cup unsalted butter with 3 cups mini marshmallows in 30-second intervals, stirring between each until completely smooth. Immediately stir in 1 tsp vanilla extract and 0.25 tsp salt.
Divide this base evenly among three separate bowls. Stir 1 tsp green food coloring gel into one, 1 tsp purple food coloring gel into the second, and 1 tsp orange food coloring gel into the third. Each mixture should achieve a uniform, vibrant color before proceeding.
Step 2: Create the Layered Rice Krispie Foundation
Working quickly before the marshmallow sets, fold 2 cups Rice Krispies Cereal into each colored bowl until fully coated. Press the green mixture into a 9×13-inch pan lined with parchment paper, creating an even ½-inch thick layer. Repeat with the purple and orange mixtures, layering them directly on top.
Use a buttered spatula to smooth each layer, ensuring they adhere to one another without gaps. Let the layered base cool at room temperature for 15 minutes until firm enough to handle but still slightly tacky.
Step 3: Add Monster Details and Eyes
Melt 0.5 cup white chocolate chips in the microwave in 20-second intervals, stirring until smooth. Stir in 0.5 tsp black food coloring gel to create a dark chocolate mixture for detailing. Transfer each to separate piping bags or small plastic bags with a tiny corner snipped off.
Pipe white chocolate to create monster mouths, scars, or stitches on the cooled base. Use the black chocolate mixture for pupils, eyebrows, or other defining features. Press candy eyeballs into the still-tacky white chocolate details to secure them in place.
Step 4: Final Set and Portioning
Return the pan to room temperature for 30 minutes to allow all decorations to fully set. The treats are ready when the chocolate details are completely firm to the touch and the layers hold together when gently pressed.
Use a sharp knife dipped in hot water to cut into 12 equal squares, wiping the blade between cuts for clean edges. Each portion should showcase all three colored layers with visible monster details on top.
Pro Tips For Making Monster Rice Krispie Treats
- Melt Butter Slowly: Use low heat when melting the butter to prevent the marshmallows from seizing up or burning. I learned this the hard way after ruining two batches with overheated butter.
- Use Fresh Marshmallows: Mini marshmallows can get stale and hard—check the bag’s date. Fresh ones melt smoothly and bind the cereal better.
- Color Before Adding Cereal: Mix the food coloring gels into the melted marshmallow-butter mixture before folding in the Rice Krispies. This ensures even, vibrant colors without streaks.
- Press Lightly: When pressing the mixture into the pan, use a buttered spatula and gentle pressure to avoid crushing the cereal. This keeps the treats airy and crisp.
Best Sauces and Condiments for This monster rice krispie treats
Chocolate Drizzle
Melt ½ cup semi-sweet chocolate chips with 1 tsp coconut oil for a glossy drizzle that adds richness. Use a piping bag to create spiderweb patterns or monster veins. The coconut oil keeps the chocolate fluid for easier application. 💫
Caramel Sauce
Warm ¼ cup store-bought caramel sauce for 10 seconds in the microwave to loosen it. Drizzle over the treats in zigzag patterns for a sticky, sweet contrast. I love using Smucker’s brand for consistent quality.
Vanilla Glaze
Mix 1 cup powdered sugar with 2 tbsp milk and ½ tsp vanilla extract for a simple glaze. This creates a smooth white base that makes colors pop. Thin with additional milk if needed for drizzling.
Colored Sugar
Sprinkle green, purple, or orange sanding sugar over the glaze while it’s still wet. This adds texture and reinforces the monster theme. I find Wilton brand sanding sugars work best for vibrant colors.
Cream Cheese Frosting
Beat 4 oz cream cheese with ¼ cup powdered sugar and 1 tsp vanilla for a tangy contrast. Pipe small dollops on top for monster warts or horns. This adds a surprising depth of flavor.
Sprinkle Mix
Combine Halloween-themed sprinkles with crushed Oreos for a spooky topping. Press gently into the top layer before it fully sets. The Oreos add a cookies-and-cream element that kids adore.
Nutrition Facts
Frequently Asked Questions
Can I use regular marshmallows instead of mini?
Yes, but cut them into quarters first for even melting. Mini marshmallows melt faster and more uniformly, but regular ones work in a pinch. Just expect a slightly longer melting time and more stirring.
How do I keep the layers from mixing together?
Work quickly and press each colored layer firmly before adding the next. Use a buttered spatula to smooth surfaces, and let each layer cool for 5 minutes before adding the next to prevent color bleeding.
Can I make these without food coloring?
Skip the coloring and use natural alternatives like matcha powder for green or beet juice for purple. The treats will still taste delicious, just less monster-themed.
How long do these stay fresh?
Store in an airtight container at room temperature for up to 3 days. For longer storage, wrap individually and freeze for up to 1 month. Thaw at room temperature before serving.

- Mujadara Rice and Lentils Recipe: Earthy Spiced Lentils With Caramelized Onions - November 1, 2026
- Naija Fried Rice Recipe: Street-Style Spice With Veggie Crunch - November 1, 2026
- Mushy Rice Recipe: Fluffy Grains Transformed in Minutes - November 1, 2026